Shop Details
Step 1: Navigate to Settings > Shop Details.
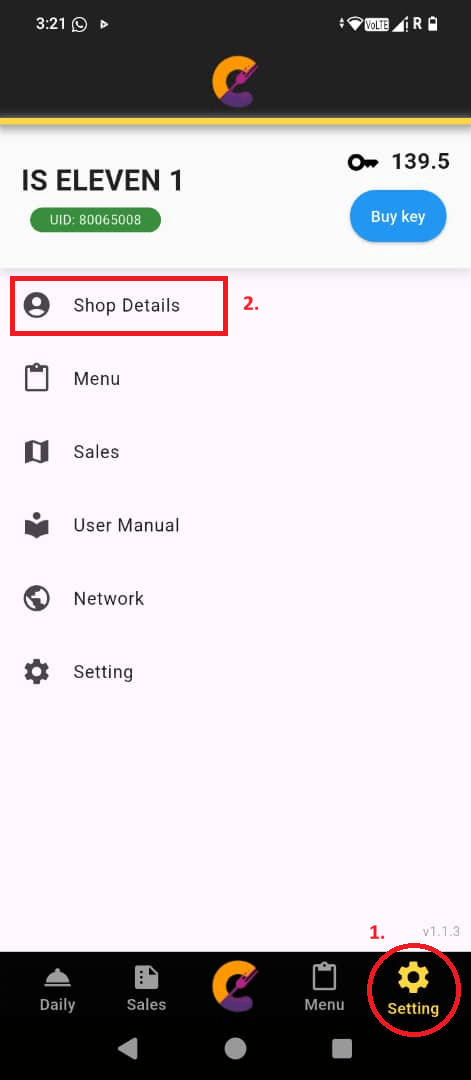
Step 2: Enter the Shop Name, SSM Registered Name, SSM Registration No, SSM Register Date, SSM Expiry Date, and Shop Tel.
Step 3: Click the “Submit” button to save the changes after completing the details.
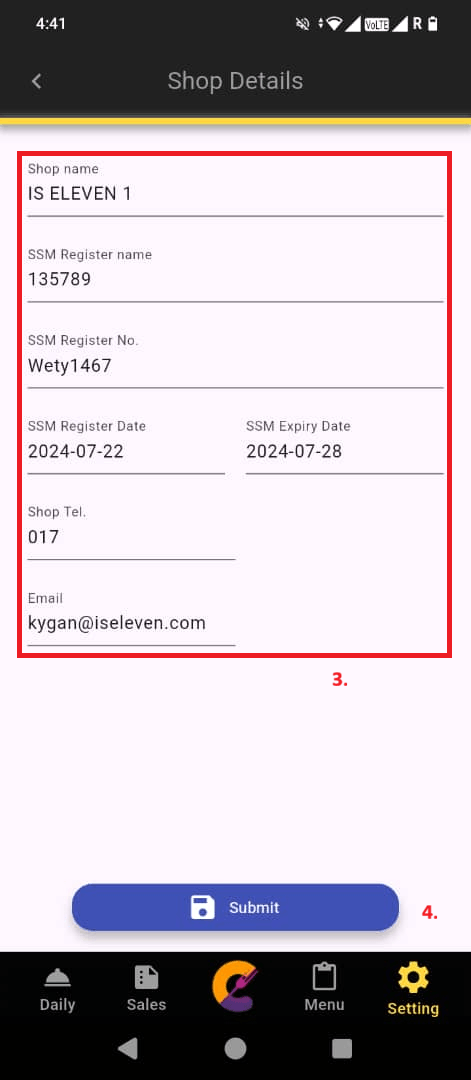
Reminder:
The email address used to receive sales reports. When generating Today Report, Monthly Report, or Financial Report, the report file will be sent to this email addres. Ensure the email is correct to receive the reports successfully.
Network (Account)
Network Account
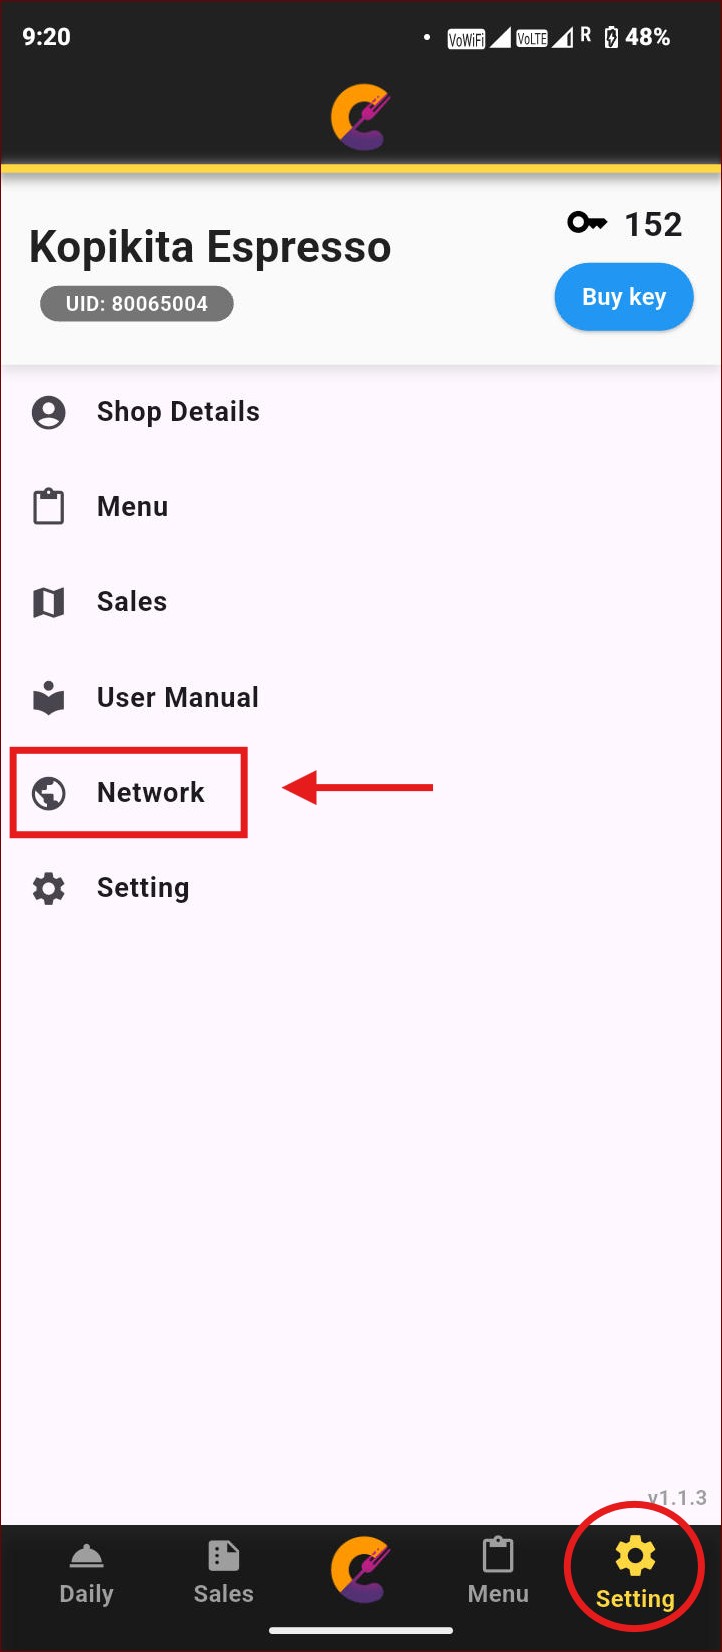
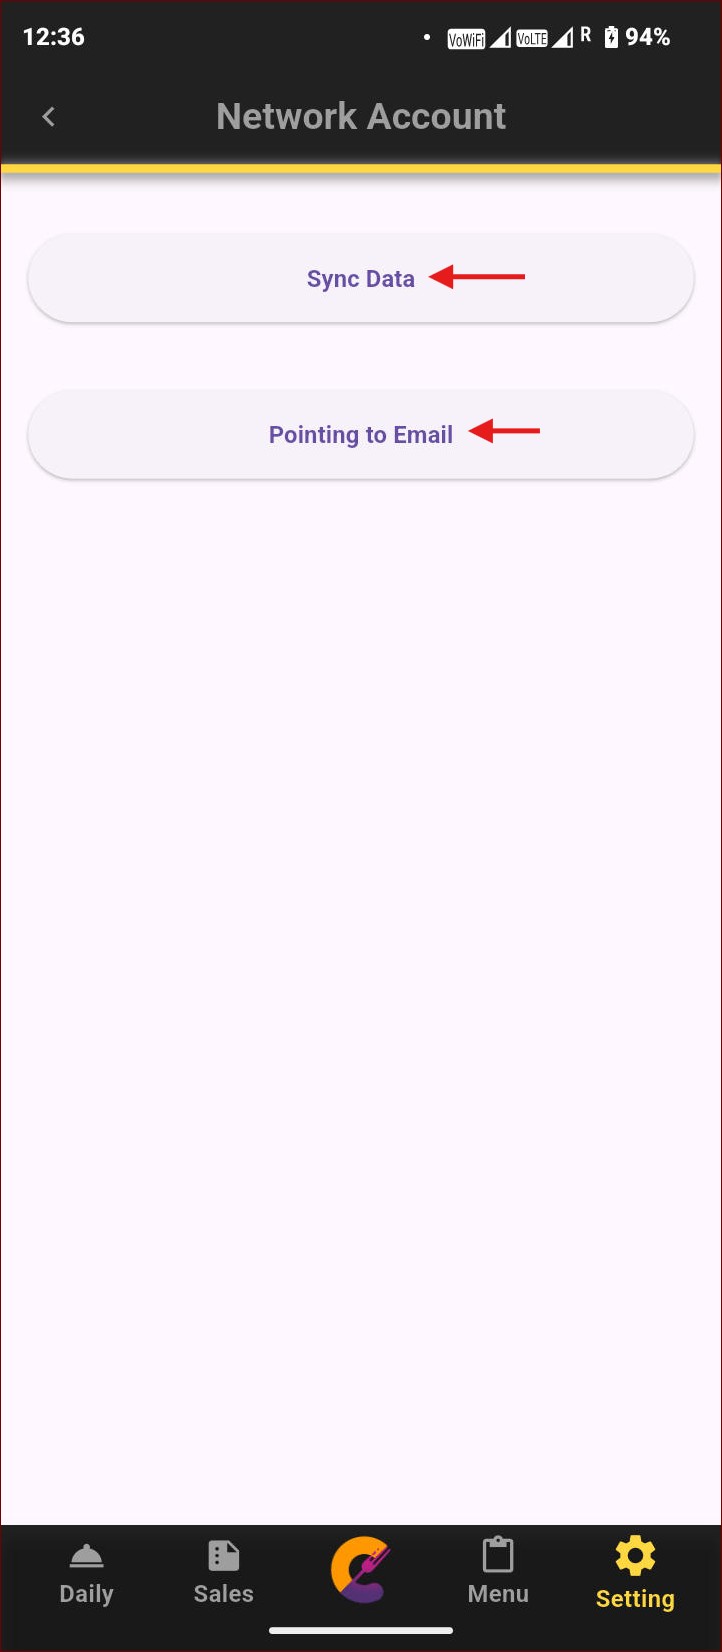
Navigate to Settings > Network > Network Account to verify the email and sync data from the server.
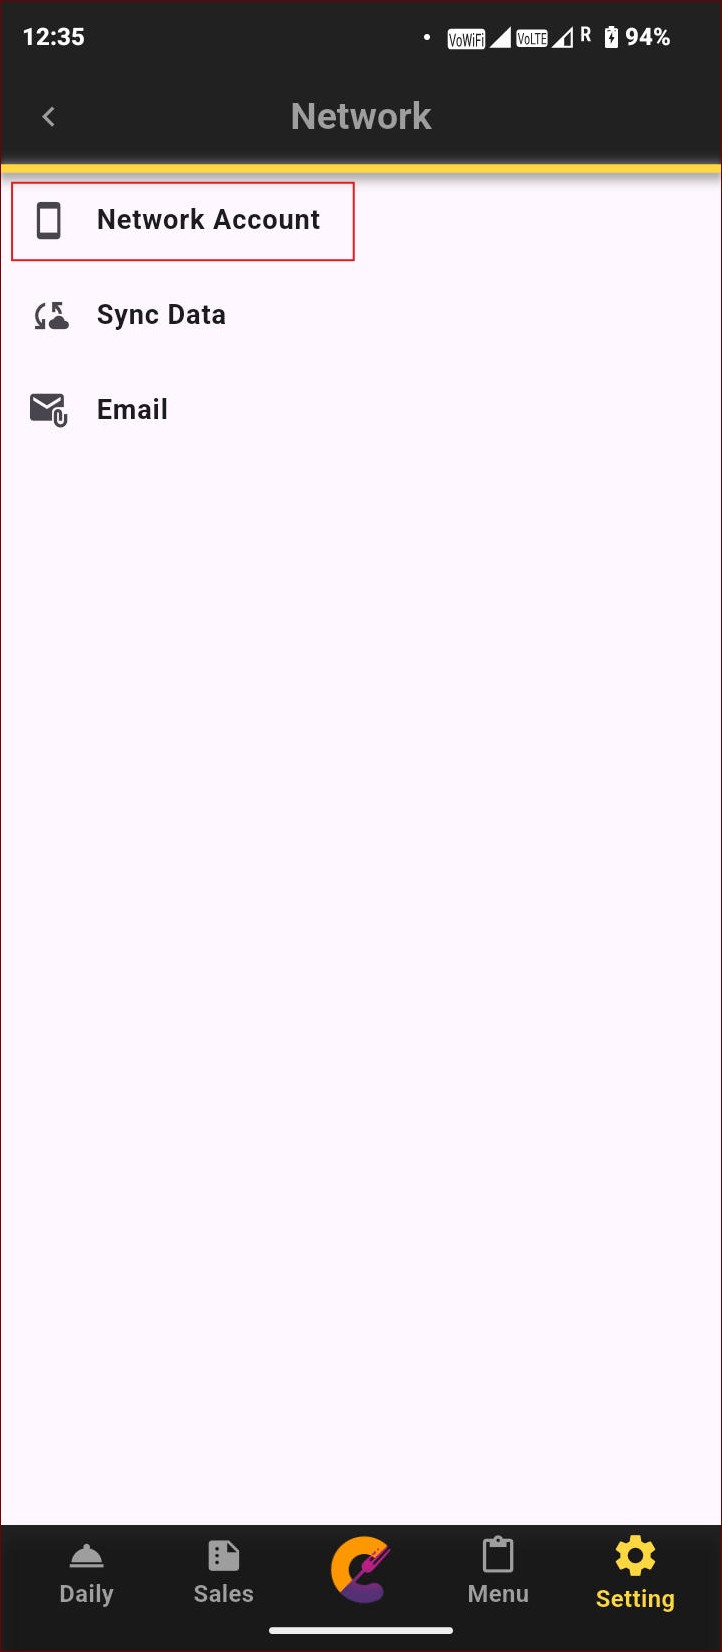
For the first time, before syncing data, use the “Pointing to Email” button to verify the account. This step is required to sync data from/to the server and ensure all data matches.
Sync Data
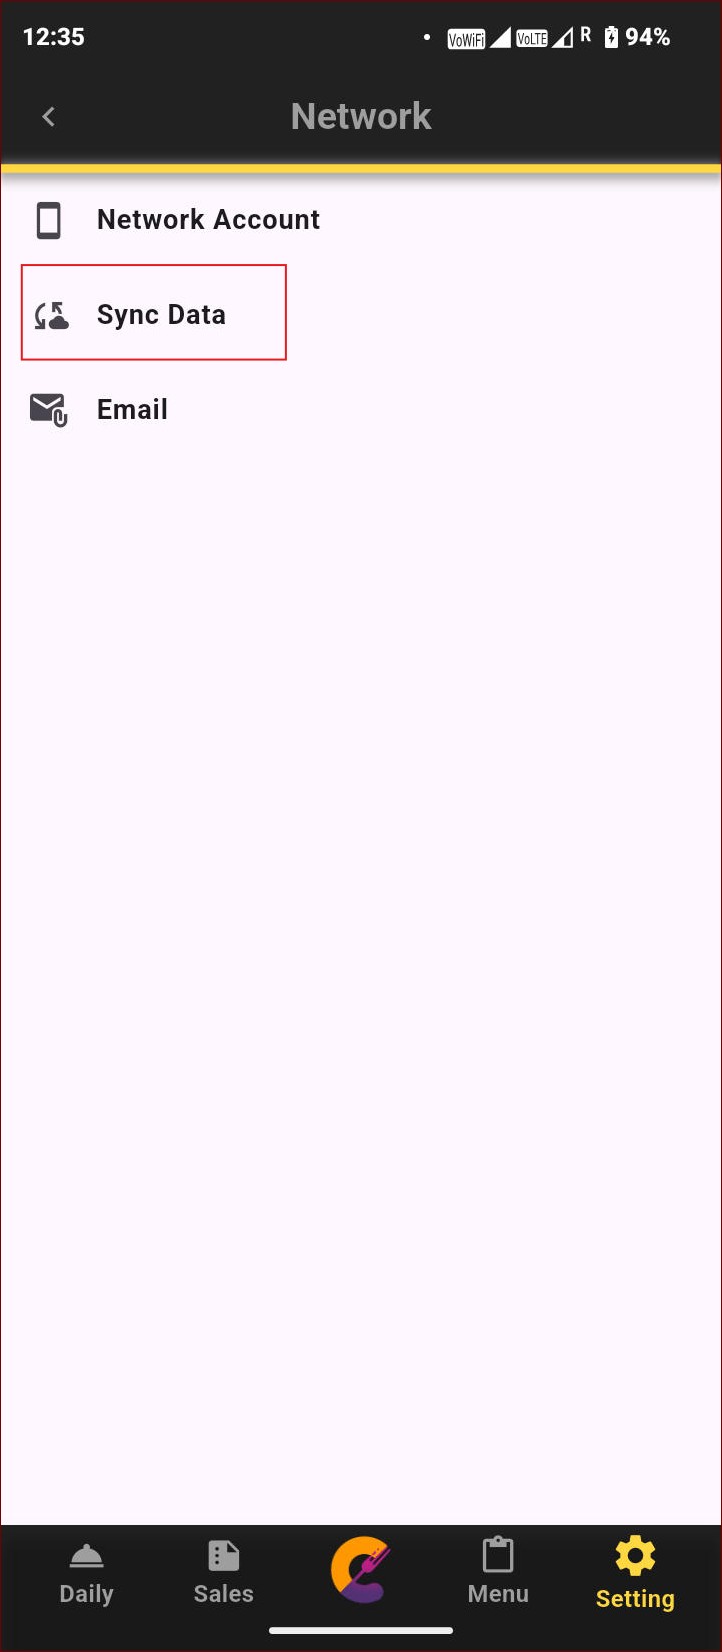
Navigate to Settings > Network > Sync Data to backup or recover data from the server.
- “Backup Data” will perform a backup to store the data on the server.
- “Data Recovery” will download the data from the server and overwrite any corrupt data.
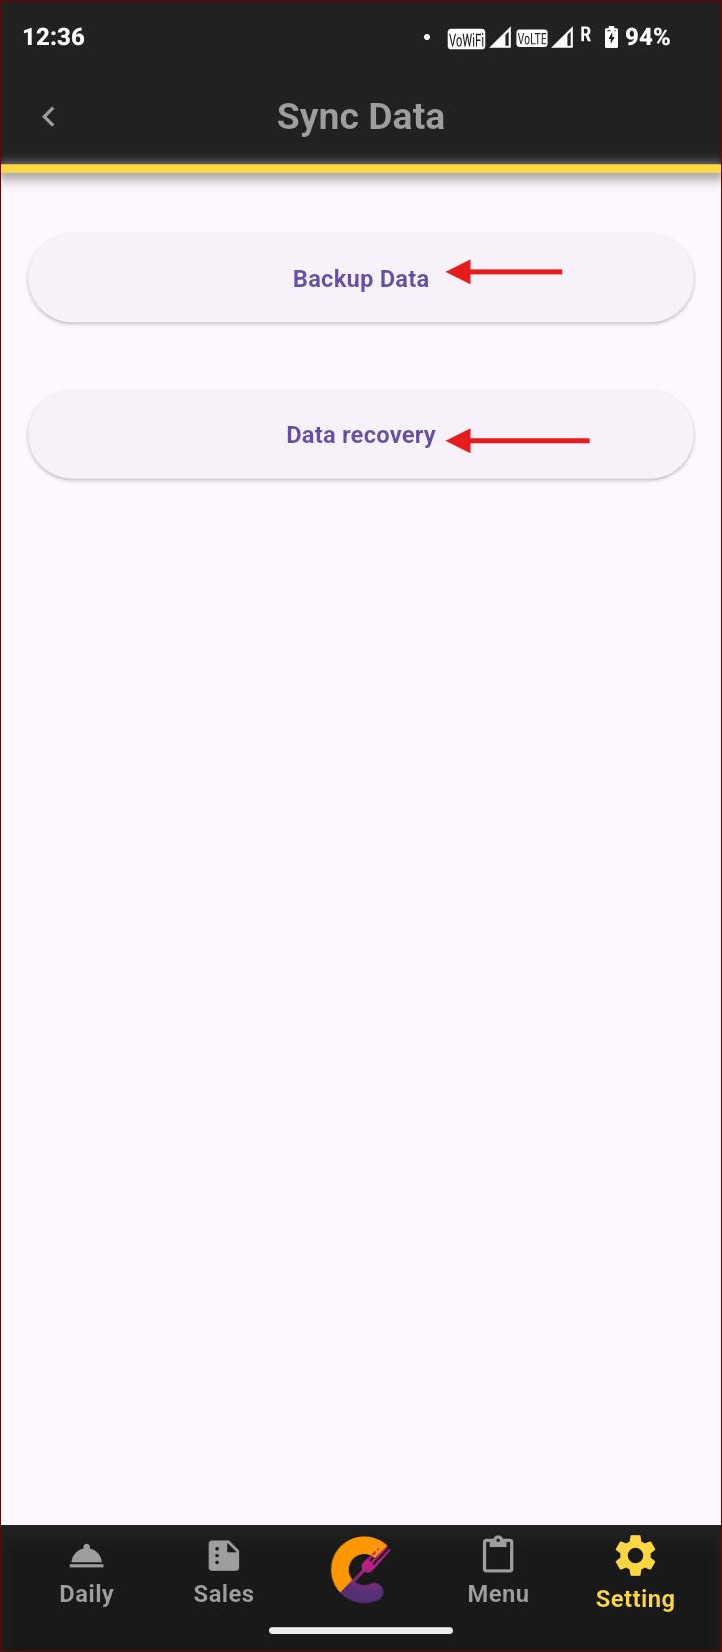
Important: It is recommended to perform a Backup Data operation regularly to ensure your latest data can be restored if needed. Only use Data Recovery when you need to recover lost or corrupted data, as any unsaved local changes will be permanently replaced by the server backup.
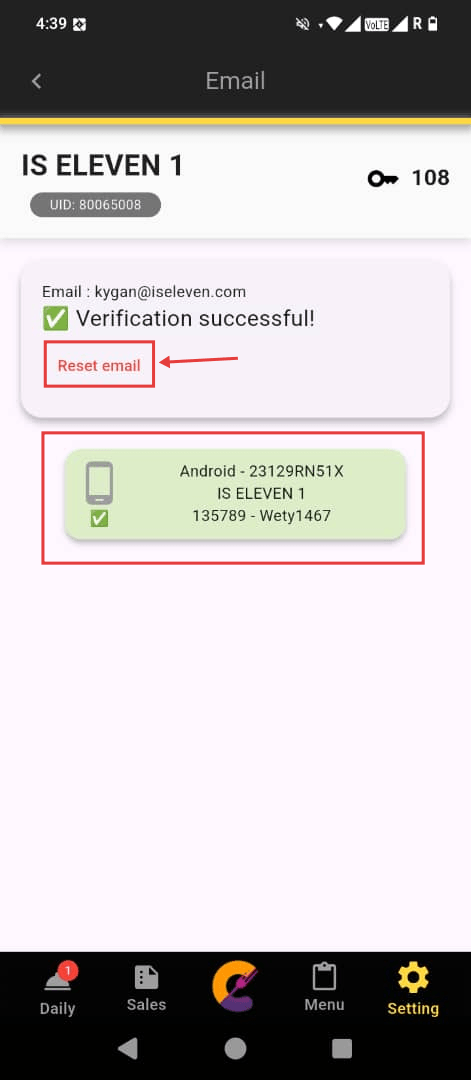
Navigate to Settings > Network > Email to change the email or check the number of devices linked to this email account.
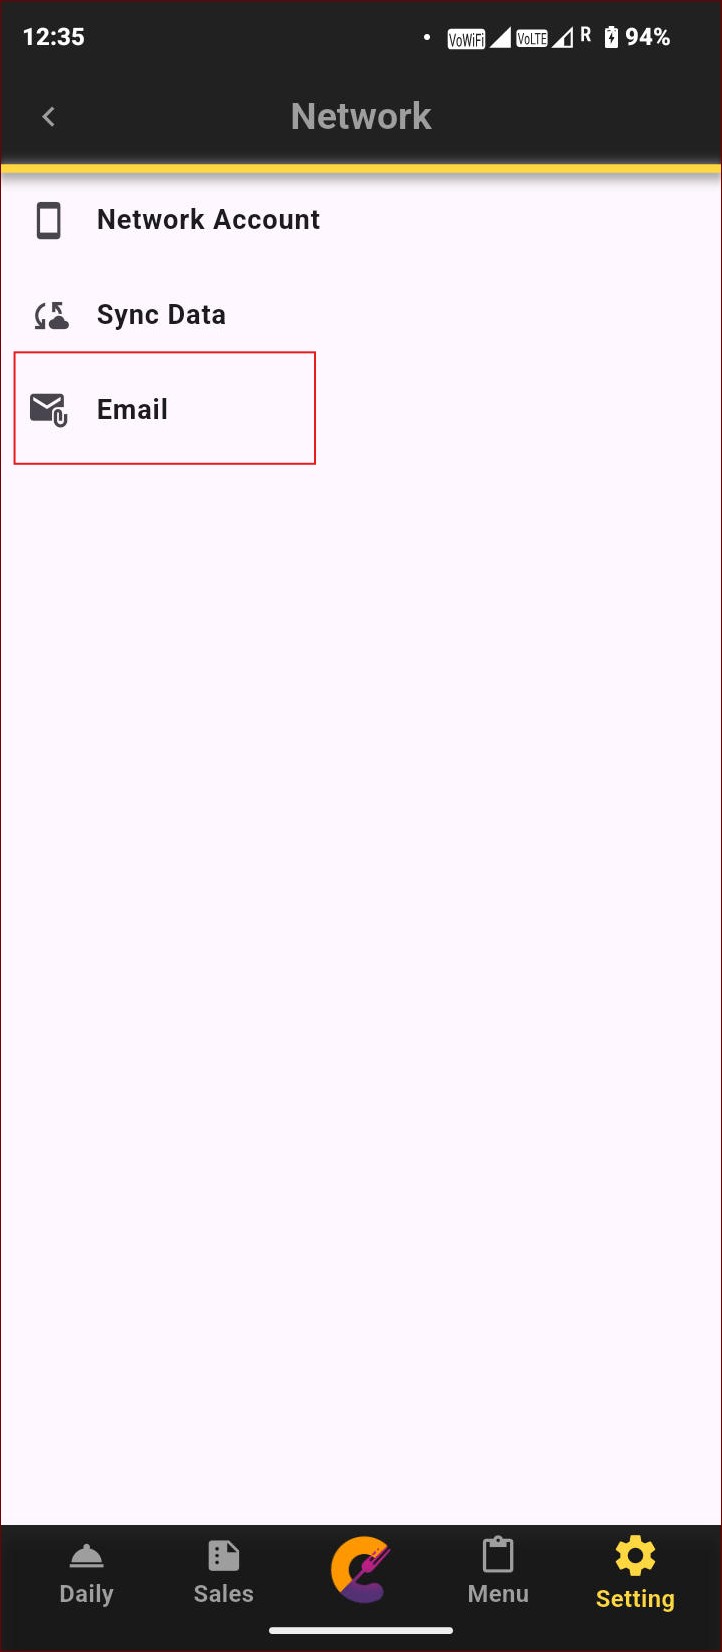
“Reset Email” is used to change the email account associated with the app. The list below shows the number of devices currently using the same email account.
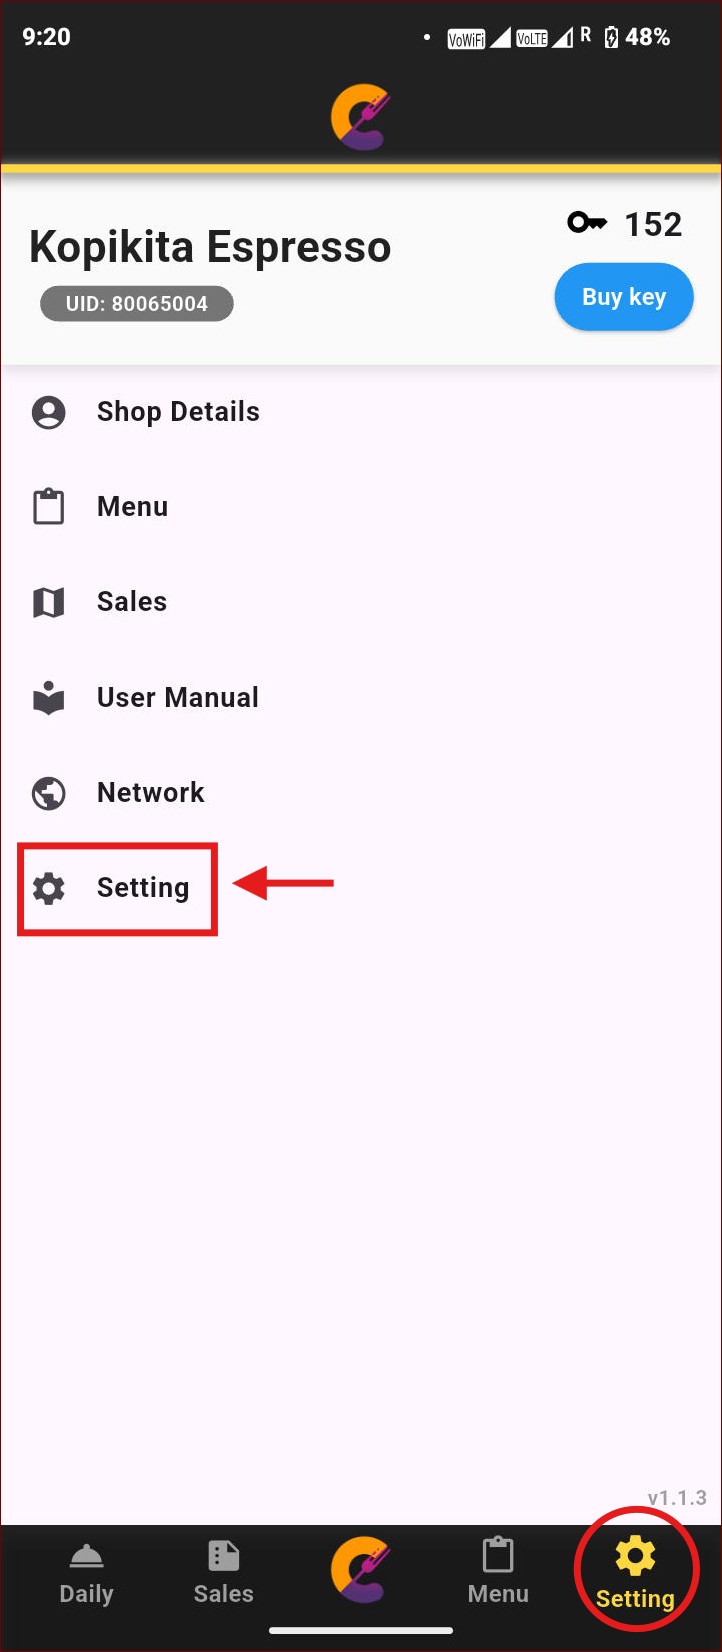
Setting / App Setting
Language
Step 1: Go to Setting > Setting > Language to change the language.
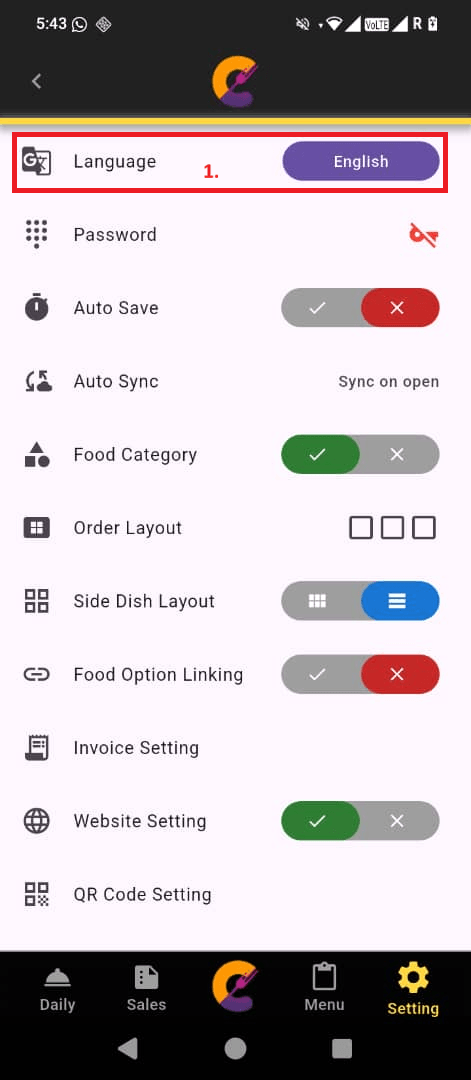
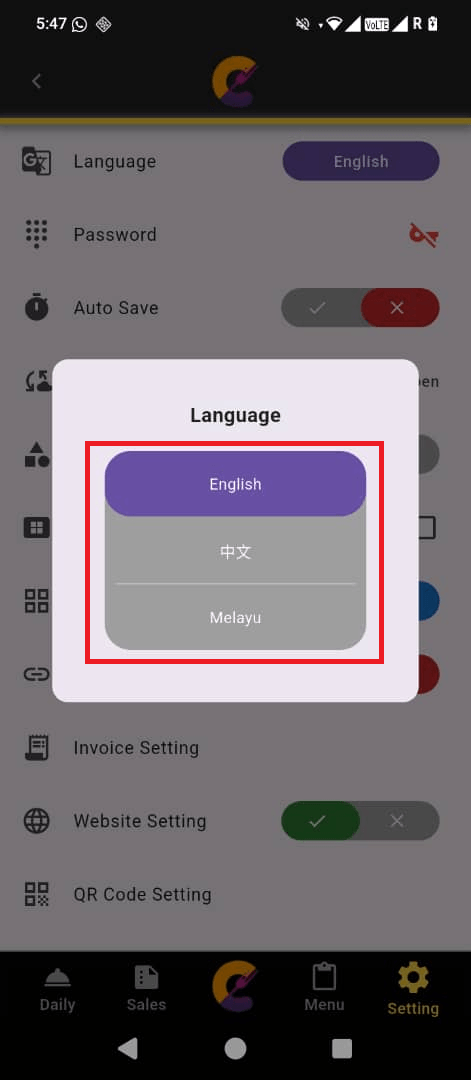
Step 2: Click on Language, and a popup will appear. Select the desired language from the options: English, Melayu, or 中文.
Password
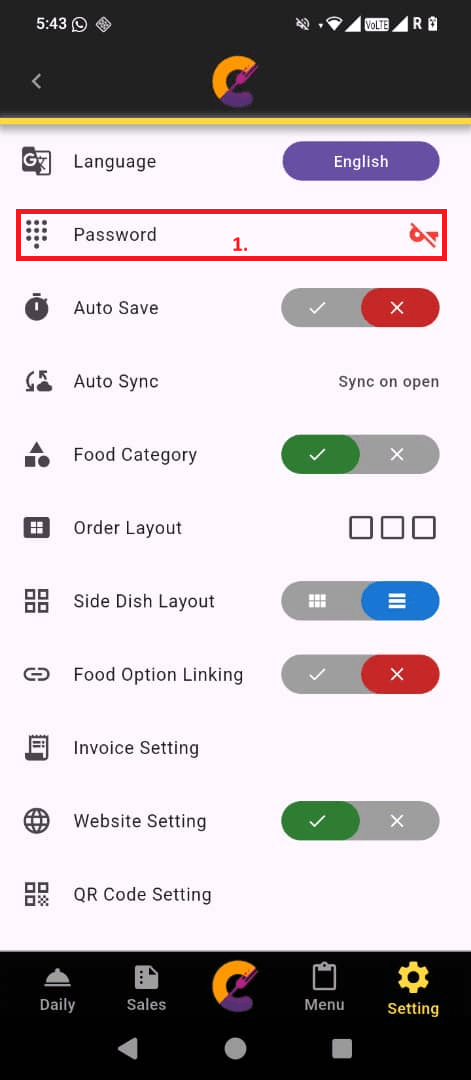
Step 1: Go to Setting > Setting > Password to set up a pin for accessing the app.
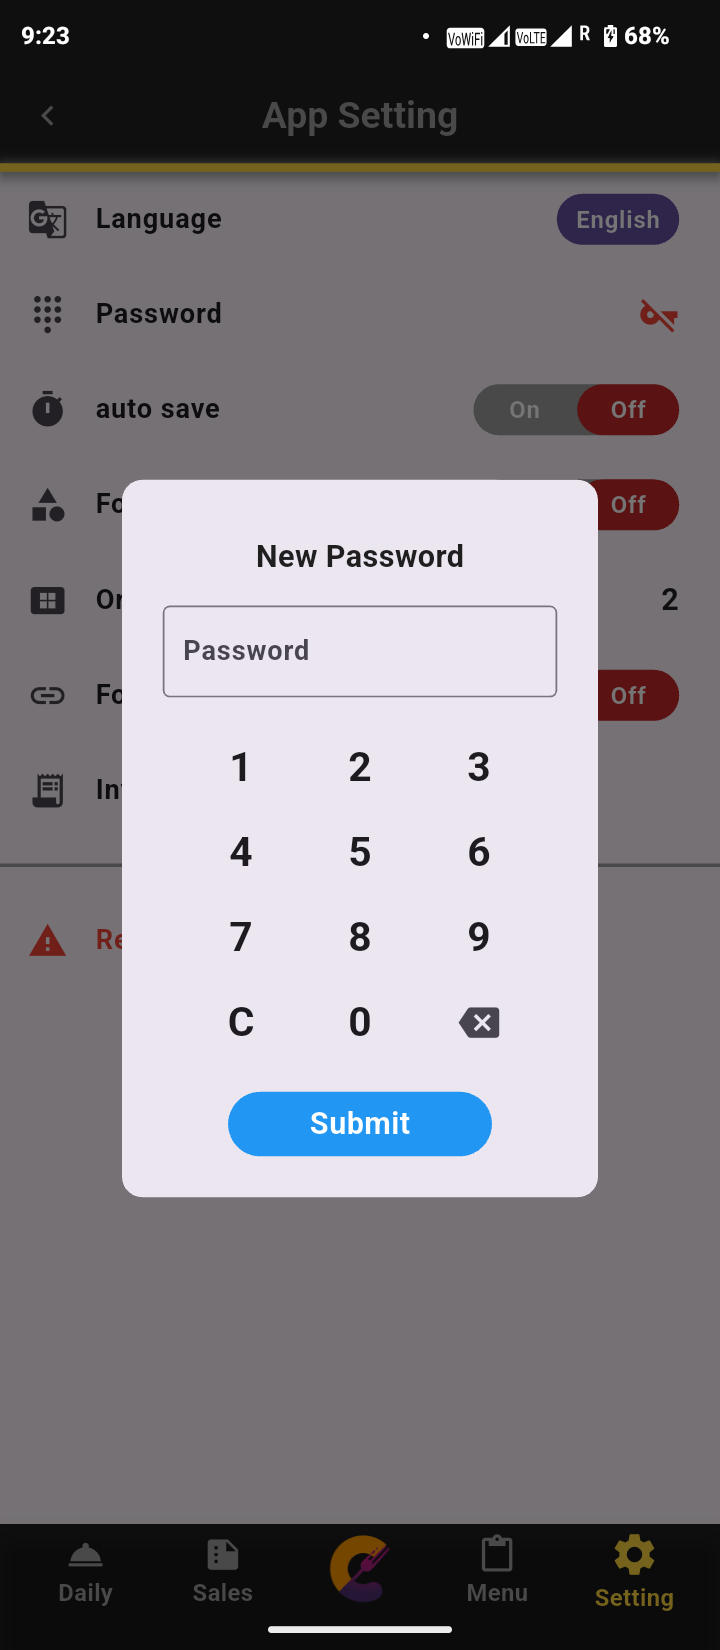
Step 2: A number pad will appear on the screen, allowing selection of digits to set up the PIN number.
Auto Save
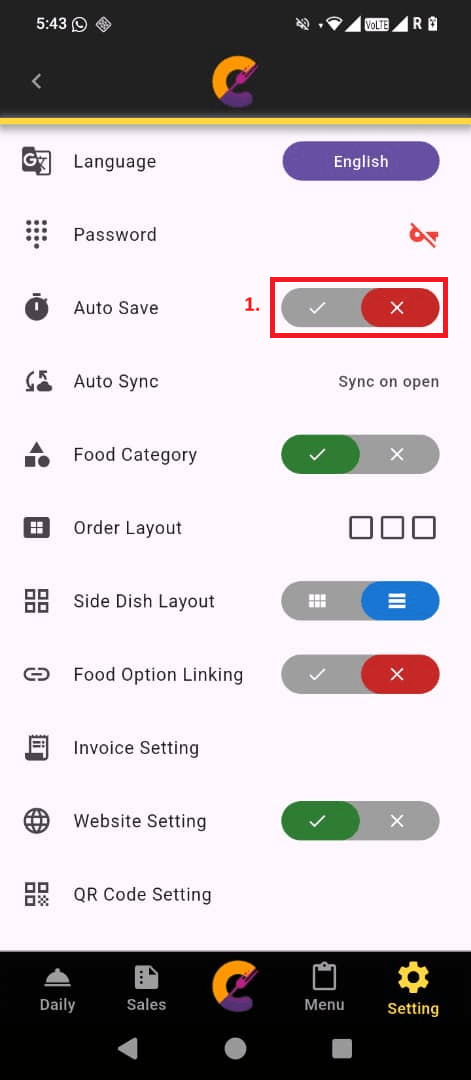
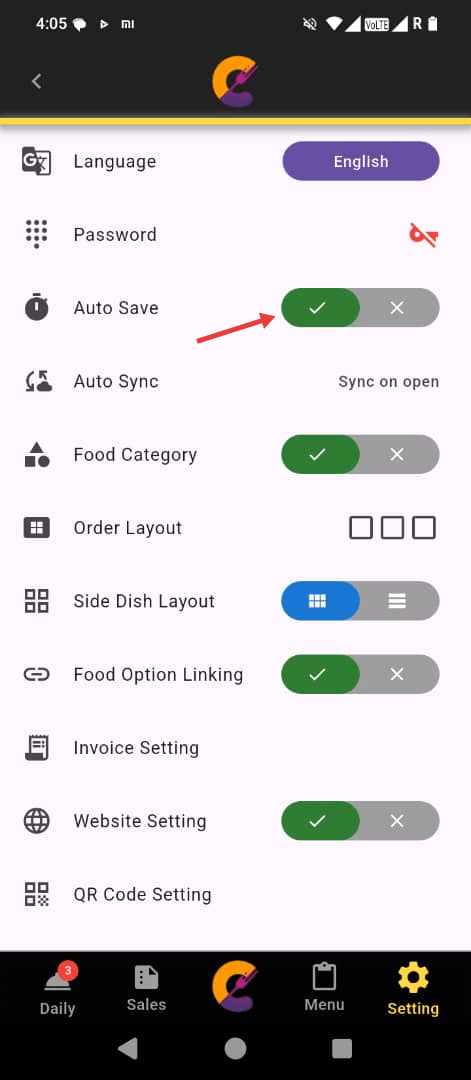
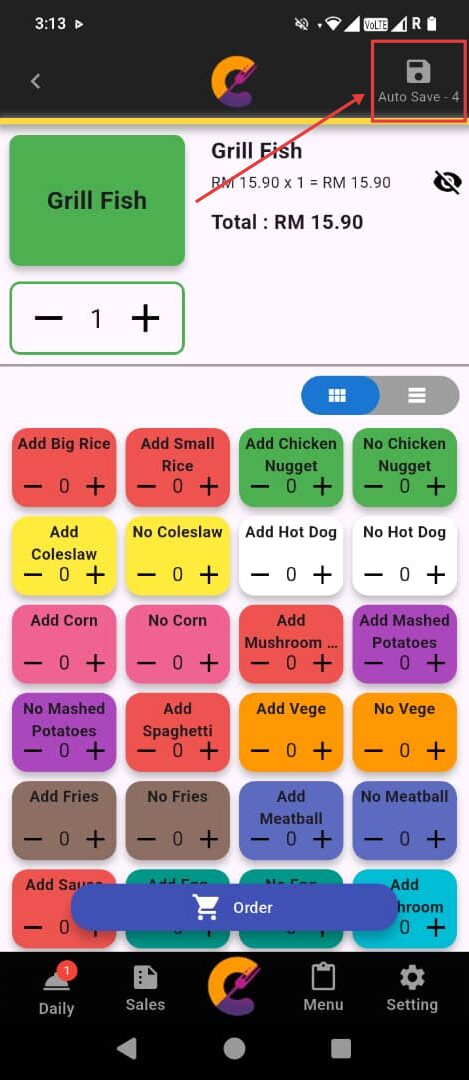
Go to Setting > Setting > Auto Save to enable automatic order placement without pressing the Submit button. This option is recommended for solo operators in the shop.
Once enabled, a countdown will appear in the top right corner. The order will be placed automatically when the countdown reaches zero.
Auto Sync
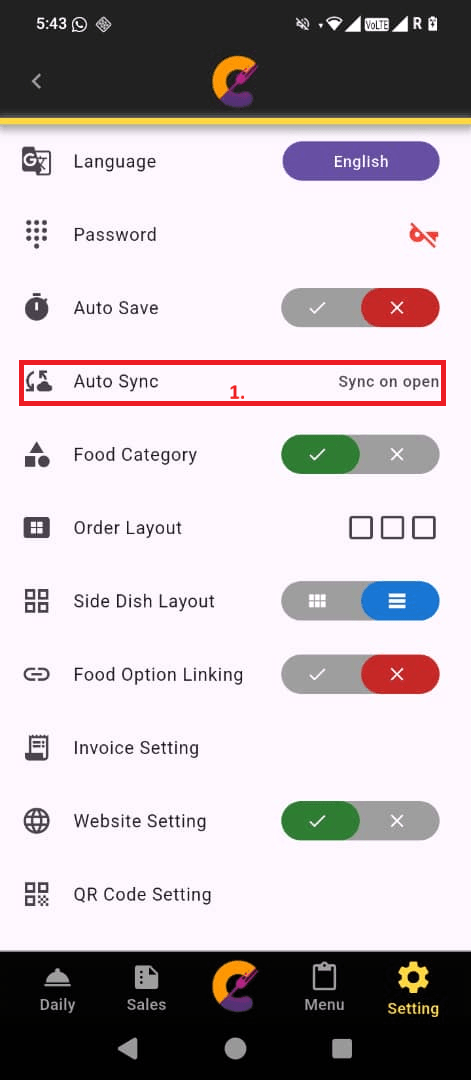
Step 1: Go to Setting > Setting > Auto Sync to select the preferred sync method.
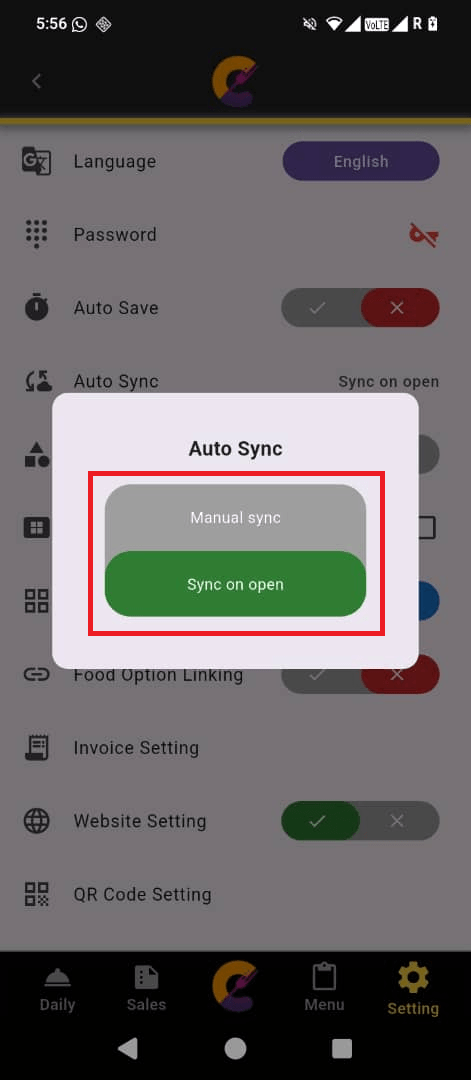
Step 2: Select either Manual Sync or Sync on Open as the desired sync option when launching the app.
Food Category
Go to Setting > Setting > Food Category to enable food filtering on the Menu page.
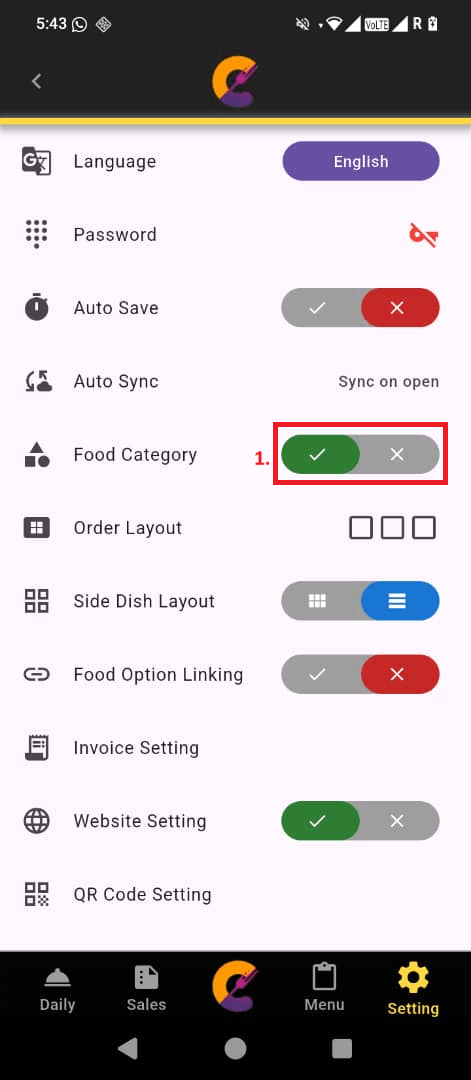
Reminder: For more information about managing the Food Category feature, refer to the Food Category on Menu page.
Order Layout
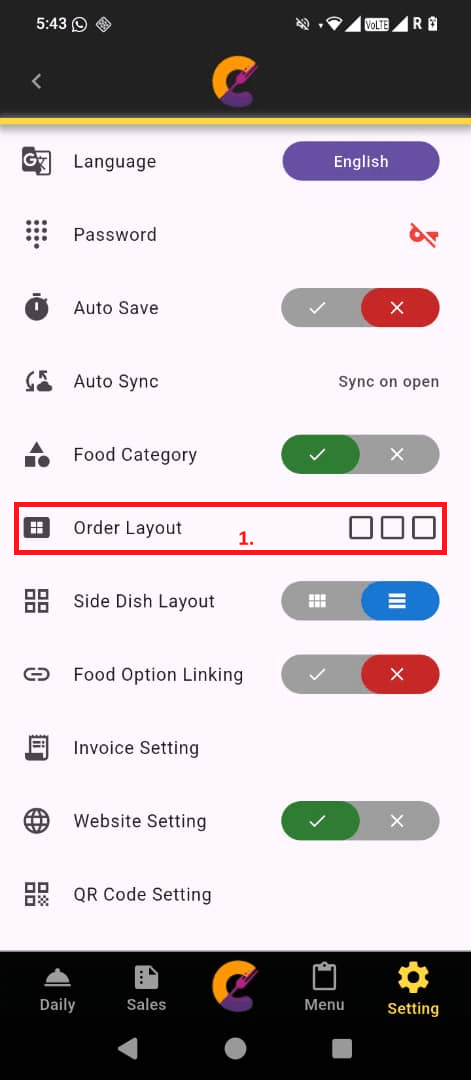
Step 1: Go to Setting > Setting > Order Layout to change the grid layout of the menu.
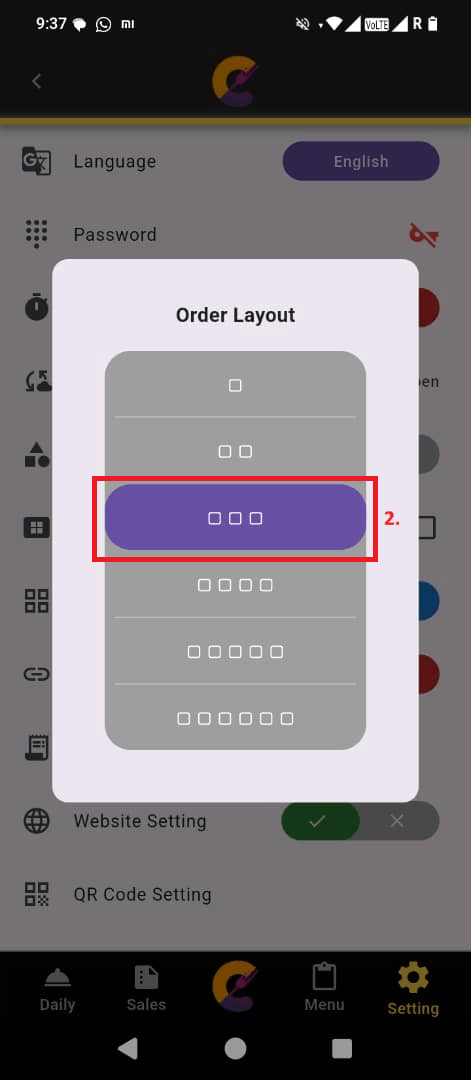
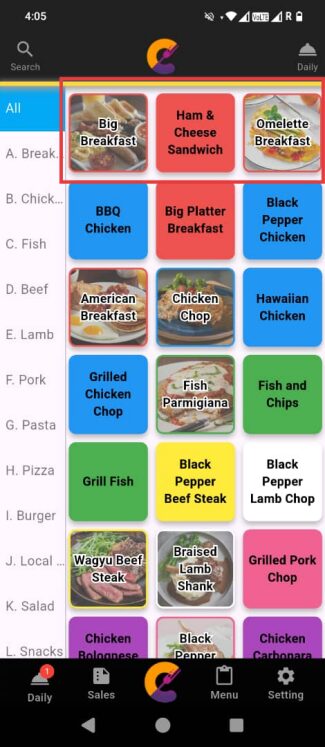
Step 2: Select a number to change the grid layout of the menu. For example, choosing 3 will display the menu in 3 columns.
Side Dish Layout
Step 1: Go to Setting > Setting > Side Dish Layout to change the grid layout of the menu.
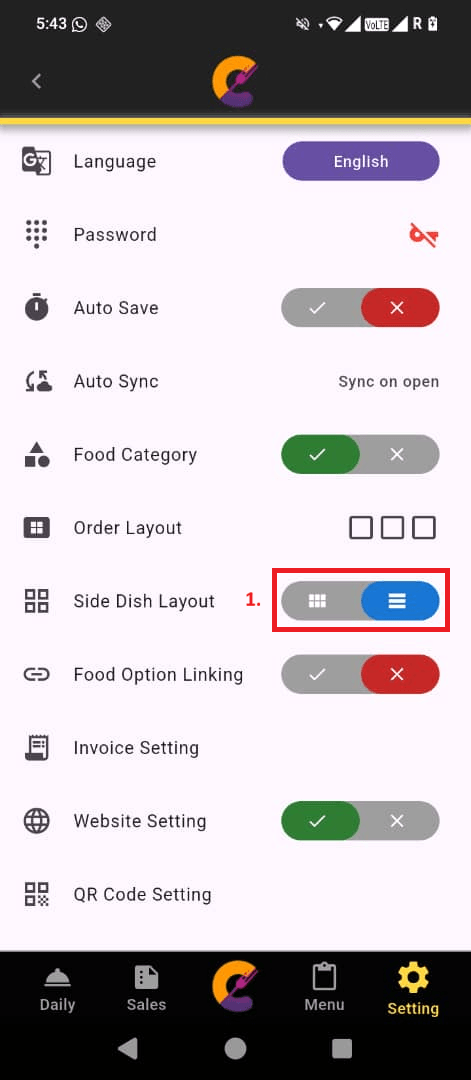
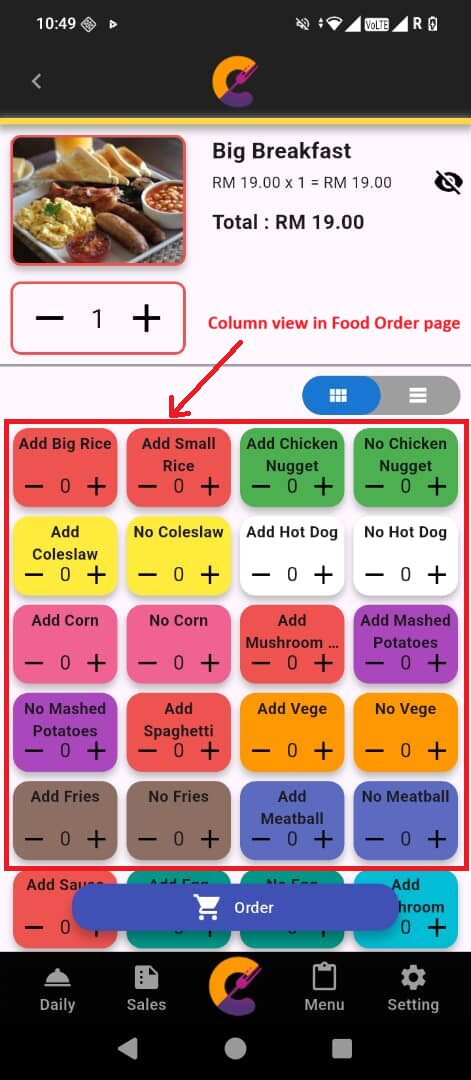
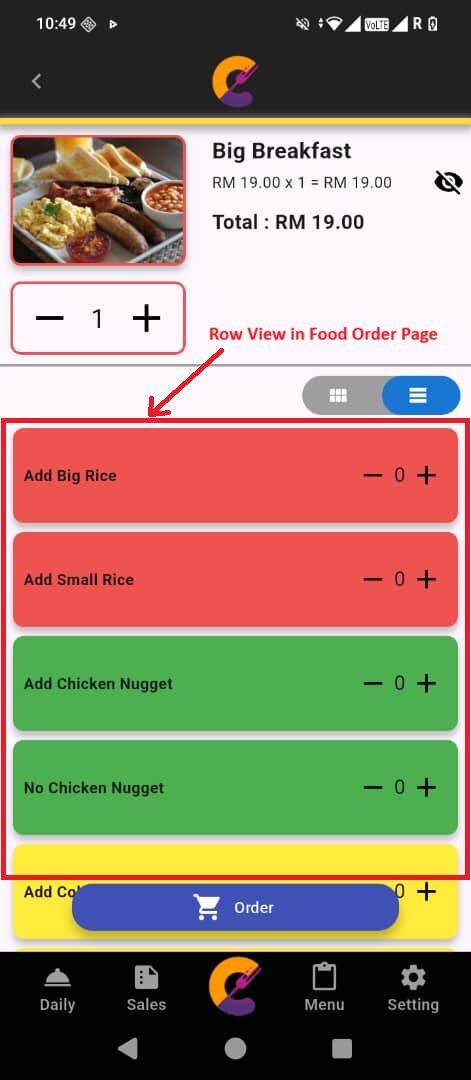
Step 2: Select the layout to display side dish layout on the Add/Edit Food/Drink page, Food Order page, and Add/Edit Food Option Linking page to display items in rows or columns.
Food Option Linking
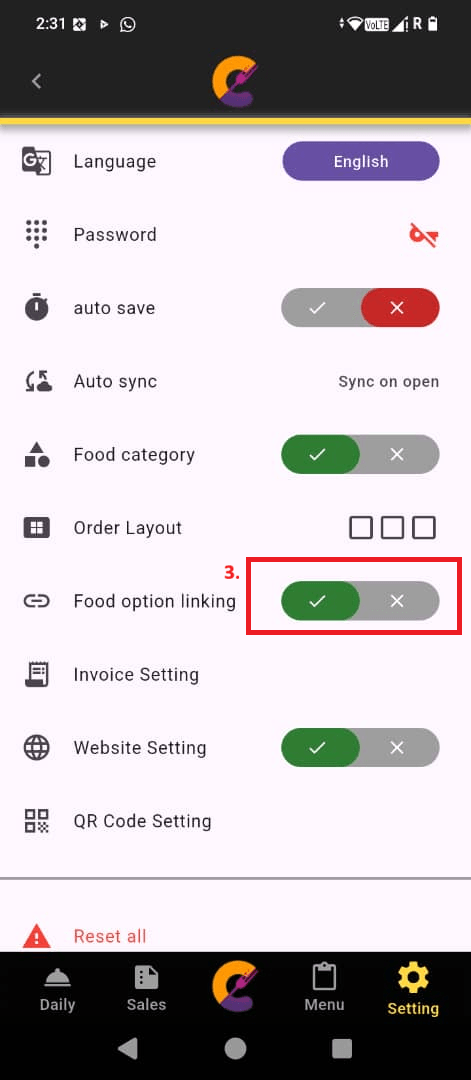
Go to Setting > Setting > Food Option Linking to allow multiple food items to share the exact same group of side dishes.
This feature manages how side dishes are linked to main menu items during the ordering process.
Reminder:
- When this function is disabled, staff must manually assign specific side dishes to each individual food item Add New Food/Drink page.
- For more information, refer to the Food Option Linking page.
Invoice Setting
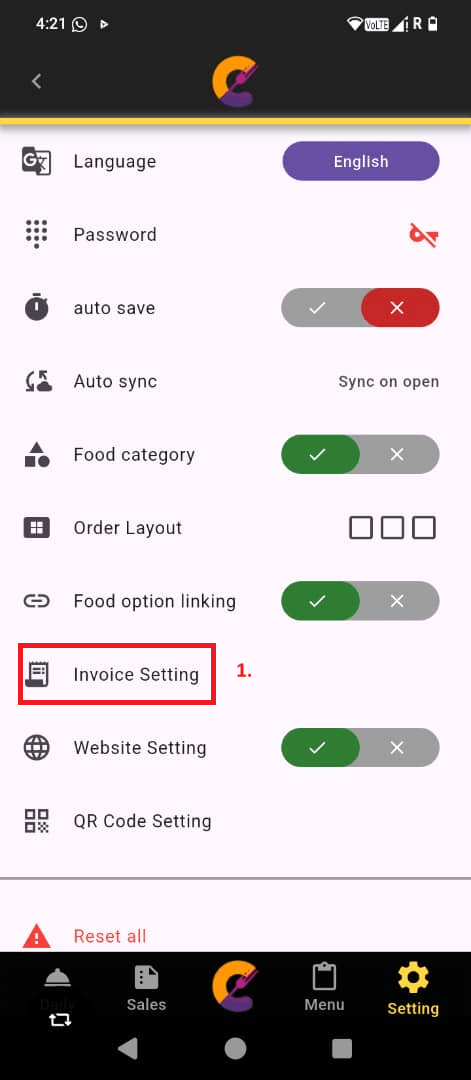
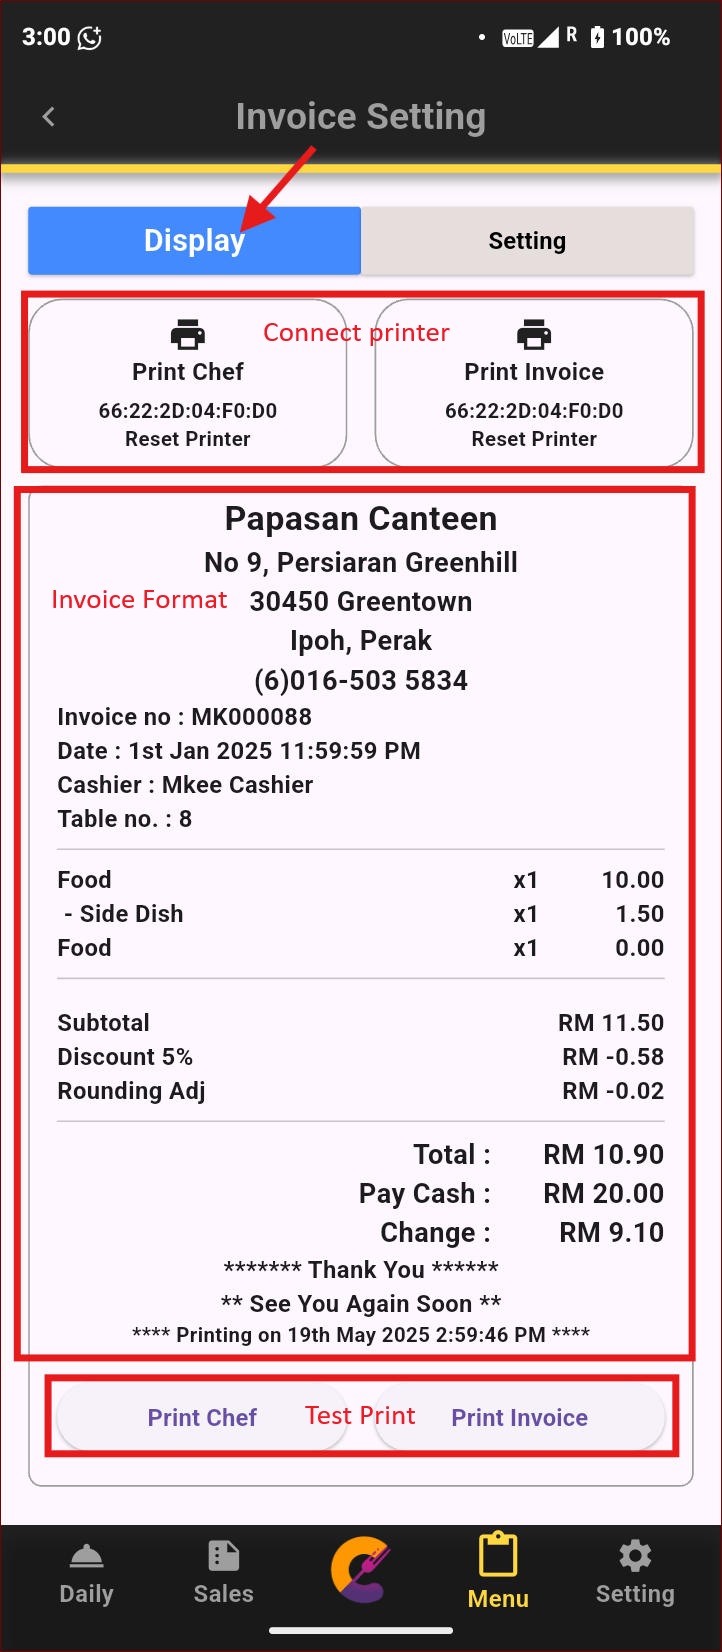
Navigate to Setting > Setting > Invoice Setting to customize the invoice format.
Display
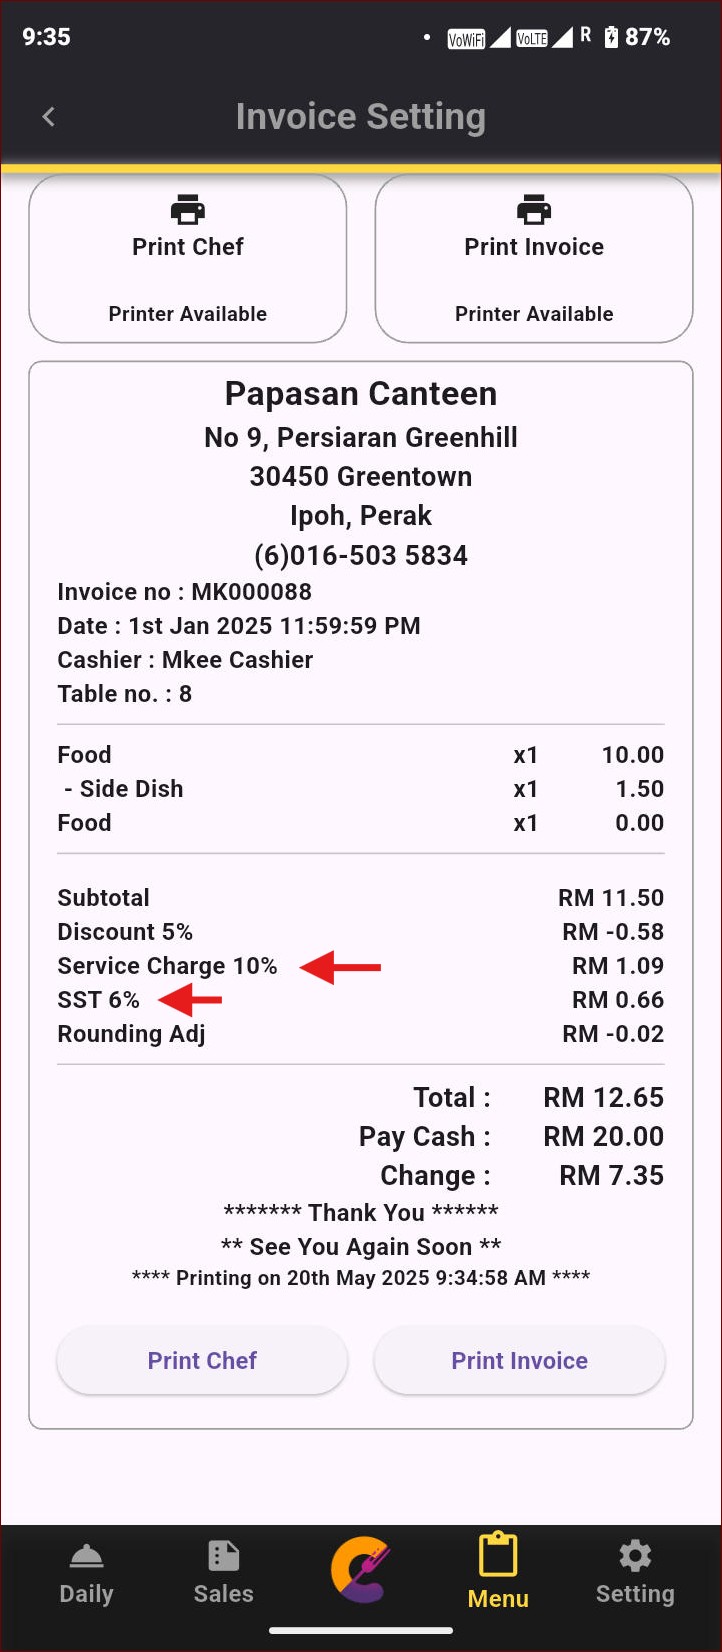
In the Display tab, view the invoice format output, configure the printer connection, and perform a test print of the invoice.
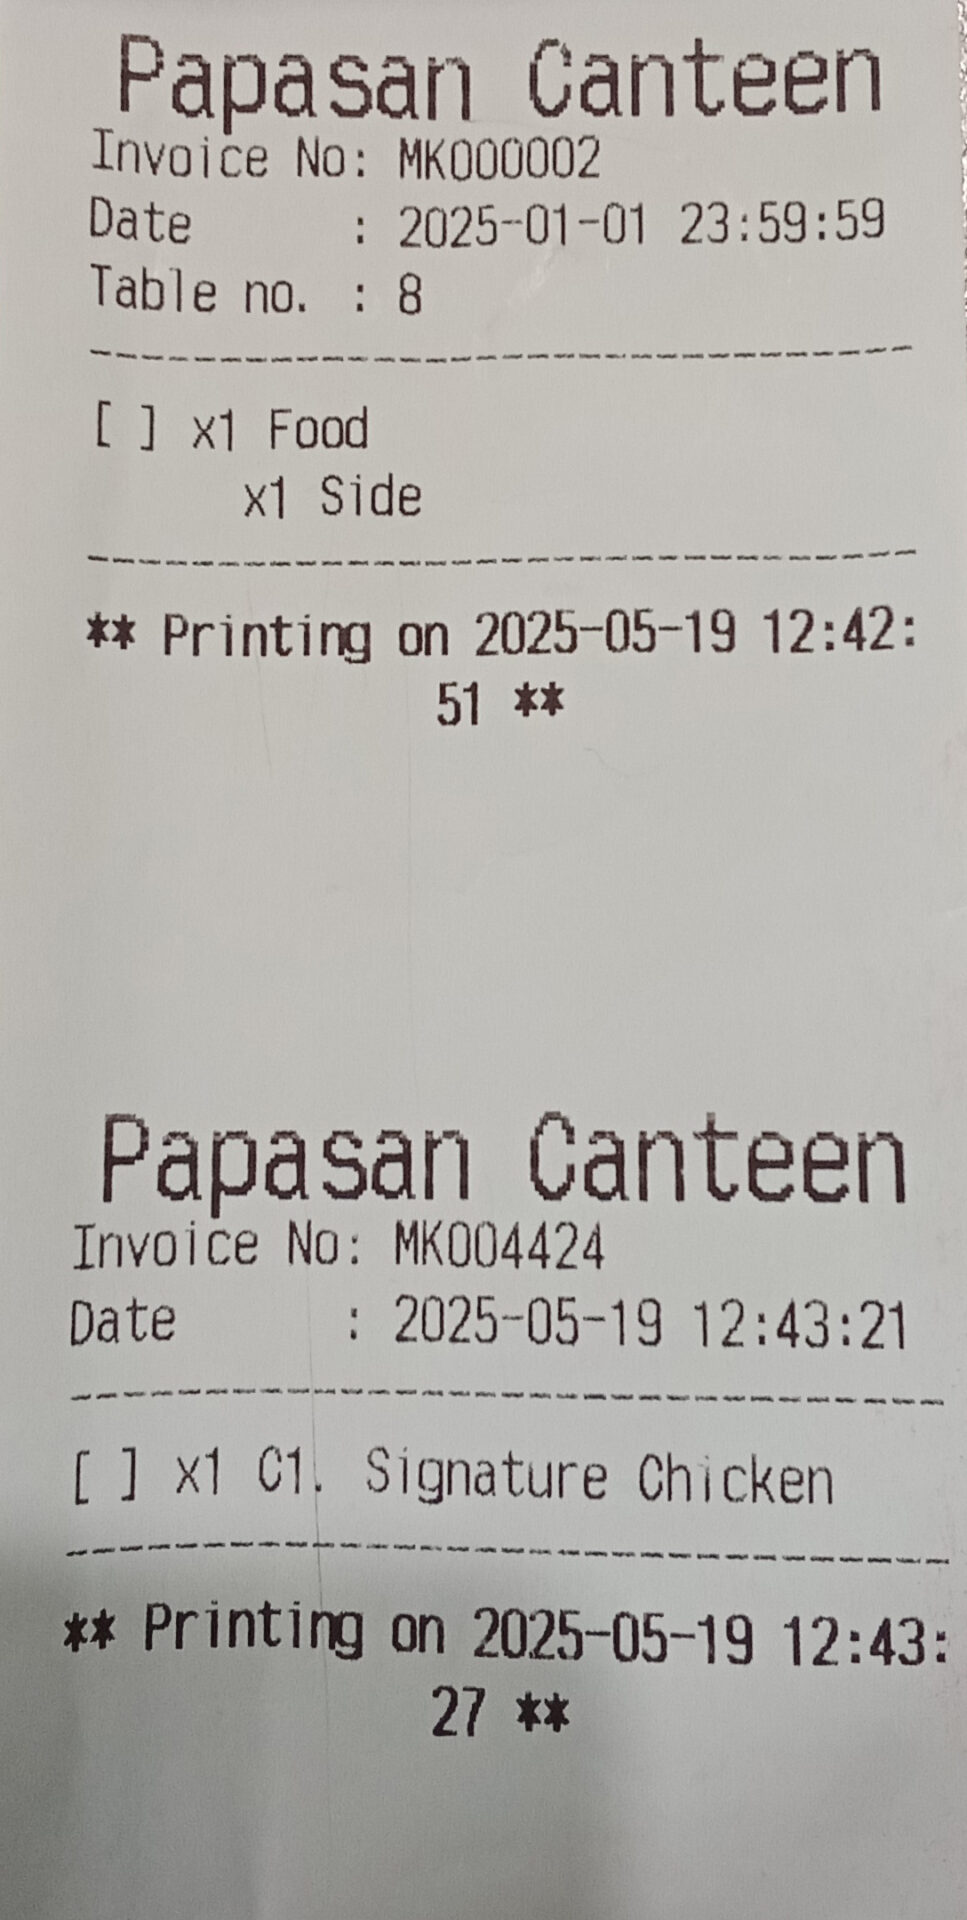
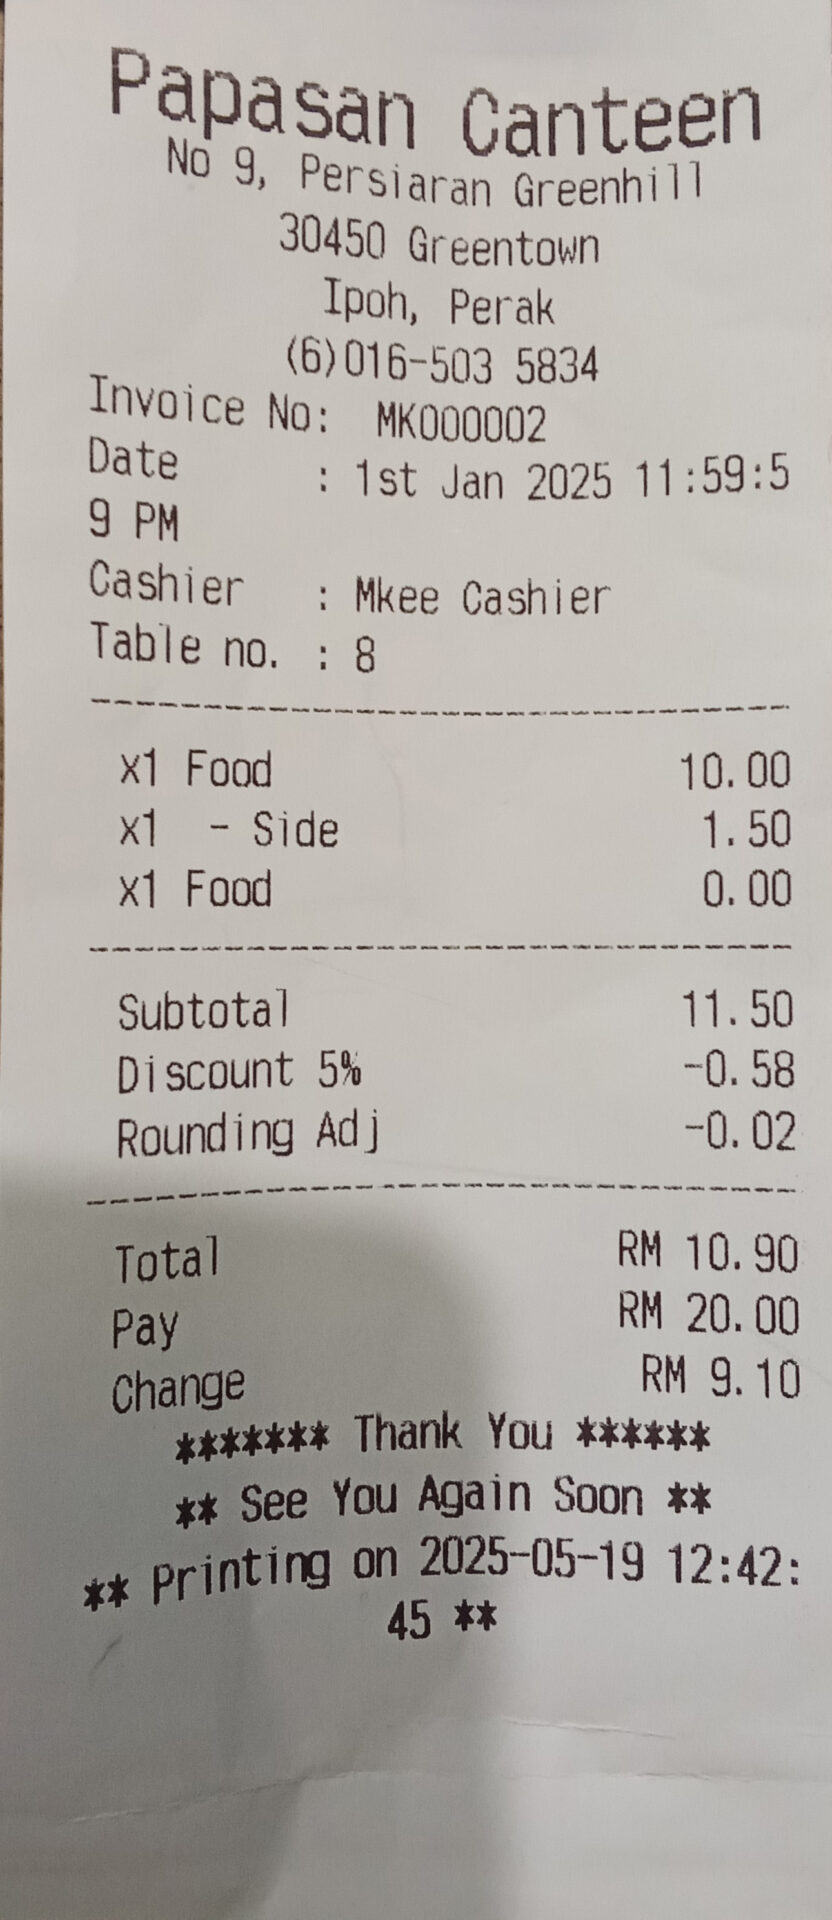
Examples of the printout results for “Print Chef” and “Print Invoice” are shown below.
Setting
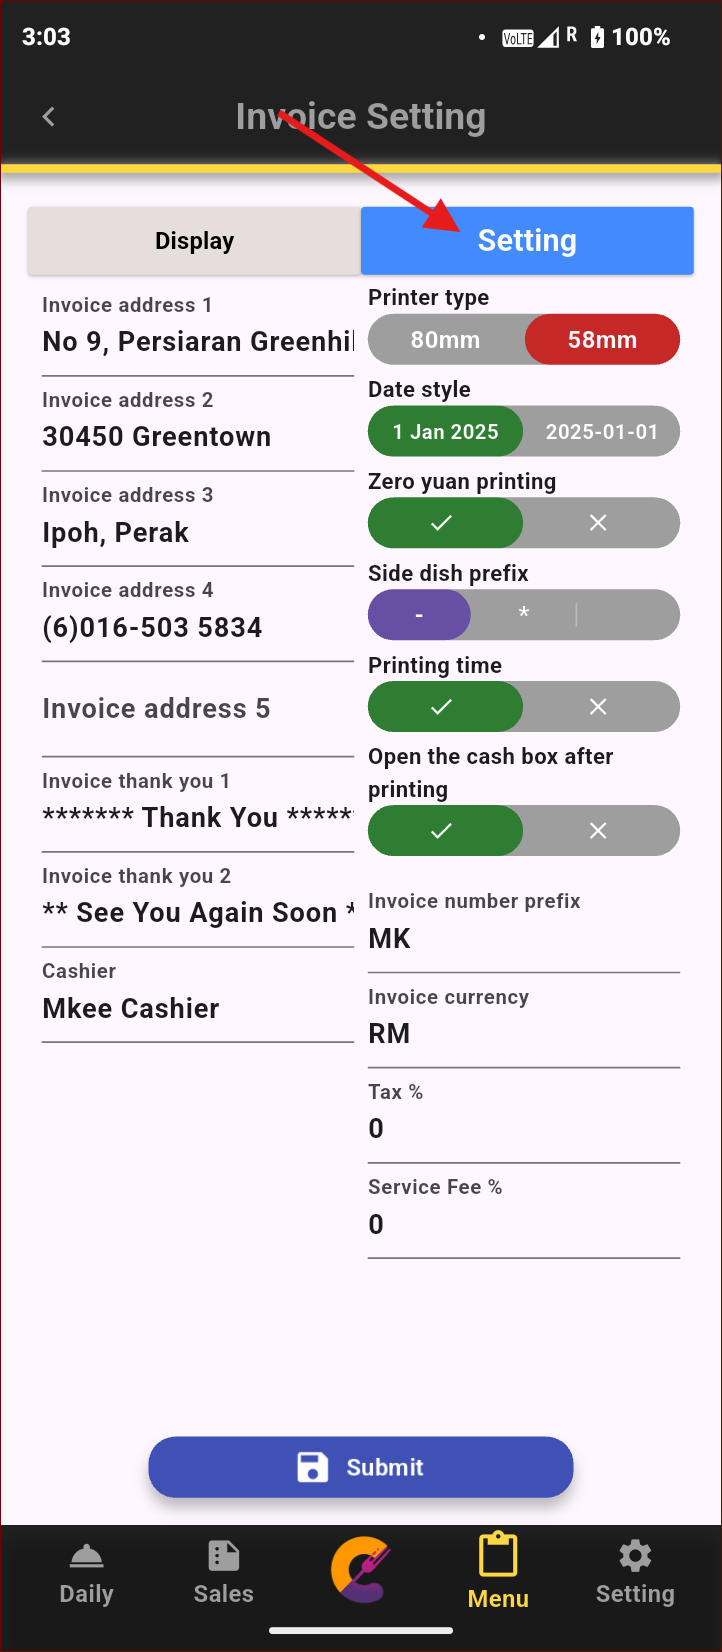
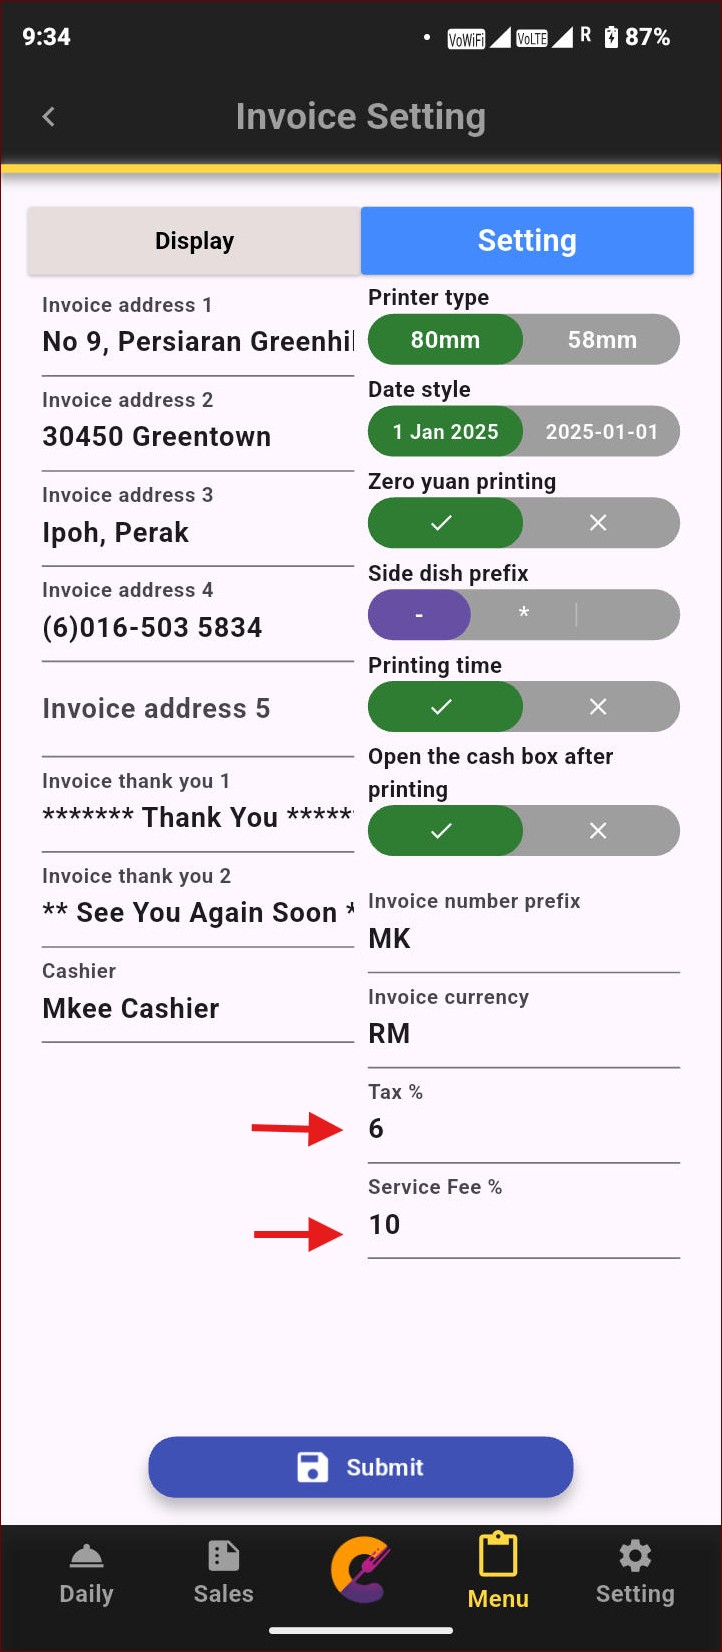
Adjust the invoice format settings to customize the print layout. Click the “Submit” button to apply and save the changes.
Tax / Services Fee
To add a tax or service fee, go to Setting. You’ll see two fields to enter the amounts as percentages.
Website Setting
Go to Setting > Setting > Website Setting to allow customers access Website Ordering by scanning the QR Code.
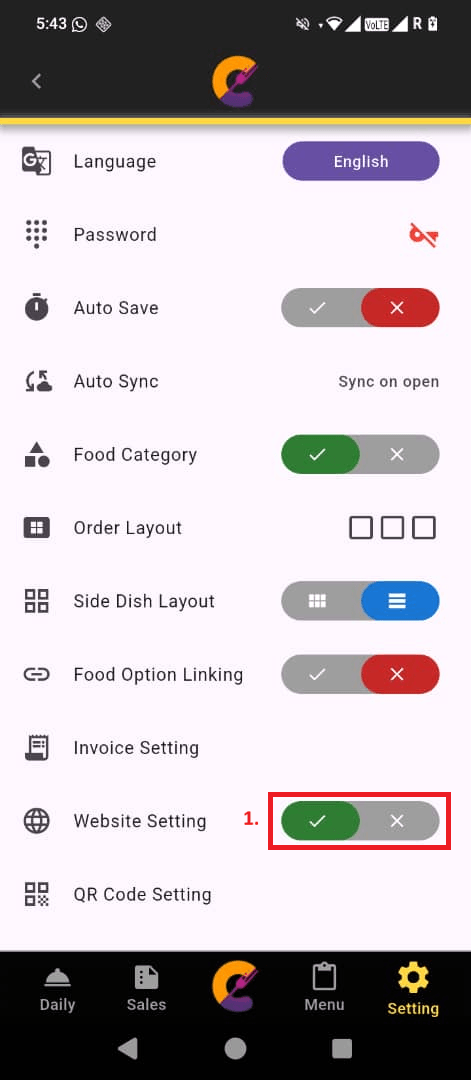
Reminder: This feature only available in Premium Plan.
QR Code Setting
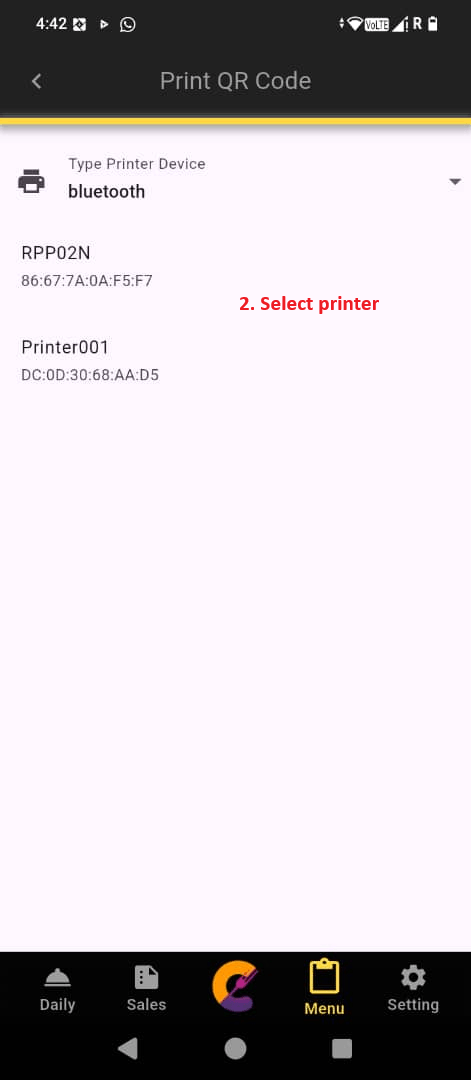
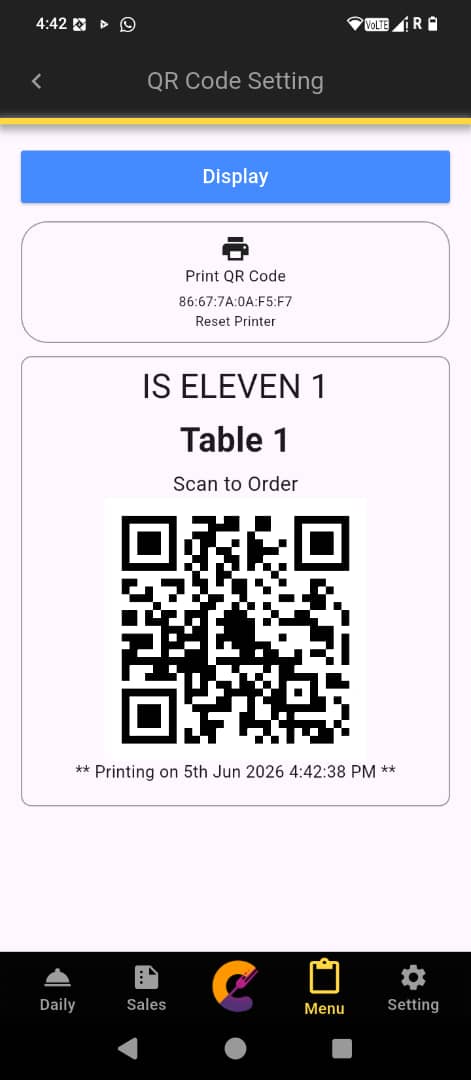
Step 1: Go to Setting > Setting > QR Code Setting. Click to connect printer for 1st time connection.
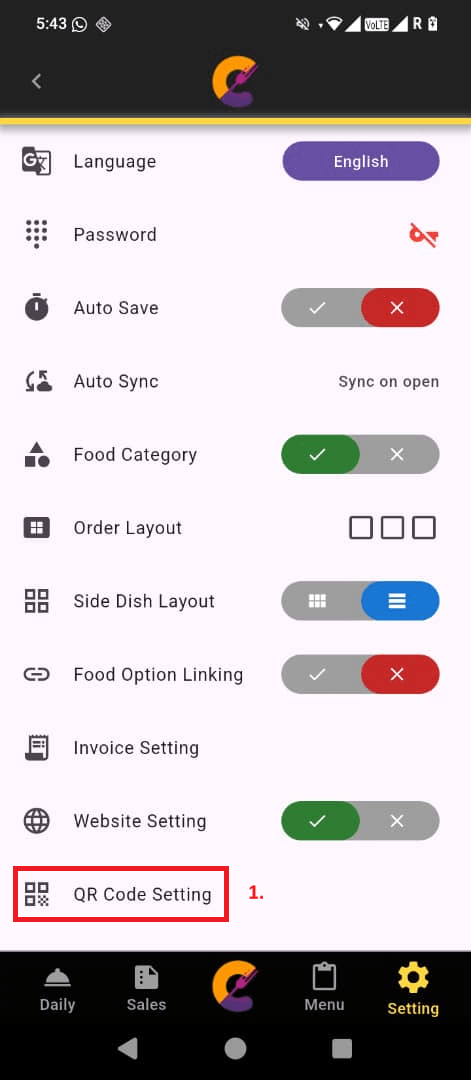
Step 2: Select your shop printer and view example QR Code view.
Reminder: This feature only available in Premium Plan.


