Food
Add New Food / Drink
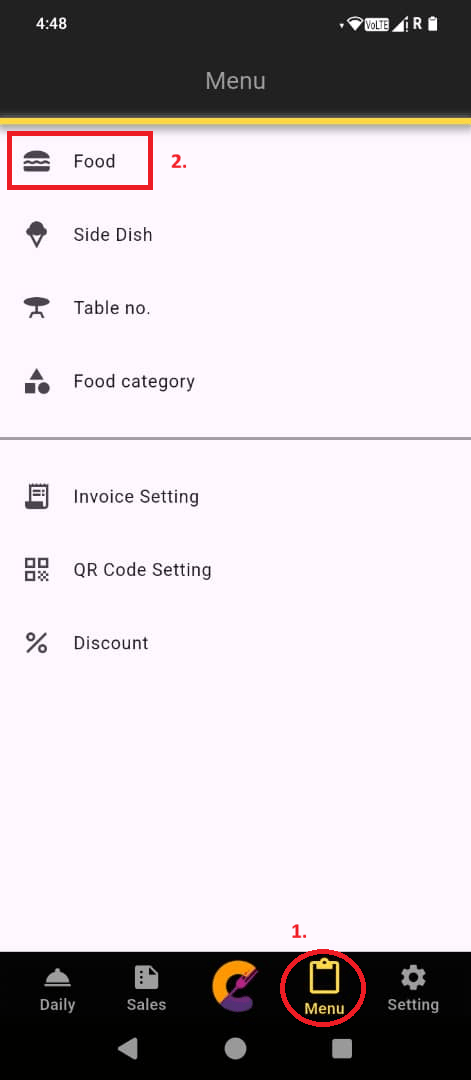
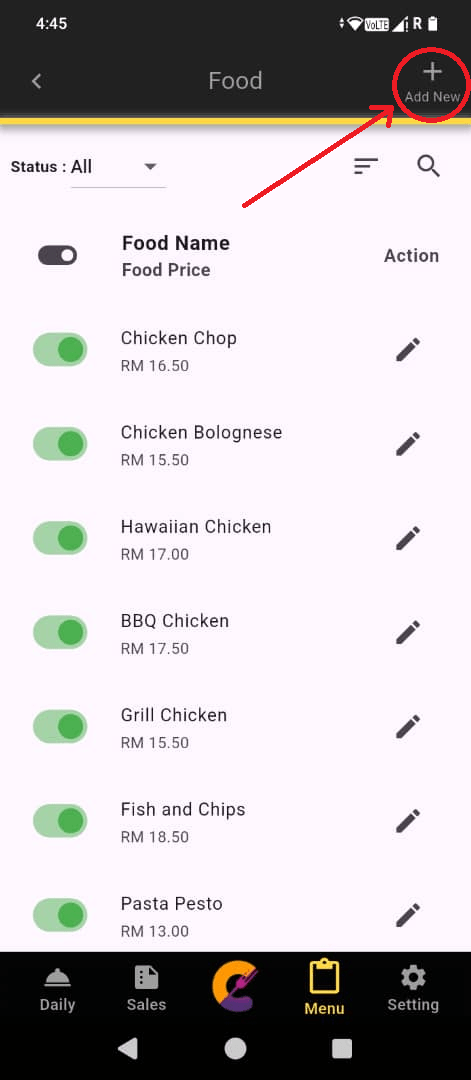
Step 1: Go to Menu, then select Food, and click Add New to create a new menu item.
Step 2: Enter the new menu item (Food/Drink) details.
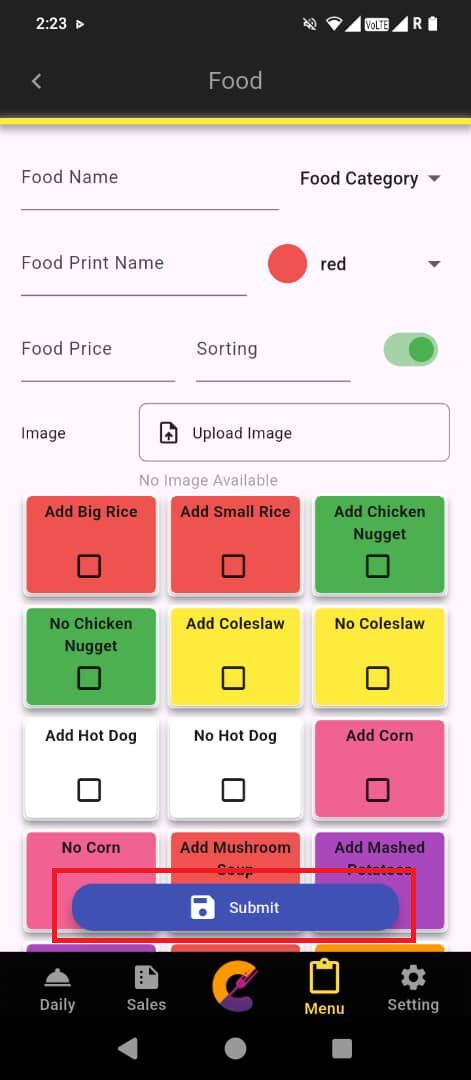
Step 3: Click Submit to save the item record.
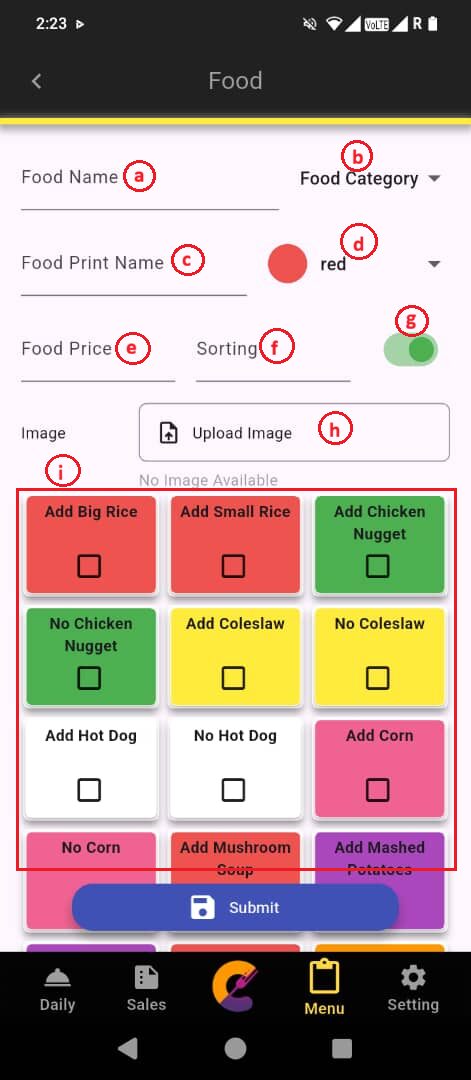
The functions are described below:-
a) Food Name: The name displayed on the menu for staff to identify the item.
b) Food Category: Allows staff to sort and organize items by category for easier menu management.
c) Food Print Name: The name that appears on the invoice when an order is processed. This may differ from the menu name if needed.
d) Color: Assign a custom color to each item to help visually distinguish them in the system.
d) Food Price: The selling price of the item as set in the system.
f) Sorting: Set the order in which items appear on the menu for staff to navigate efficiently.
g) On/Off button: Toggle this setting to enable or disable an item from appearing on the menu.
h) Upload Image: Upload a photo of the food item to display on the website order for easier visual recognition.
i) Add on Side Dish: Used to create combination meals or sets when taking an order. User may go to setting to change side dish layout to row view and column view.
Edit/ View Food / Drink
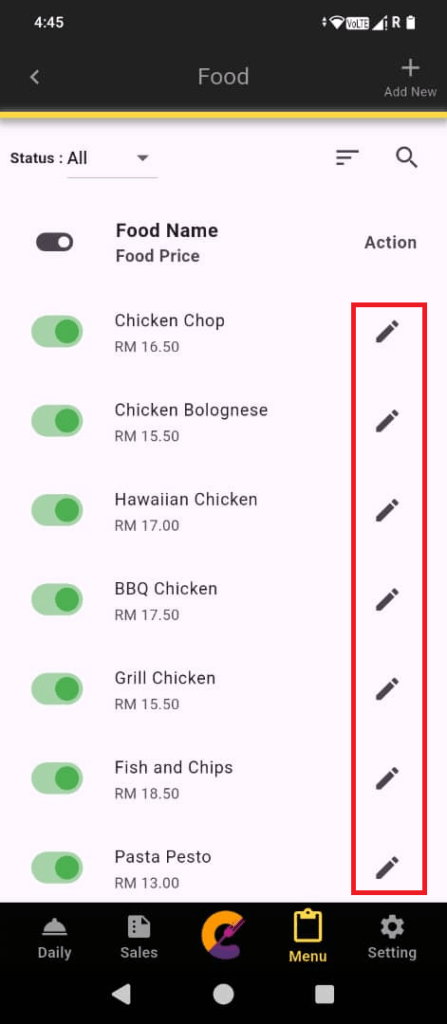
Step 1: Go to Menu, select Food, and click Edit icon to edit/view an item.
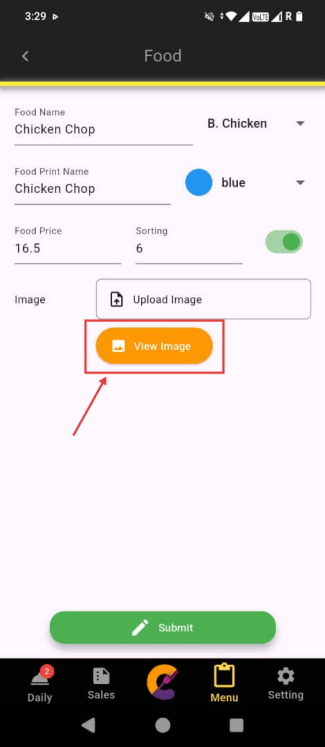
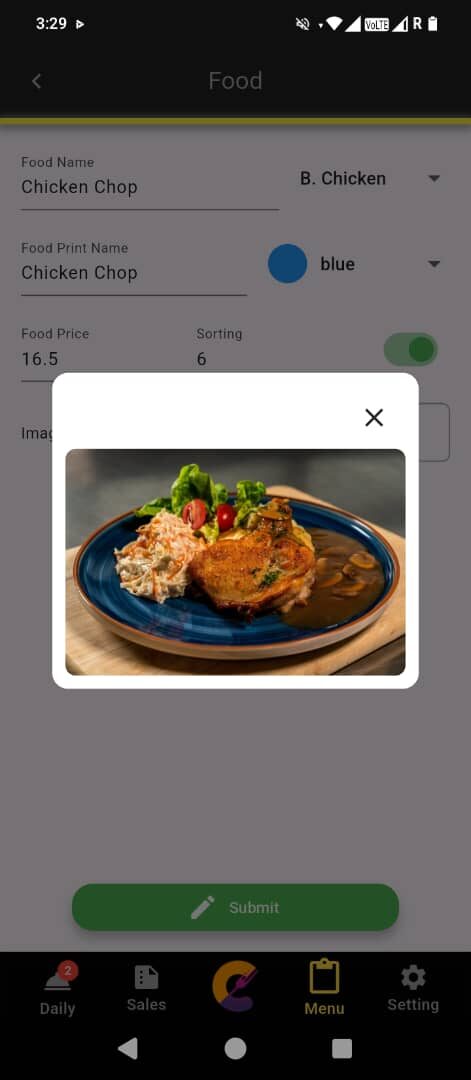
Step 2: Click View Image to view the image, which is displayed on both the Food Order page and the Website Order (customer view) to assist with ordering.
Reminder: If an item has an uploaded image, a View Image button will appear.
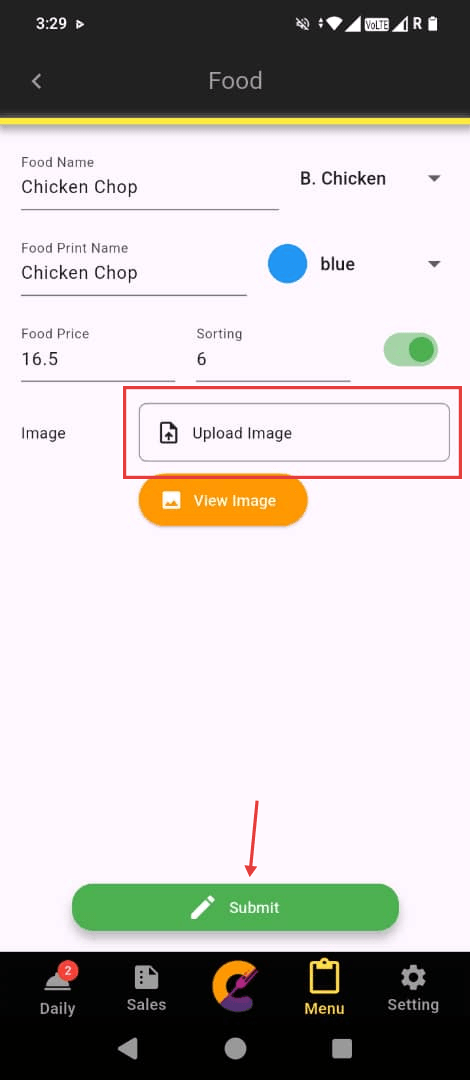
Step 3: Click Upload Image to upload a new image and click Submit to save the changes.
Search Food / Drink
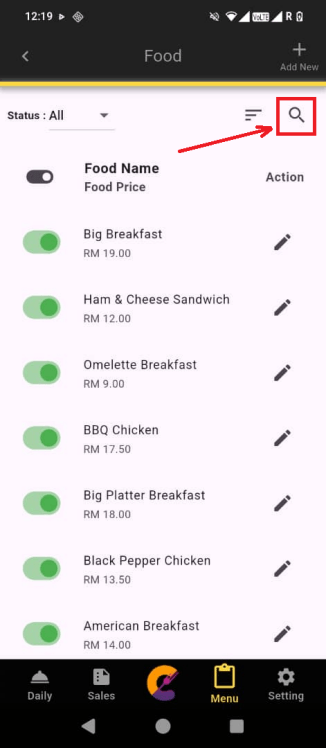
Step 1: Go to Menu, select Food, and click the Search icon at the top right corner.
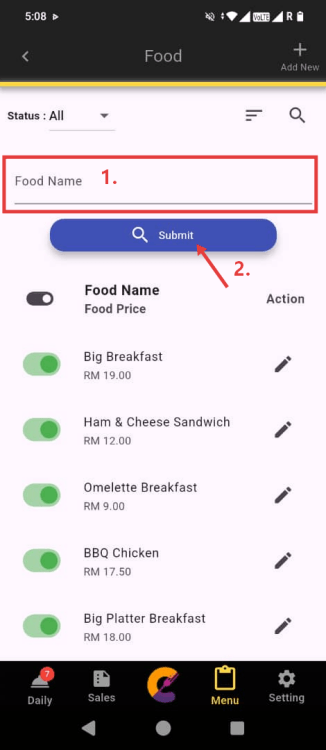
Step 2: Enter the Food Name and click the Submit button to filter matched results.
Sorting Food / Drink
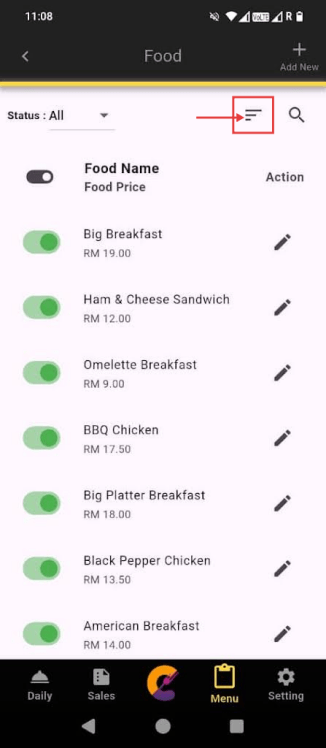
Step 1: Go to Menu, select Food and click the Sorting icon to enter food sorting page.
Step 2: There are 2 ways to sort the items:
1. Press and hold any item in the list, then drag it to the desired position. Click Submit to save the records.
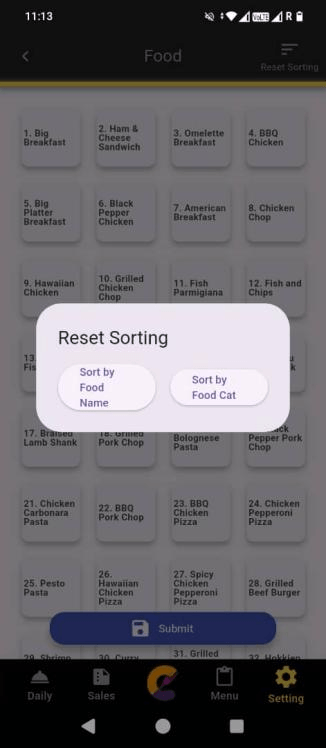
2. Click the Reset Sorting button at top right corner.
Select Sort by Food Name to rearrange the item alphabetically or select Sort by Food Cat to rearrange item based on item’s food category.
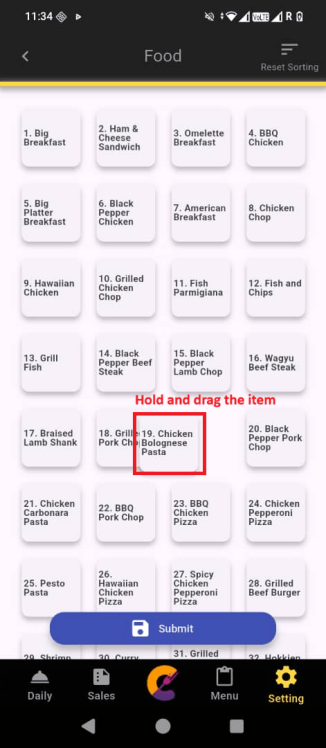
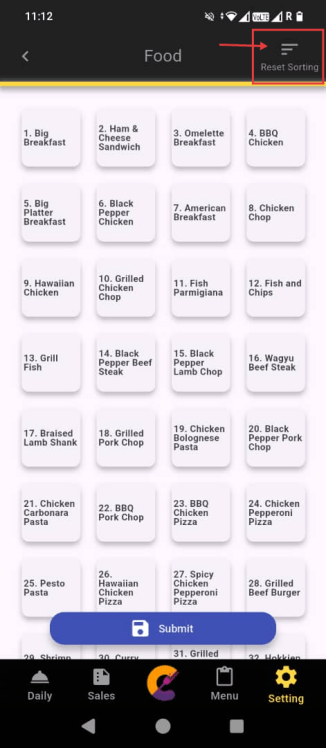
Step 3: Click Submit to save the records.
Side Dish
Add Side Dish
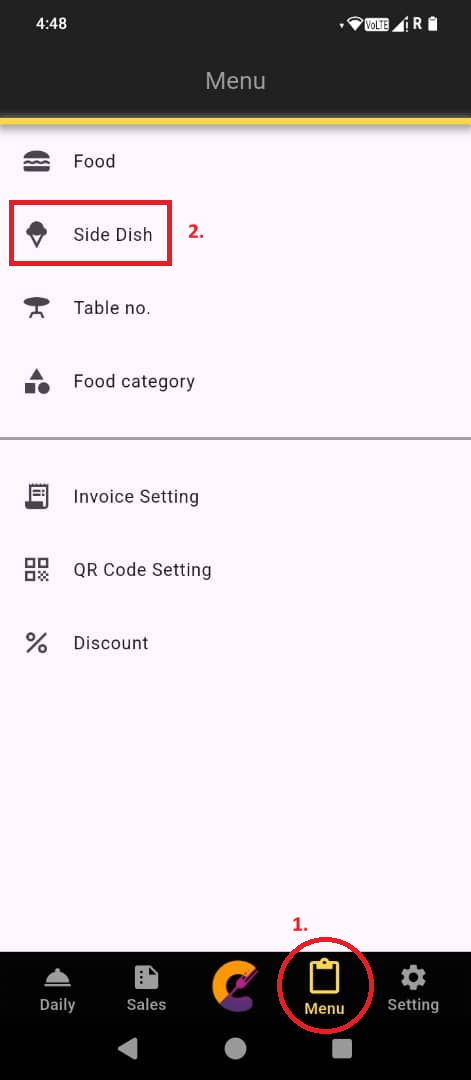
Step 1: Go to “Menu” and select “Side Dish” and choose Add New to create a new side dish.
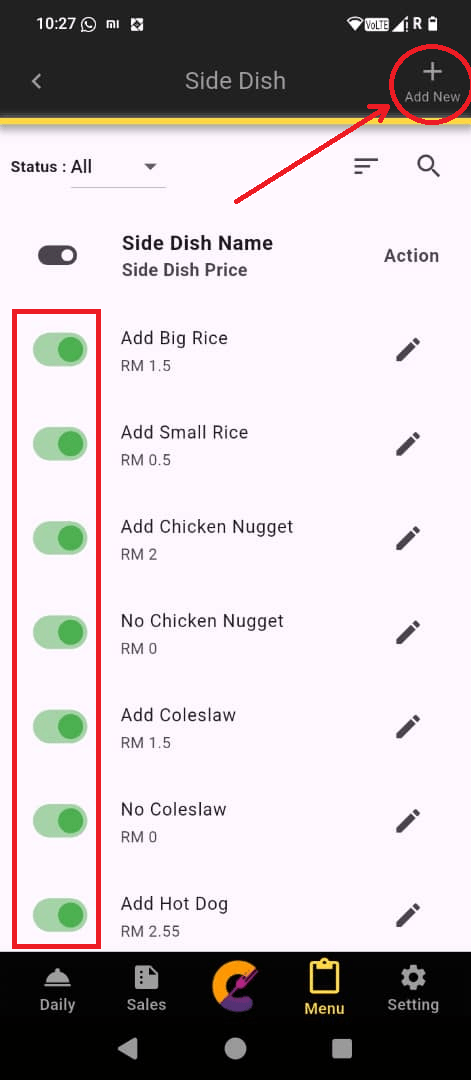
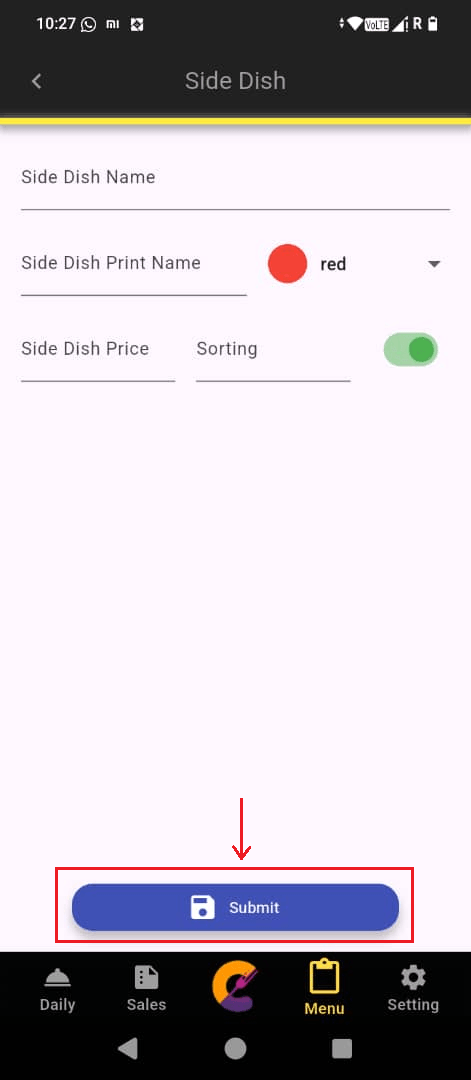
Step 2: Enter the details of the new side dish, then click Submit to save the record.
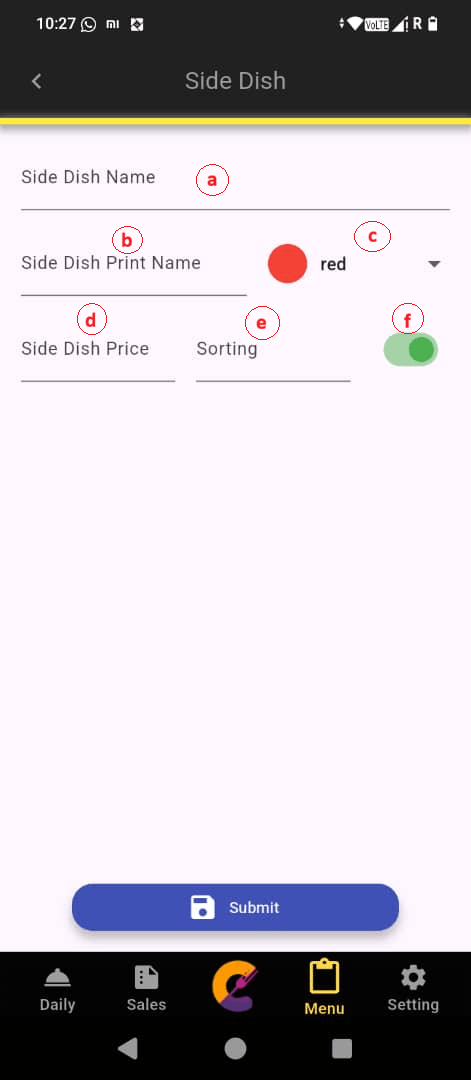
The functions are described below:-
a) Side Dish Name: The name displayed on the menu for staff to identify the item.
b) Side Dish Print Name: The name of the side dish as it will appear on printed invoices or kitchen chits.
c) Color: Assign a custom color to each item to help visually distinguish them in the system.
d) Side Dish Price: The selling price of the item as set in the system.
e) Sorting: Set the order in which items appear on the menu for staff to navigate efficiently.
f) On/Off button: Toggle this setting to enable or disable an item from appearing on the menu.
Edit Side Dish
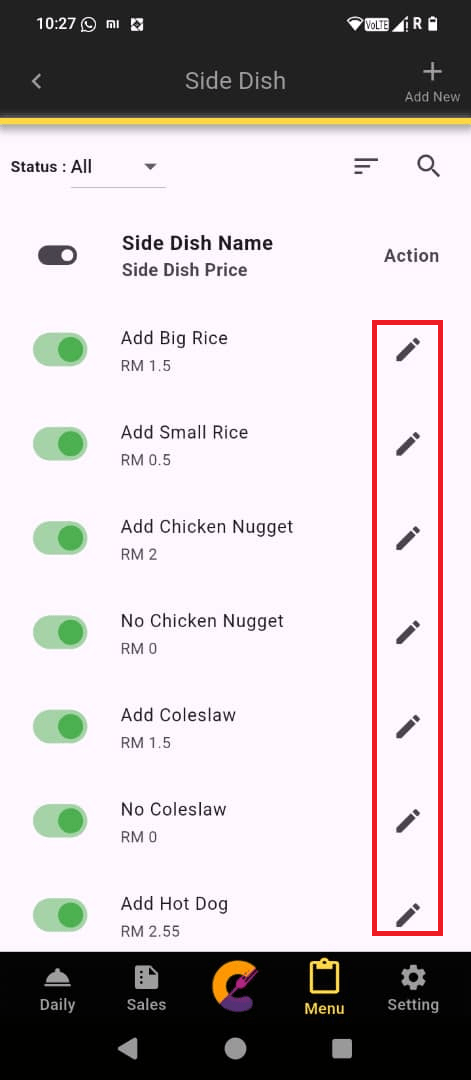
Step 1: Go to Menu, select Side Dish, and click Edit icon to edit/view and item.
Search Side Dish
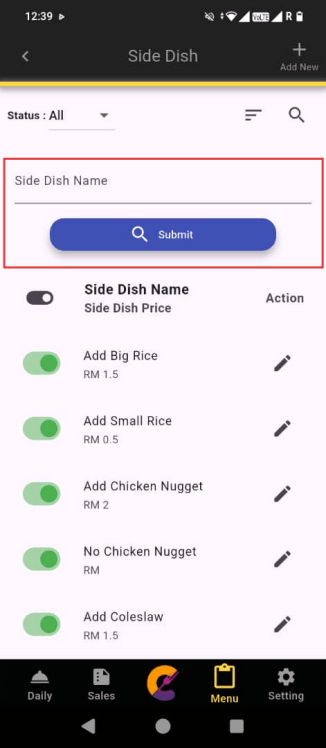
Step 1: Go to Menu, select Side Dish, and click the Search icon at the top right corner.
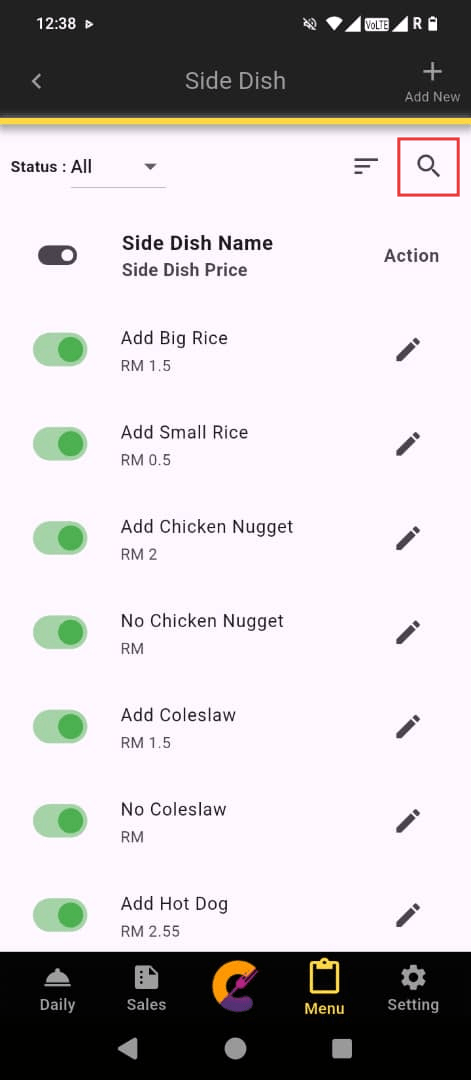
Step 2: Enter the Side Dish Name, then click the Submit button to filter matched results.
Sorting Side Dish
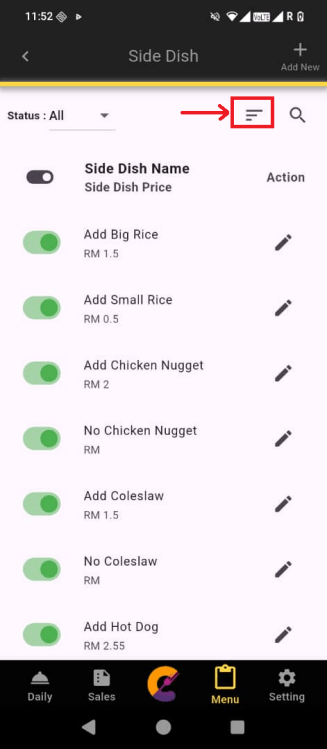
Step 1: Go to Menu, select Side Dish, and click the Sorting icon to enter sorting page.
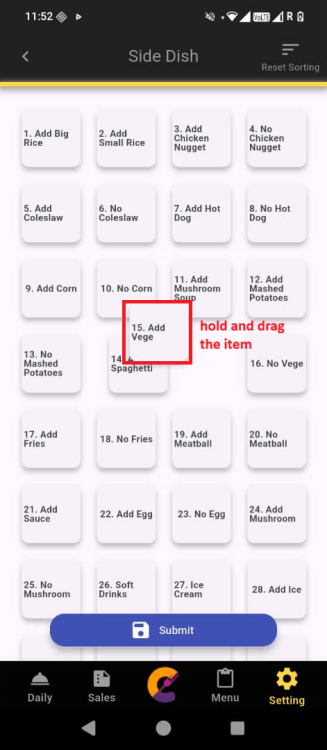
Step 2: There are 2 ways to sort the items:
1. Press and hold any item in the list, then drag it to the desired position. Click Submit to save the records.
2. Click the Reset Sorting button at top right corner. Select Sort by Side Name to rearrange the item alphabetically then click Submit to save the records.
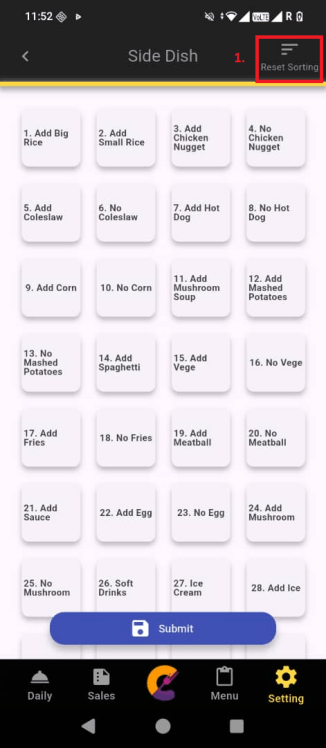
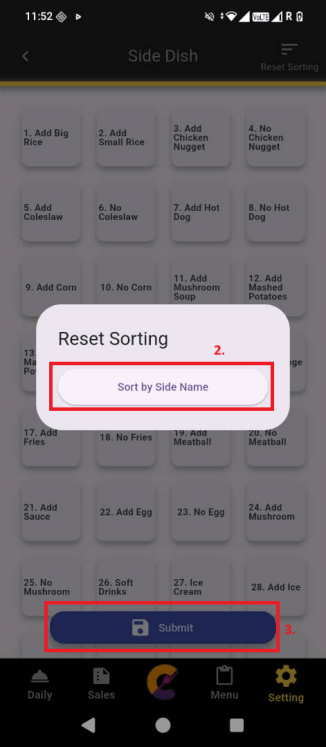
Table No
Add Table No.
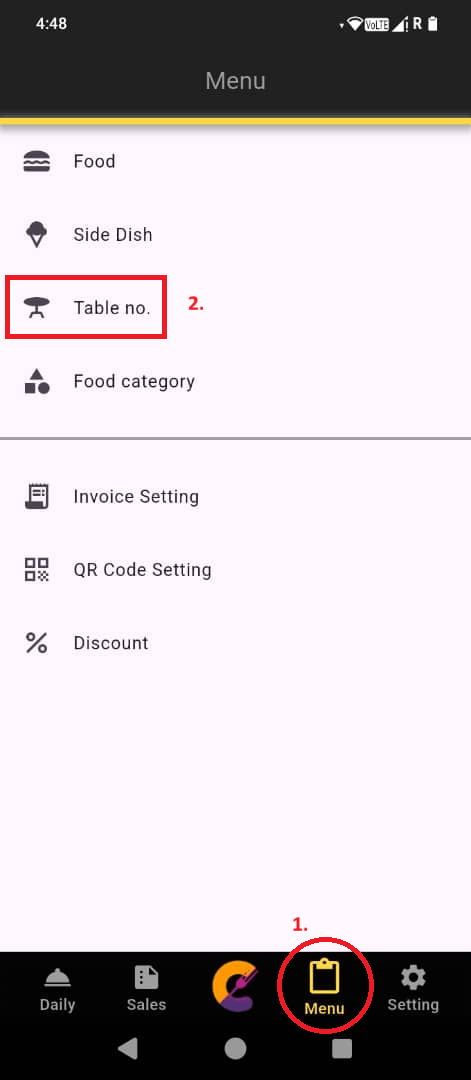
Step 1: Go to “Menu” and select “Table no.” to set up table numbers for easier management.
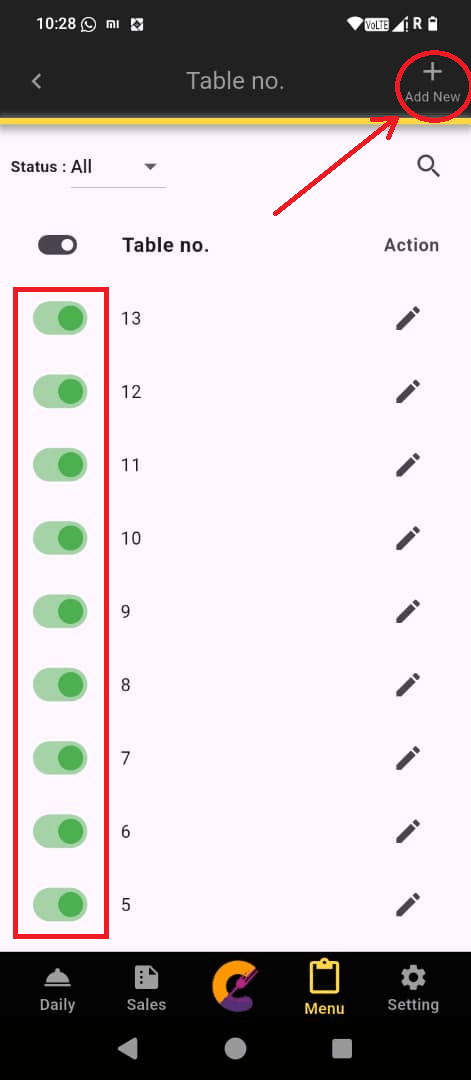
Step 2: Navigate to the top right to click “Add New” to add table number.
- The green on/off toggle is used to enable or disable table number.
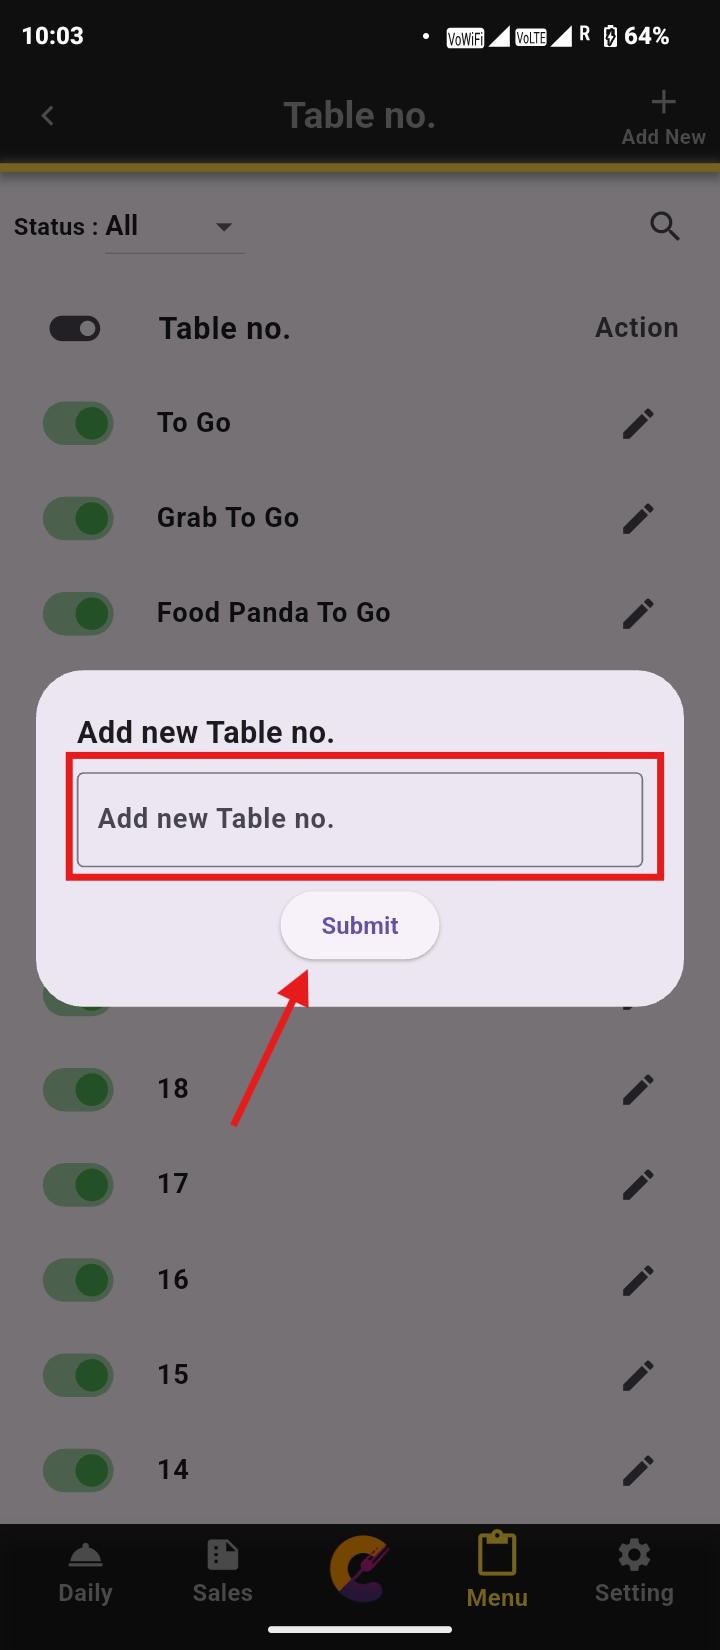
Step 3: Enter the table name or number, then click “Submit” to save.
Edit Table No.
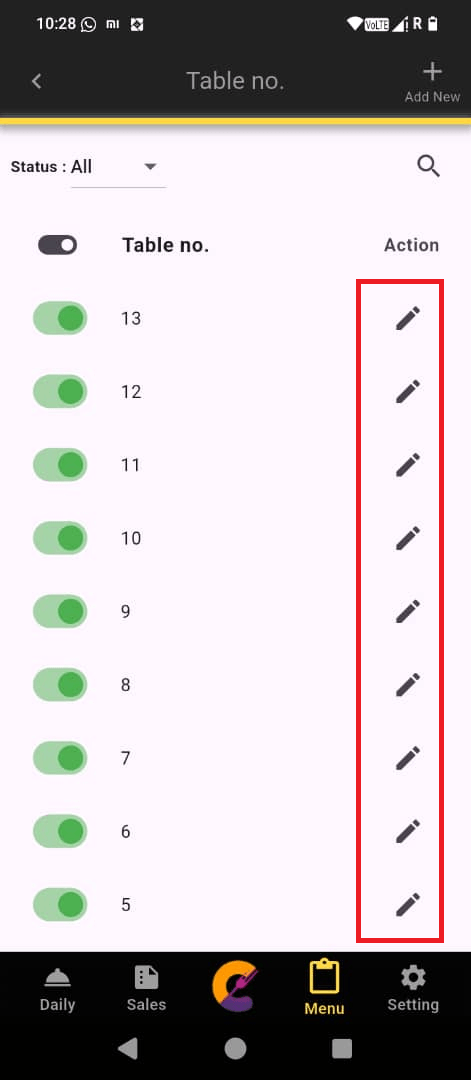
Step 1: Go to Menu, select Table no., and click Edit icon to edit a table no.
Search Table No.
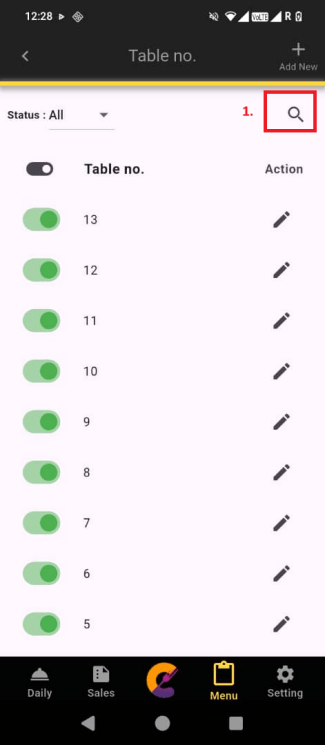
Step 1: Go to Menu, select Table no., and click Search icon.
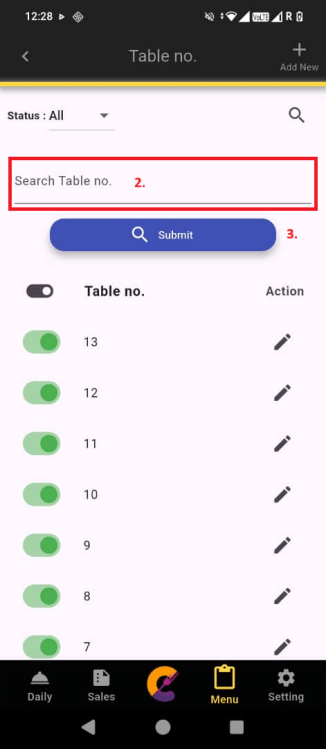
Step 2: Enter Table no and click Submit to filter matched results.
Print Table QR Code
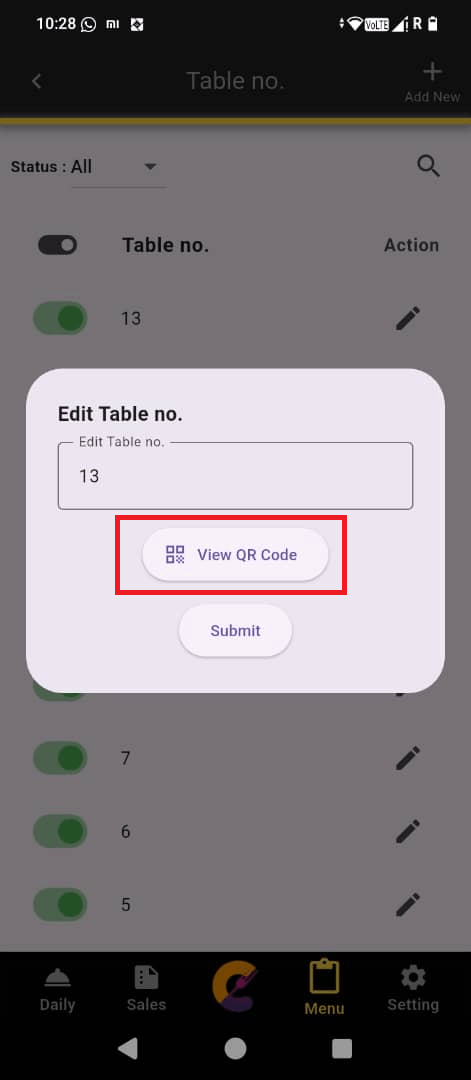
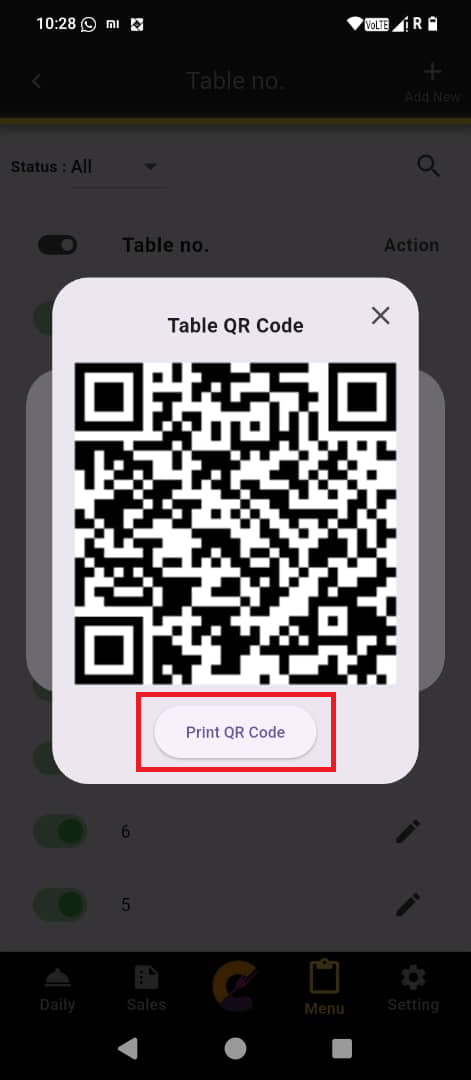
Step 1: Click View QR Code to display the table QR code.
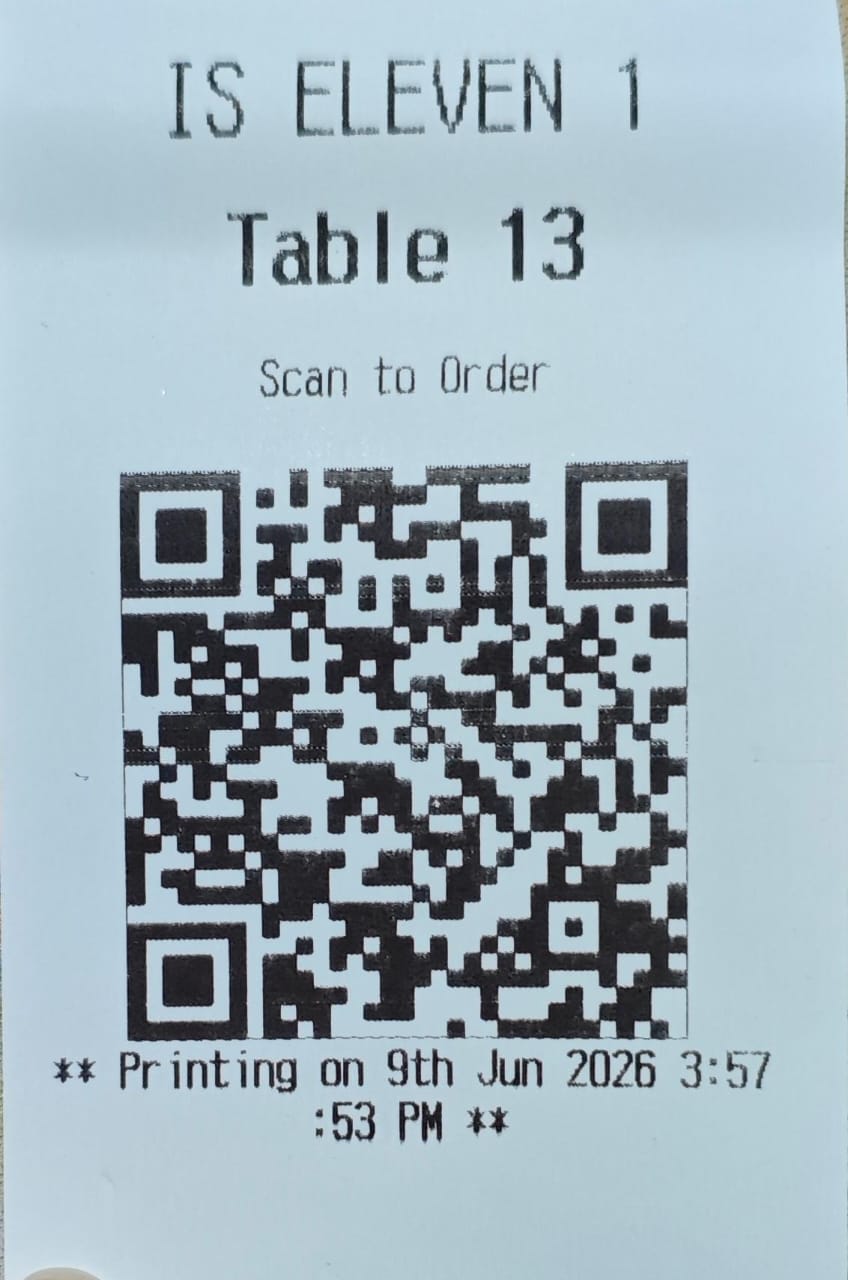
Step 2: To print it, click Print QR Code after connecting the printer.
(refer to Package to Unlock Premium Plan Feature and QR Code Setting).
Reminder: For Premium Plan accounts, a View QR Code button will appear.
Food Category
Add Food Category
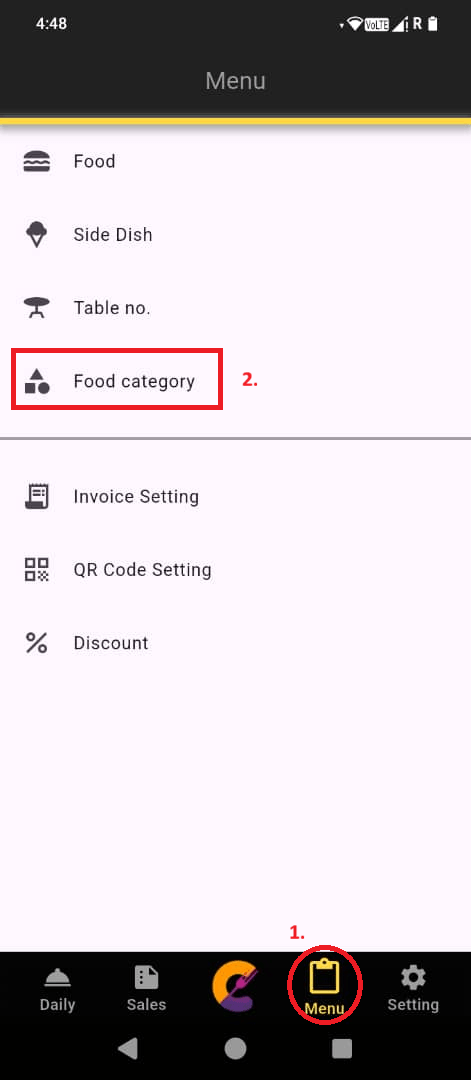
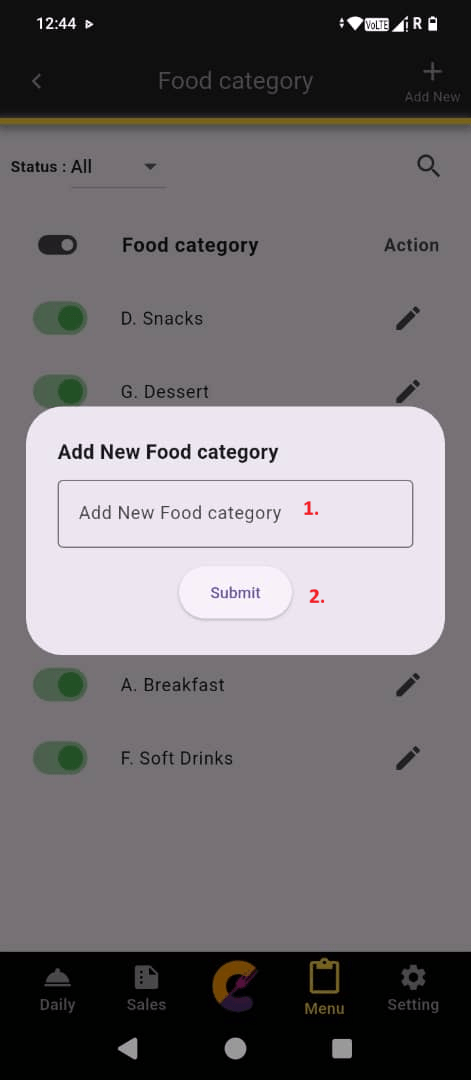
Step 1: Go to Menu, select Food Category, and click Add New to create a new food category.
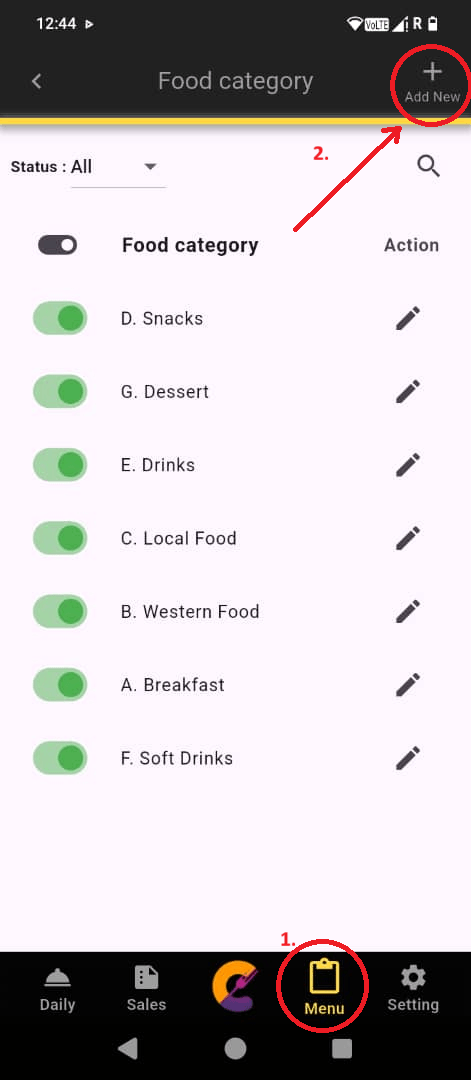
Step 2: Enter the Food category name, then click “Submit” to save.
Edit Food Category
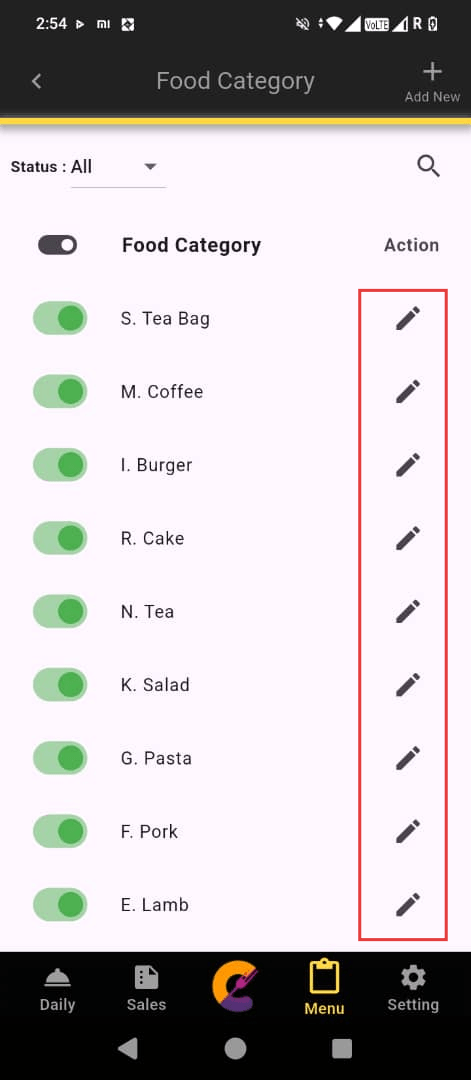
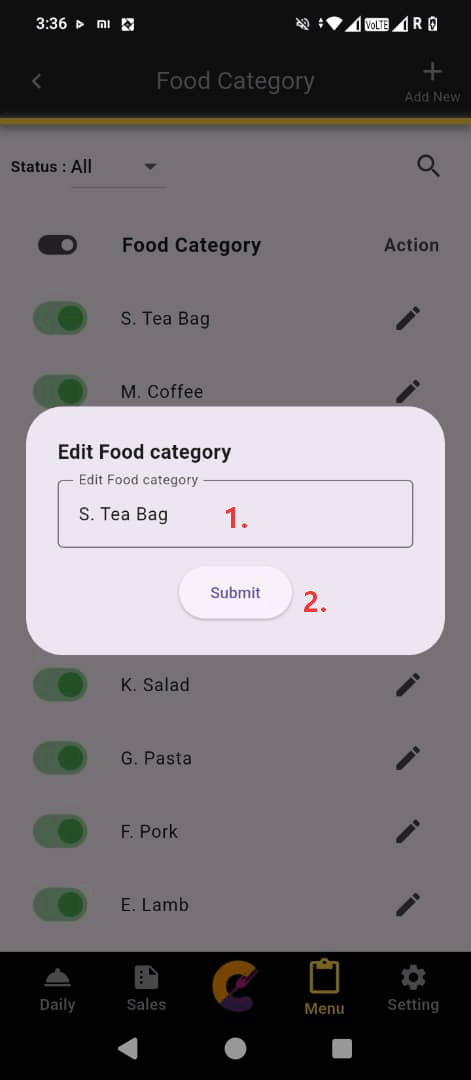
Step 1: Go to Menu, select Food Category, and click Edit icon to edit food category.
Step 2: Enter the Food category name, then click “Submit” to save.
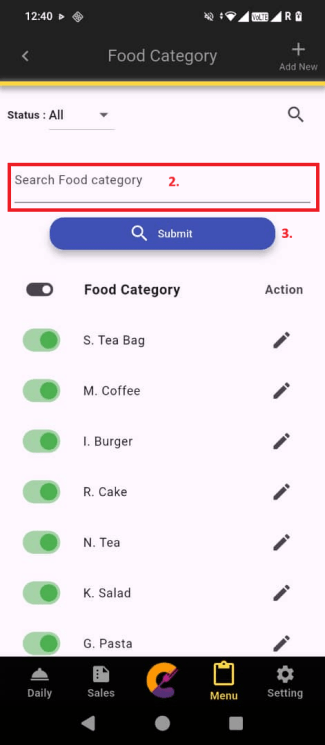
Search Food Category
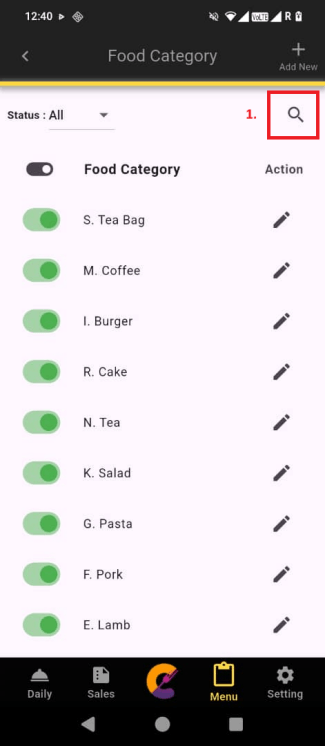
Step 1: Go to Menu, select Food Category, and click Search icon.
Step 2: Enter food category name and click Submit to filter matched results.
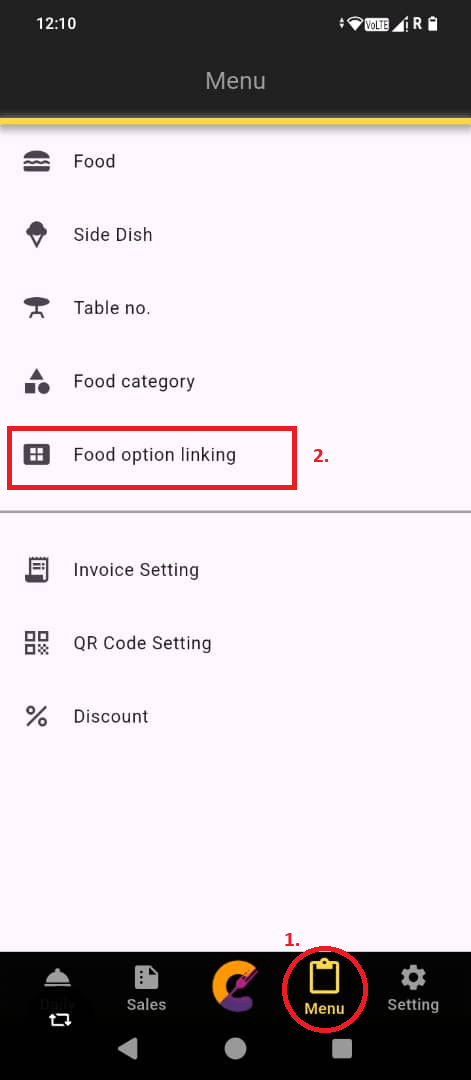
Food Option Linking
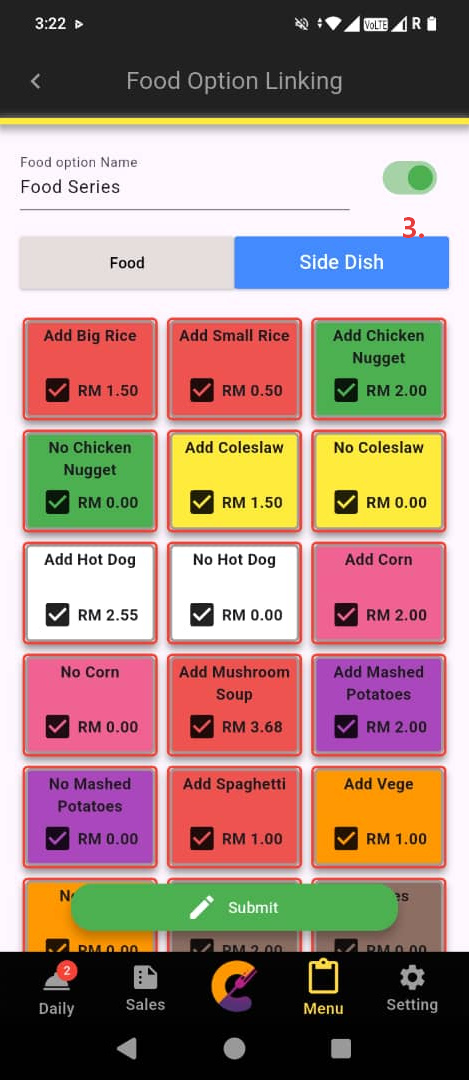
Step 1: Go to Menu, select Food option linking, and click Add New to create a new food option linking (refer to Food Option Linking to unlock this feature).
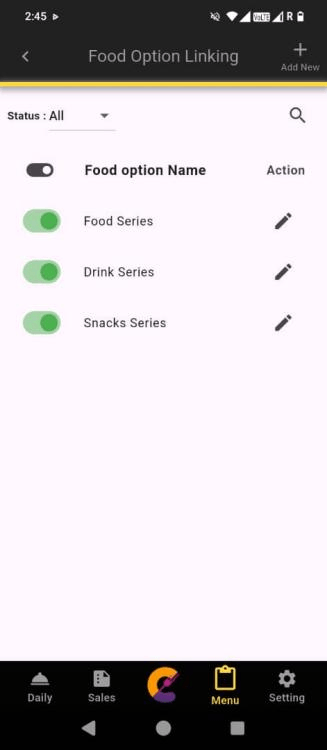
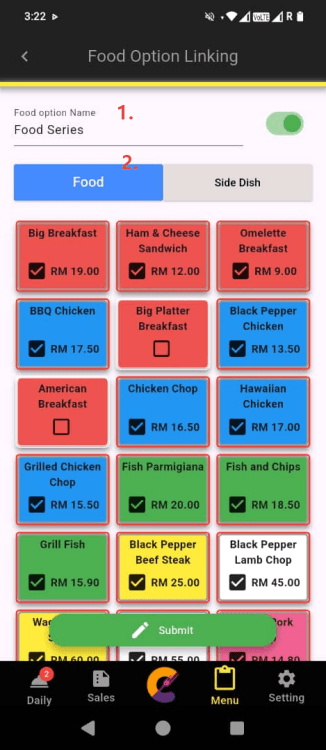
Step 2: Insert Food option Name. Select Food Item and select shared Side Dish. Click Submit to save
Discount
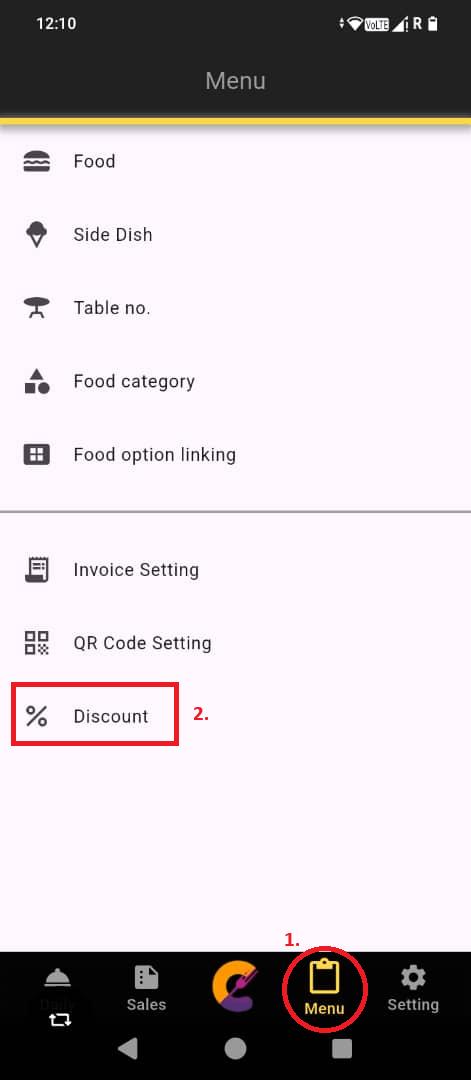
Step 1: Go to “Menu” and select “Discount” to manage discounts.
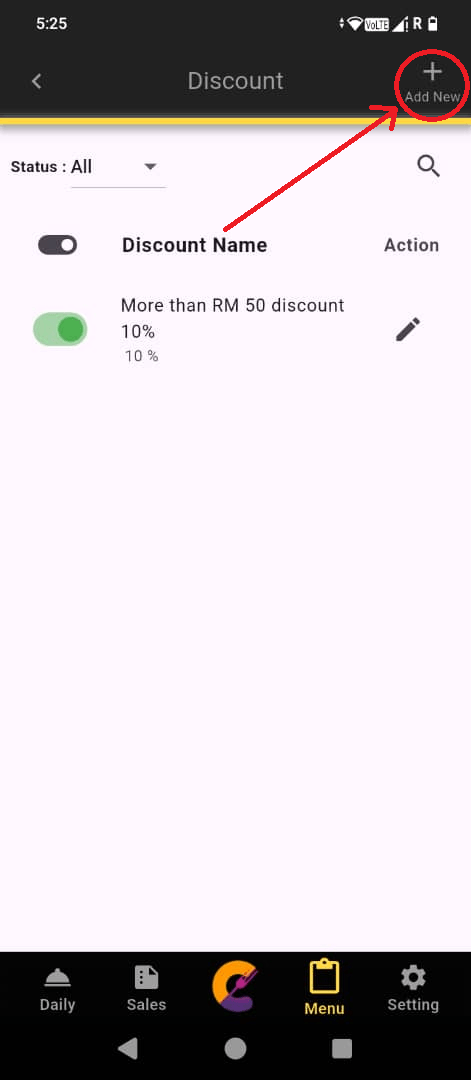
Step 2: Navigate to the top right and select “Add New” to create discount.
- The green on/off toggle is used to enable or disable the discount.
- The Pen icon is used to configure the discount.
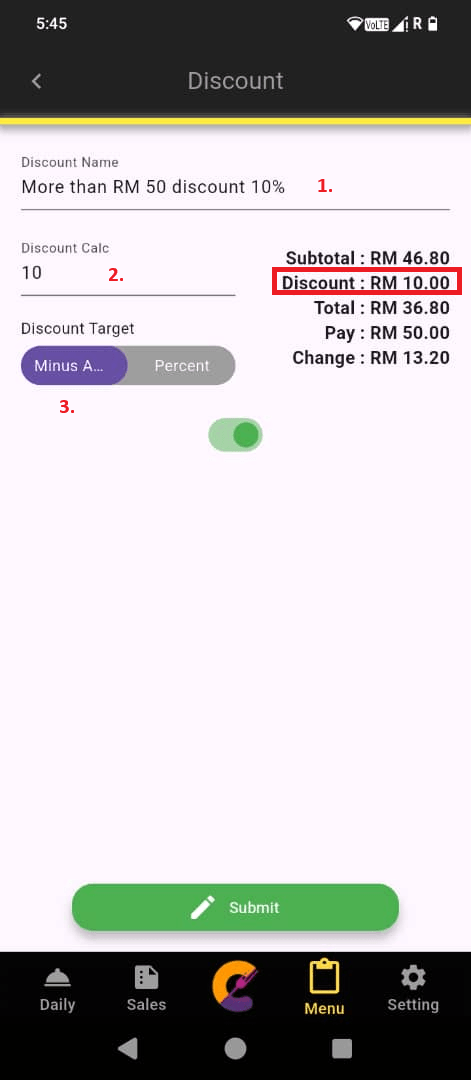
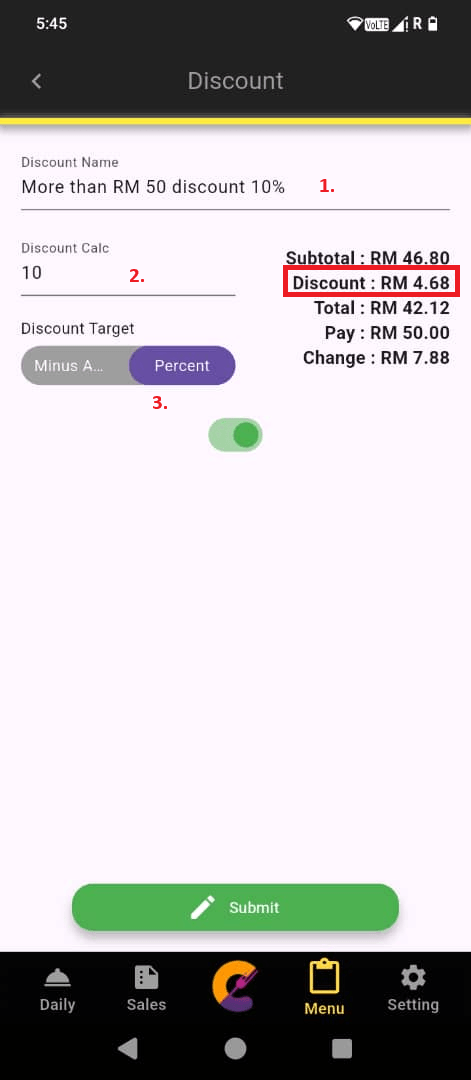
Step 3: Enter Discount Name and fill in the Discount Calc field.
- Selecting Minus Amount this value as a fixed cash deduction from the Subtotal.
- While selecting Percent treats it as a percentage deduction.
Invoice Setting
For detailed information on configuring and managing invoice settings, refer to the Invoice Settings page.


