Daily Report
Note: This is a daily report PDF generator. It can only generate reports for the current day; reports for previous days cannot be generated.
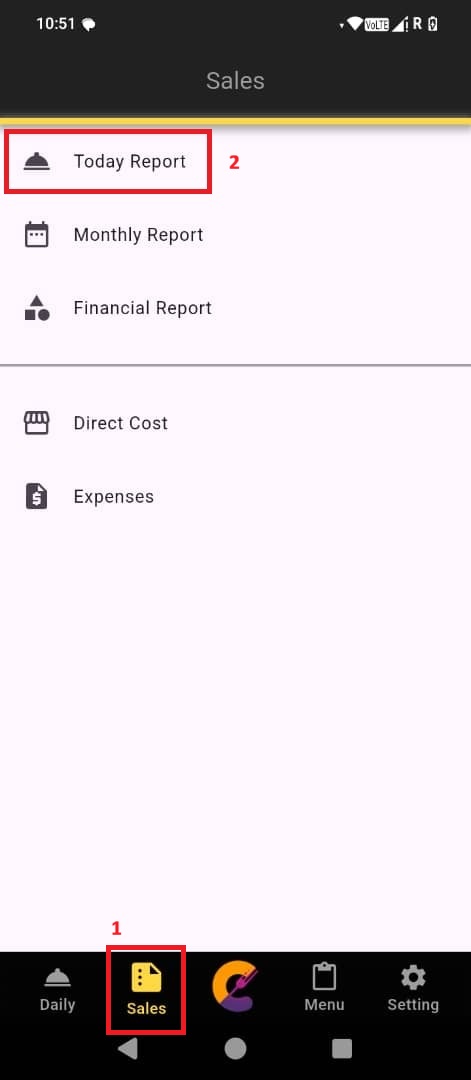
i. Click Sales to open the Sales Report page. Click Today Report to view today’s order.
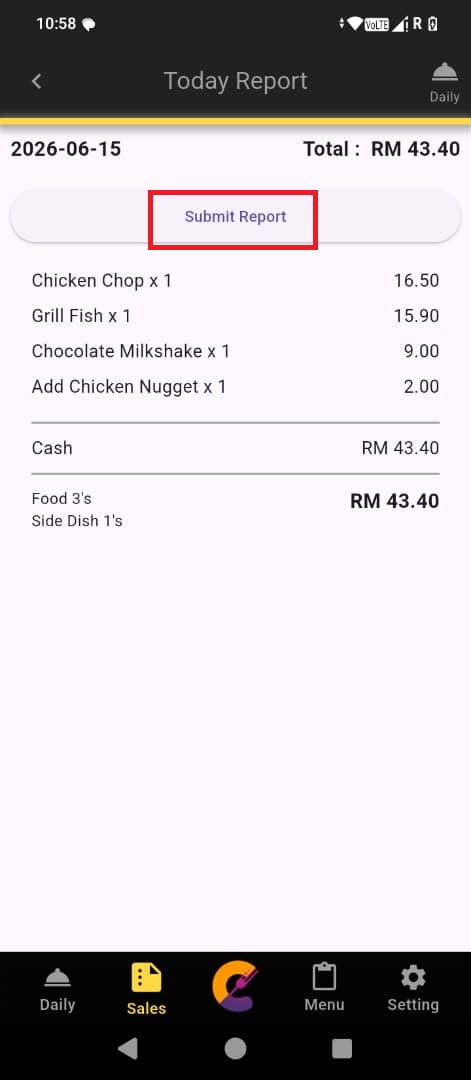
ii. Click Submit Report to generate the excel files report and send to your email.
Reminder:
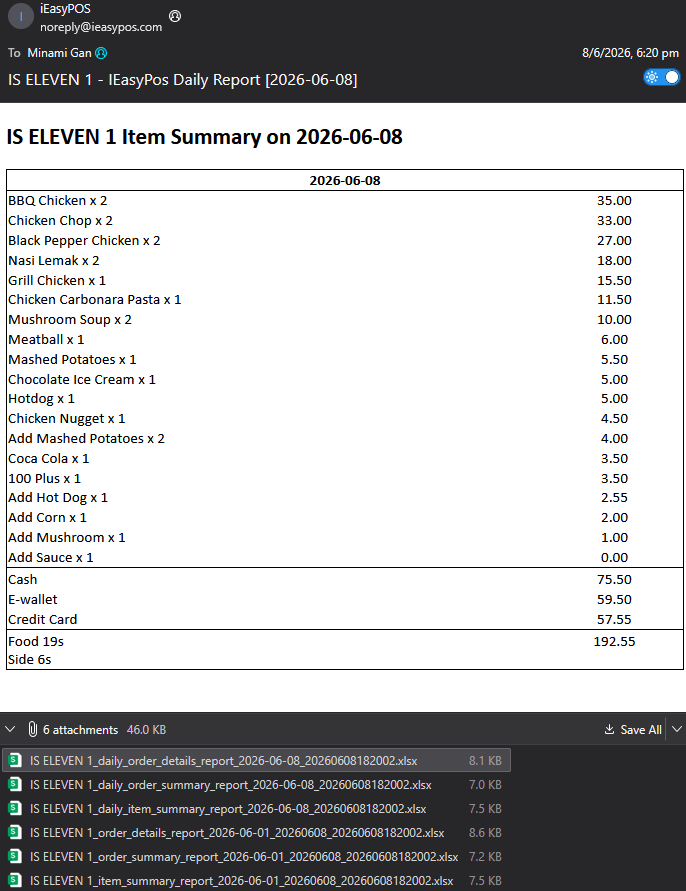
- User will receive total 6 excel files in the email after 1 minute.
a)Daily Order Detail Report
b)Daily Order Summary Report
c)Daily Item Summary Report
d)Accumulated Order Detail Report From 1st day of the month till today
e)Accumulated Order Summary Report From 1st day of the month till today
f)Accumulated Item Summary Report From 1st day of the month till today
Example of Daily Report
Monthly Report
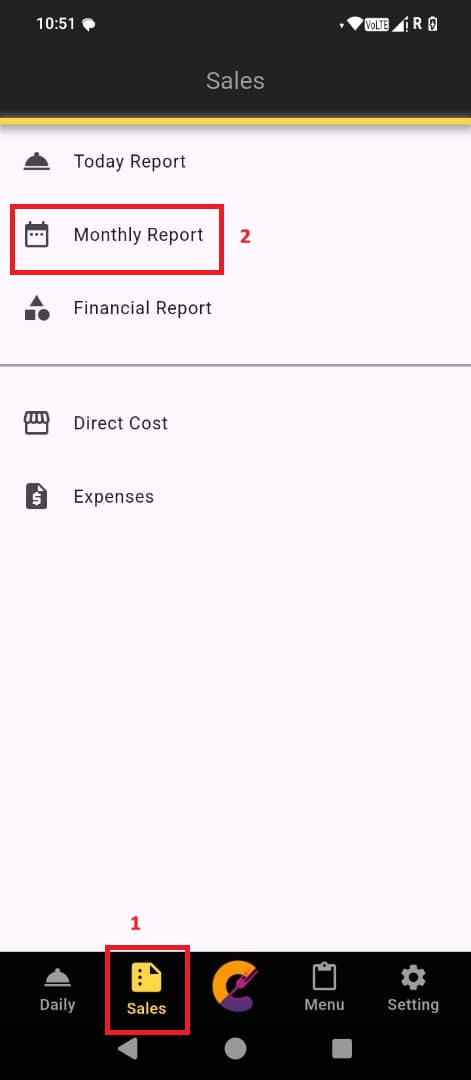
i. Click Sales to open the Sales Report page. Click Monthly Report to view today’s order.
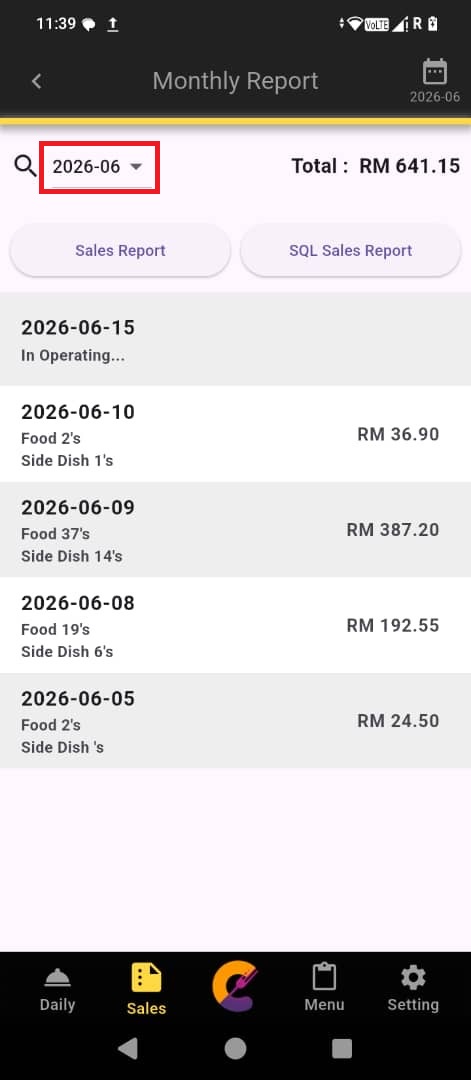
ii. Click Month dropdown (top left corner) to select previous month record.
Reminder: User will receive total 6 excel files in the email after 15 minutes.
- Monthly Order Detail Report from selected month
- Monthly Order Summary Report from selected month
- Monthly Item Summary Report from selected month
- Accumulated Order Detail Report From 1stday of the month till today
- Accumulated Order Summary Report From 1stday of the month till today
- Accumulated Item Summary Report From 1st day of the month till today
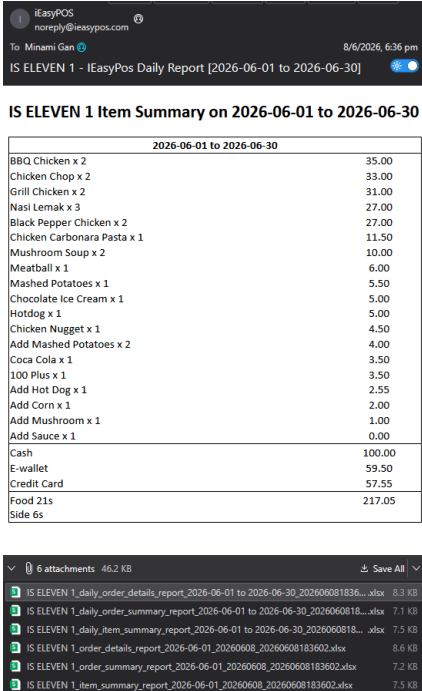
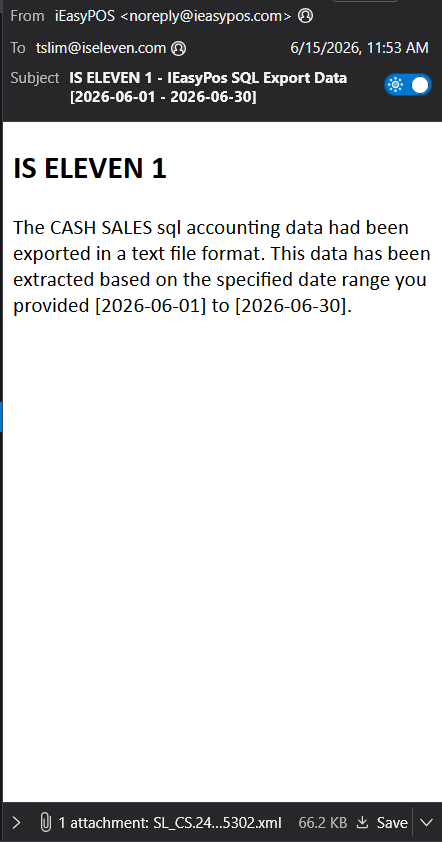
Example of Monthly Report
Financial Report
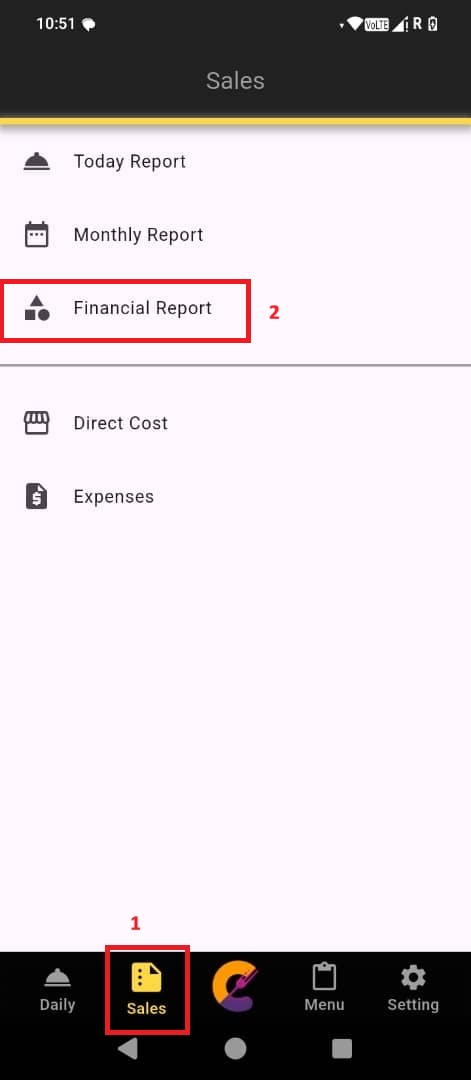
i. Click Sales to open the Sales Report page. Select Financial Report to view current financial statement.
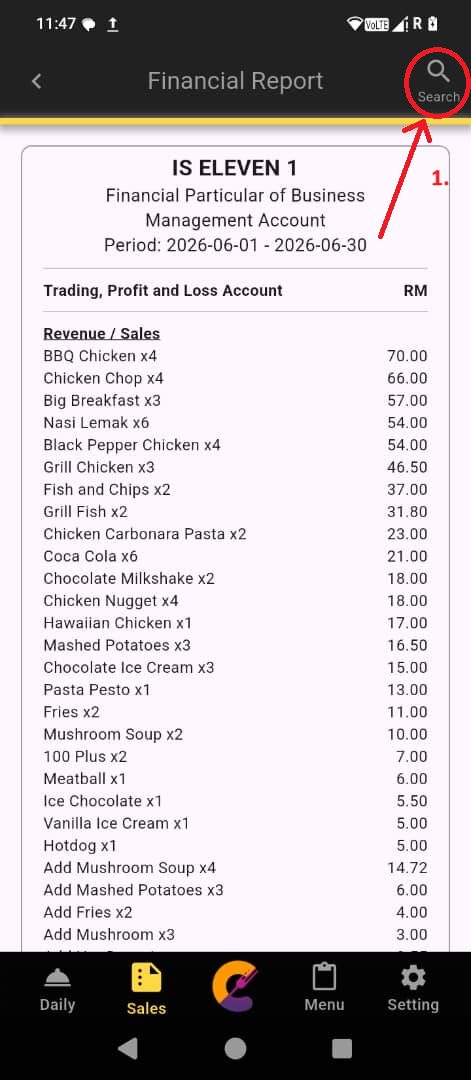
ii. To set a custom period, tap the search icon at the top-right corner.
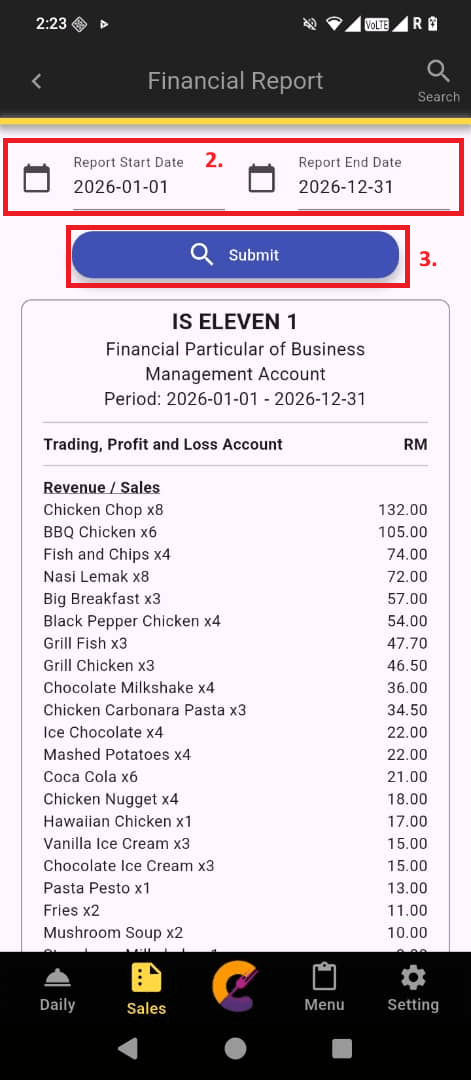
iii. Select the date and click Submit button.
Example of Financial Report
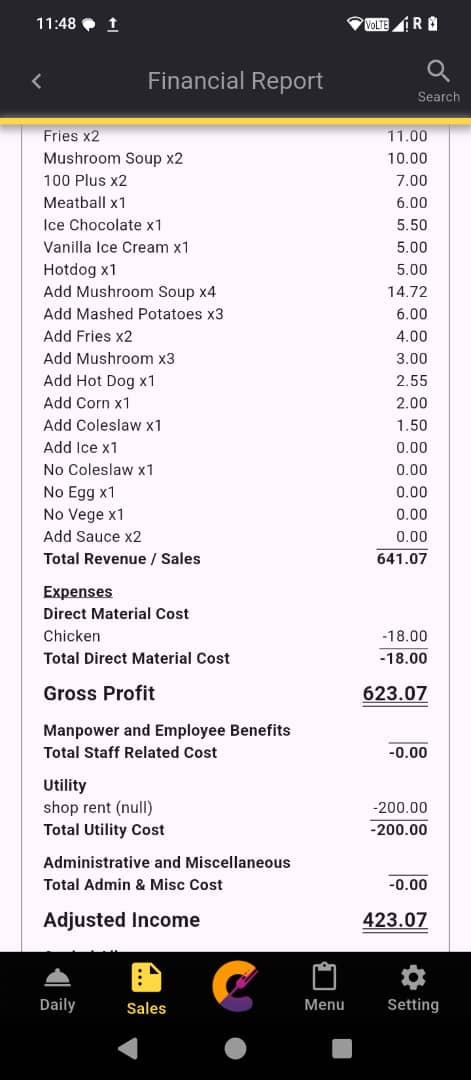
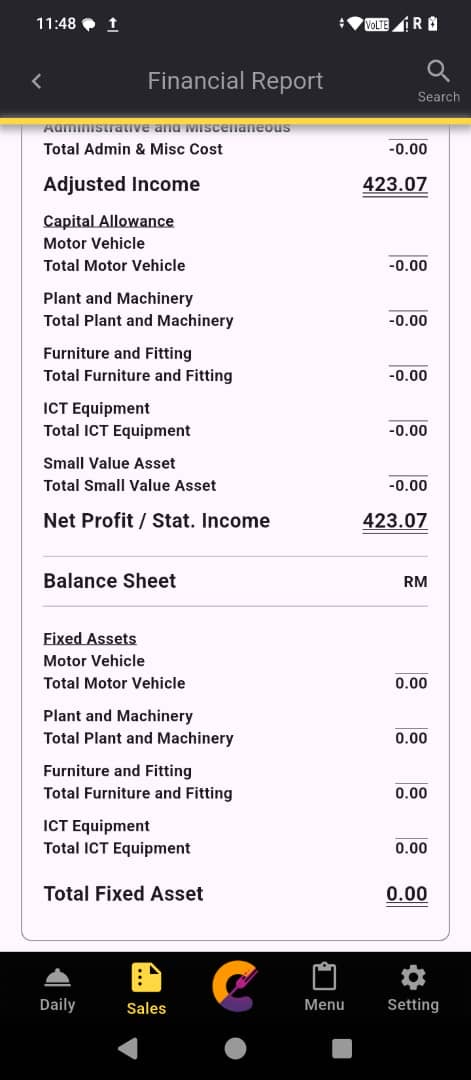
Direct Cost
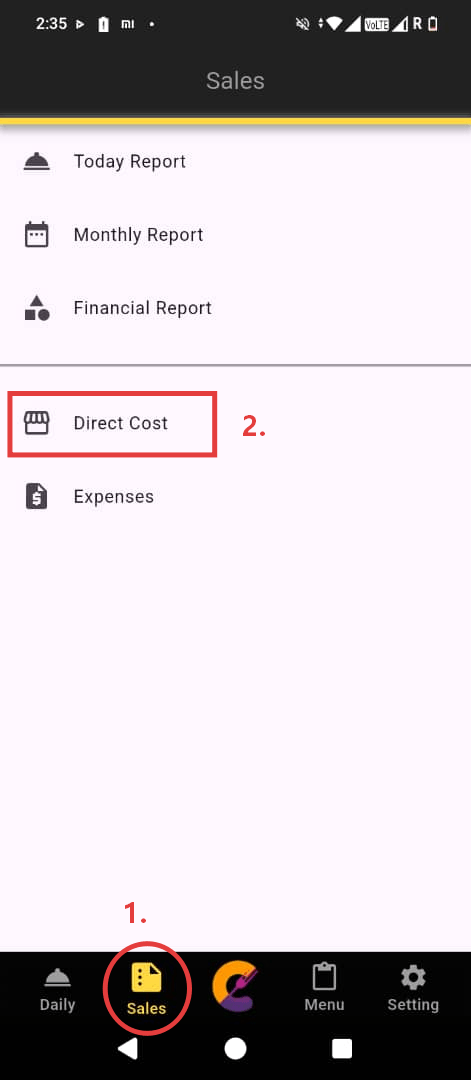
i. Click Sales to open the Sales Report page. Select Direct Cost to view direct cost list.
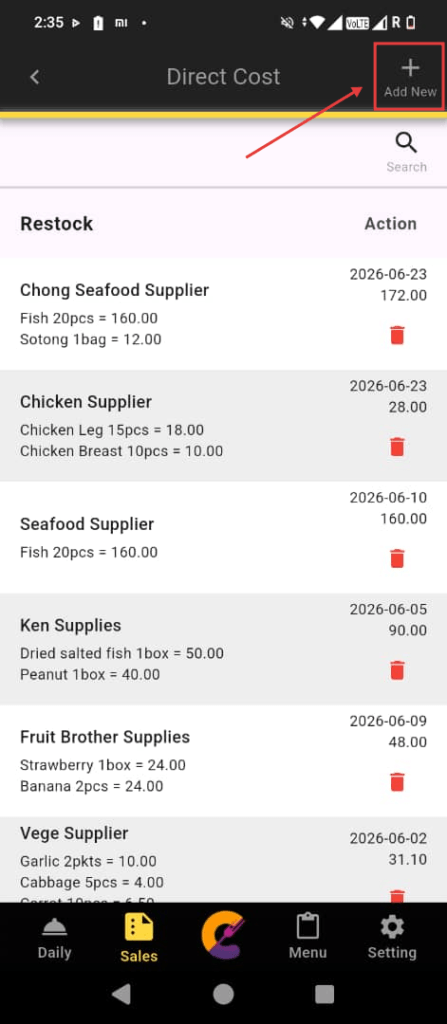
ii. Click Add New from top right corner to add new record.
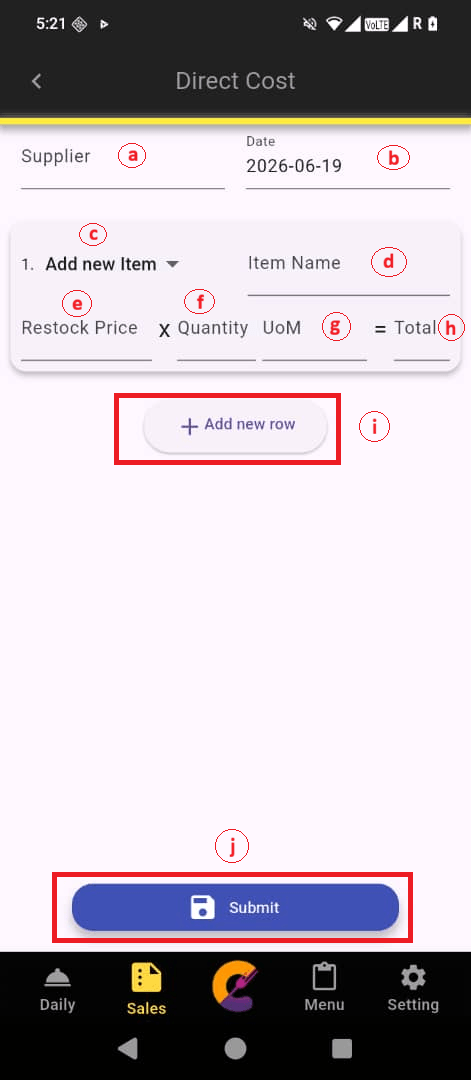
iii. Insert detail based on following features
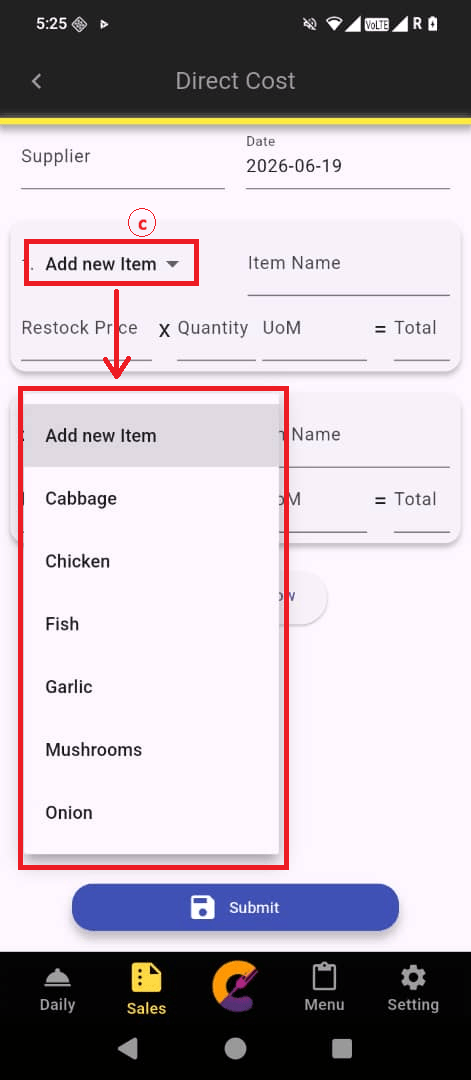
2. Insert detail based on following features:-
a) Insert supplier name
b) Select restock date
c) Item name dropdown
- Select restock Item name from the dropdown list.
- User may choose Add new Item to add new item name. The new added item name will auto record in the dropdown list.
d) Item name field
- Item name field will auto fill in after user select item name from item name dropdown.
- User may update the item name from this input field.
e) Item’s restock unit price
- This field will auto fill in item’s unit price from previous record. User may change the unit price if needed.
f) Restock quantity
- This input field will auto-fill in item’s quantity from previous record. User may change the unit price if needed.
g) Restock item’s unit of measurement
- This input field will auto-fill in item’s UoM from previous record. User may change the value if needed.
h) Restock item’s total price.
- This field will be auto calculate by app.
i)Click to Add new row for other restock items under same supplier.
j) Click Submit to save the record.
Expenses
Insert Expenses
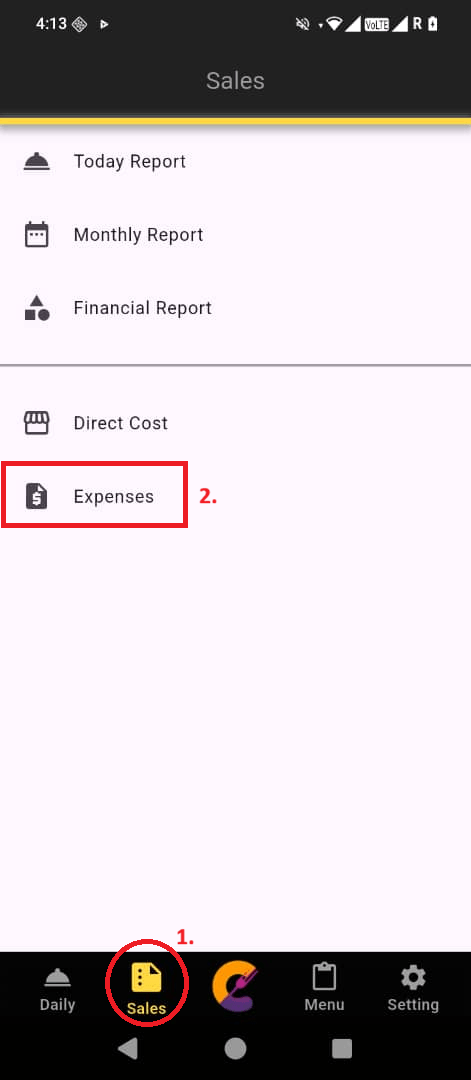
i. Click Sales to open the Sales Report page. Select Expenses to view expenses list.
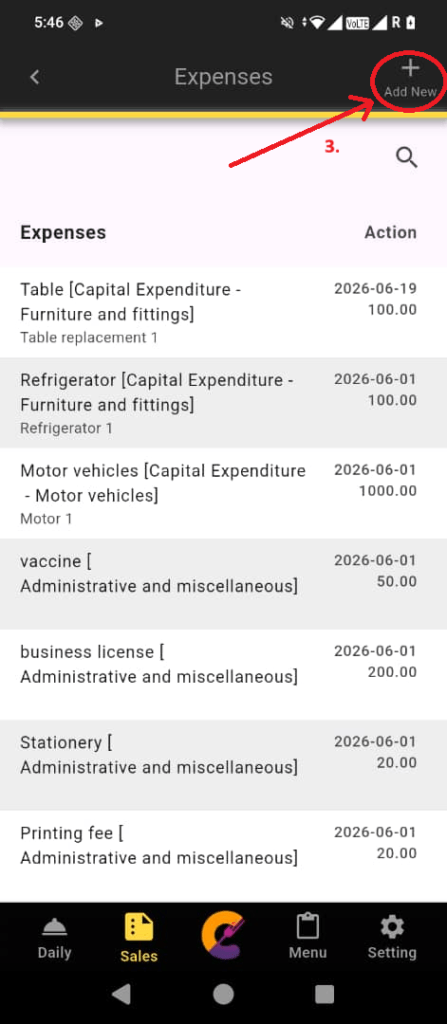
ii. Click Add New from top right corner to add new record.
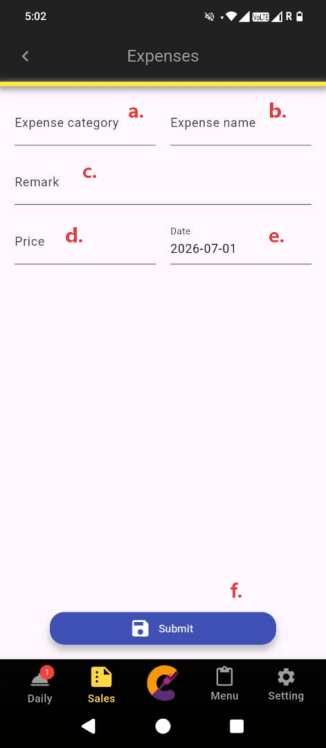
iii. Insert detail based on following features
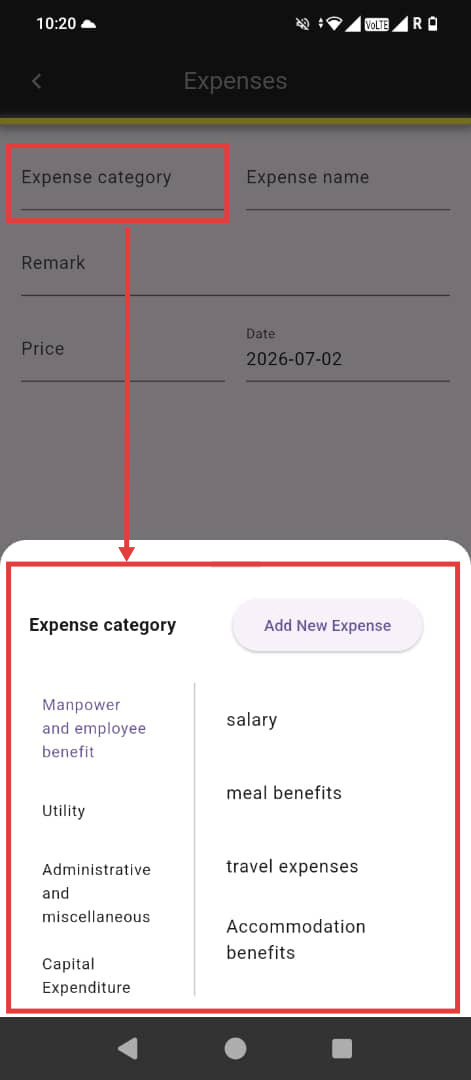
2. Insert detail based on following features:-
a) Expenses category dropdown.
- Select expenses category from the dropdown list.
- User may choose Add New Expense to add new expenses category. The new added category expenses will auto record in the dropdown list.
b) Expense name field
- Expense name field will auto fill in after user select expense category from expense category dropdown
- User may update the expense name from this input field if needed.
c) Remark field
- Enter any additional notes or description related to the expense.
d) Price field
- Enter the total amount for the expense. This field accepts numeric values only.
e) Date field
- Select the date when the expense was incurred. The current date will be displayed by default. Tap on the date field to open the calendar picker for easy date selection.
f) Submit button
- Click Submit to save the record and it will display in expenses list.


