Makanan
Tambah Makanan / Minuman Baharu
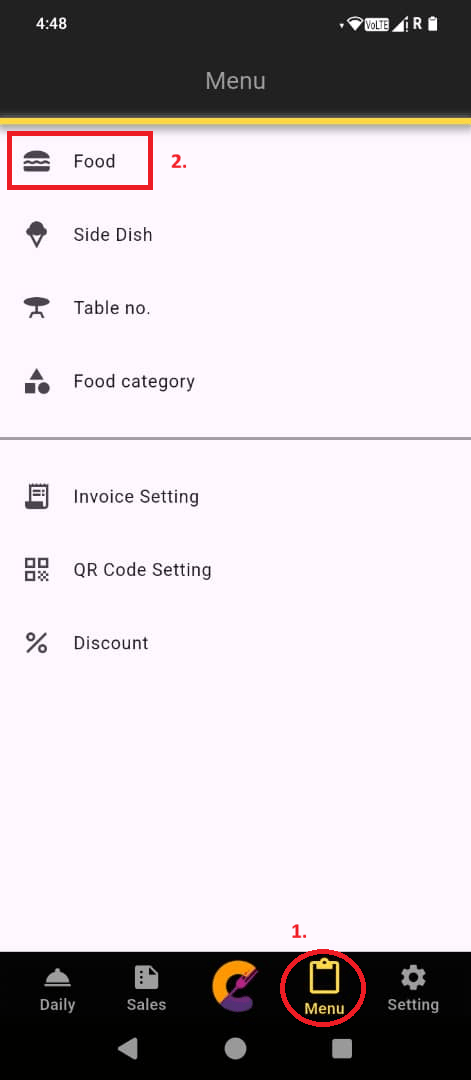
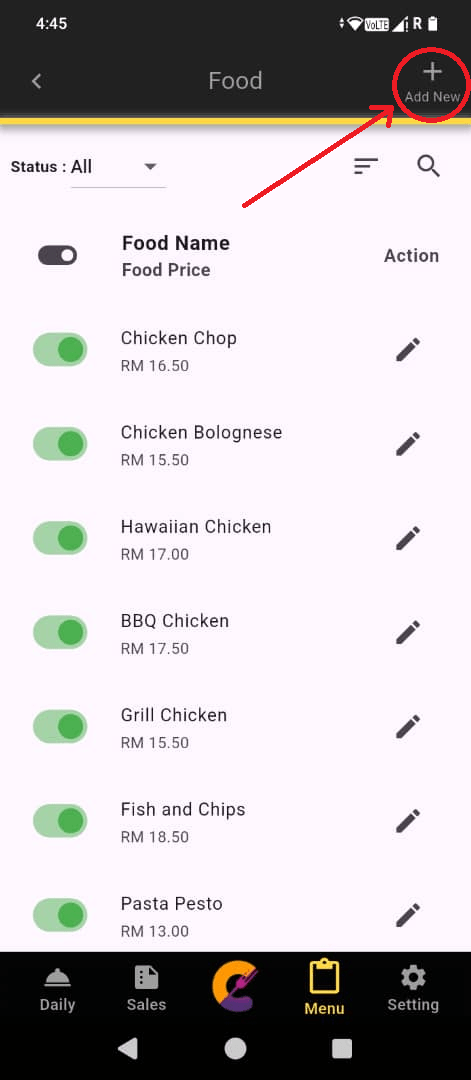
Langkah 1: Pergi ke Menu, kemudian pilih Makanan dan tekan Tambah Baharu untuk mencipta item menu baharu.
Langkah 2: Masukkan butiran item menu baharu (Makanan/Minuman).
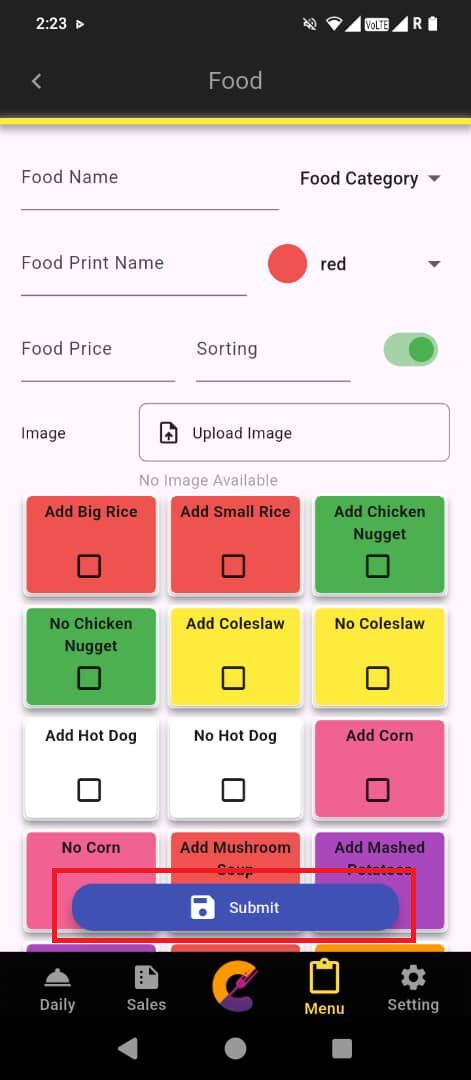
Langkah 3: Tekan Hantar untuk menyimpan rekod item.
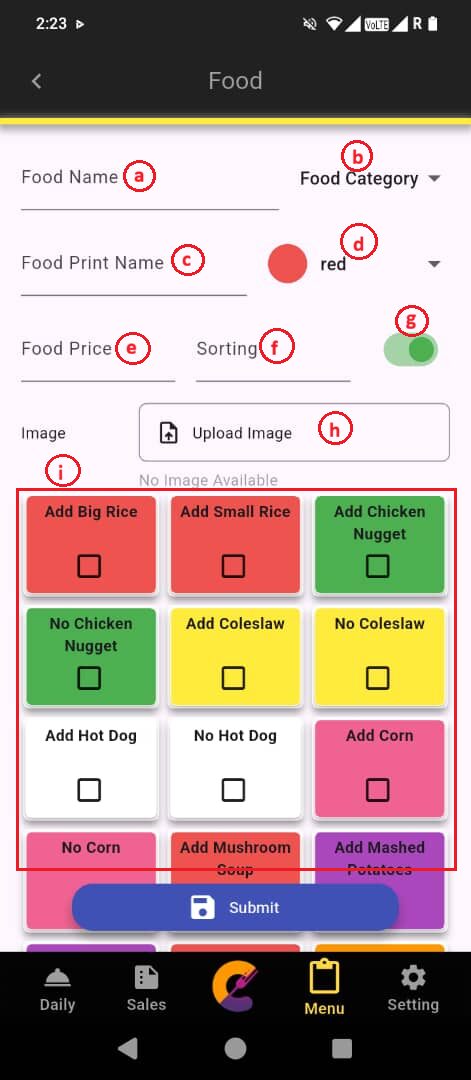
Fungsi-fungsi adalah seperti yang diterangkan di bawah:
a) Nama Makanan: Nama yang dipaparkan pada menu untuk membantu staf mengenal pasti item.
b) Kategori Makanan: Membolehkan staf menyusun dan mengatur item mengikut kategori untuk memudahkan pengurusan menu.
c) Nama Cetakan Makanan: Nama yang akan dipaparkan pada invois apabila pesanan diproses. Nama ini boleh berbeza daripada nama yang dipaparkan pada menu jika diperlukan.
d) Warna: Tetapkan warna tersuai untuk setiap item bagi membantu membezakan item secara visual dalam sistem.
e) Harga Makanan: Harga jualan item yang ditetapkan dalam sistem.
f) Susunan: Tetapkan susunan item yang dipaparkan pada menu supaya staf dapat mencari dan memilih item dengan lebih mudah.
g) Butang Hidup/Mati: Hidupkan atau matikan tetapan ini untuk membolehkan atau menghalang sesuatu item daripada dipaparkan pada menu.
h) Muat Naik Imej: Muat naik gambar item makanan untuk dipaparkan pada laman web pesanan bagi memudahkan pelanggan mengenal pasti makanan secara visual.
i) Tambah Hidangan Sampingan: Digunakan untuk mencipta hidangan gabungan atau set semasa mengambil pesanan. Pengguna boleh pergi ke Tetapan untuk menukar susunan hidangan sampingan kepada paparan baris atau lajur.
Edit / Lihat Makanan / Minuman
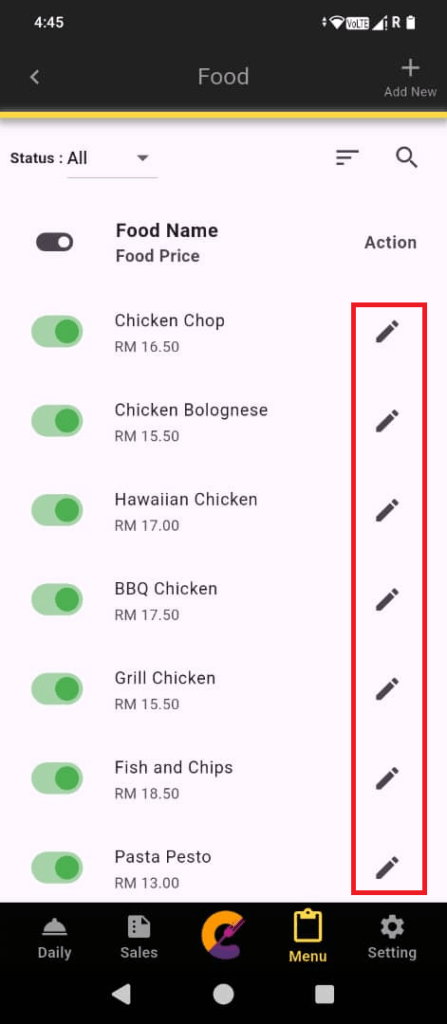
Langkah 1: Pergi ke Menu, pilih Makanan, kemudian tekan ikon Edit untuk mengedit atau melihat item.
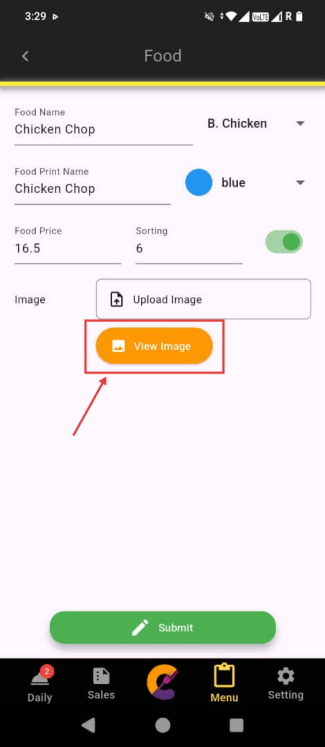
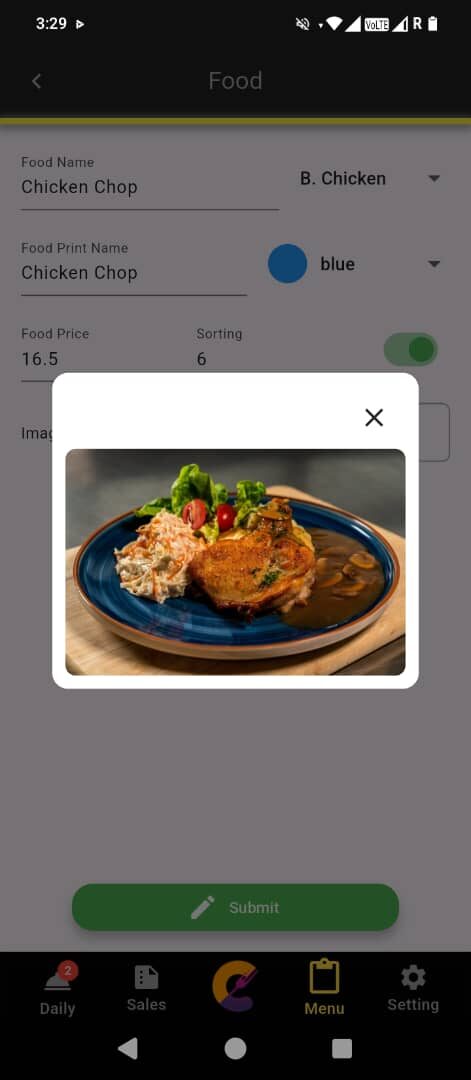
Langkah 2: Tekan Lihat Imej untuk melihat gambar yang dipaparkan pada halaman Pesanan Makanan dan Pesanan Web (paparan pelanggan) bagi membantu proses membuat pesanan.
Peringatan: Jika sesuatu item mempunyai gambar yang telah dimuat naik, butang Lihat Imej akan dipaparkan.
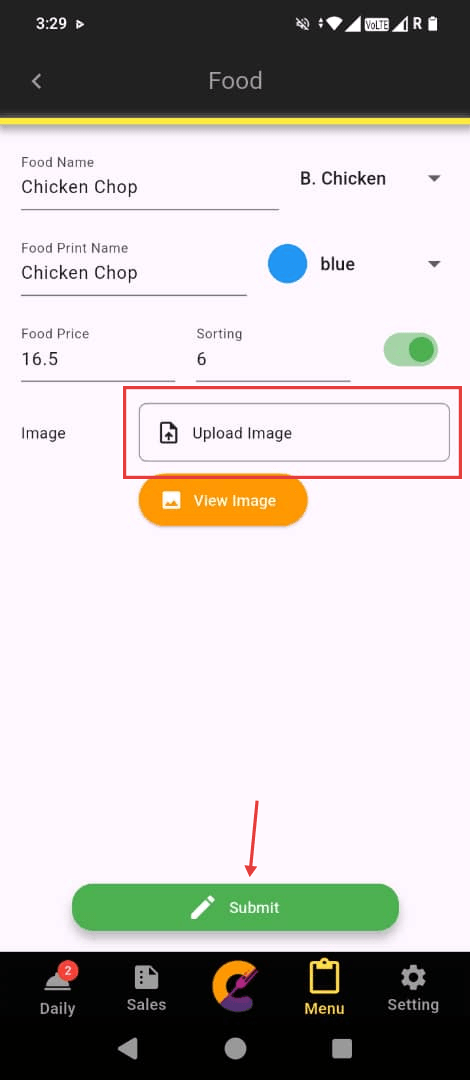
Langkah 3: Tekan Muat Naik Imej untuk memuat naik gambar baharu, kemudian tekan Hantar untuk menyimpan perubahan.
Cari Makanan / Minuman
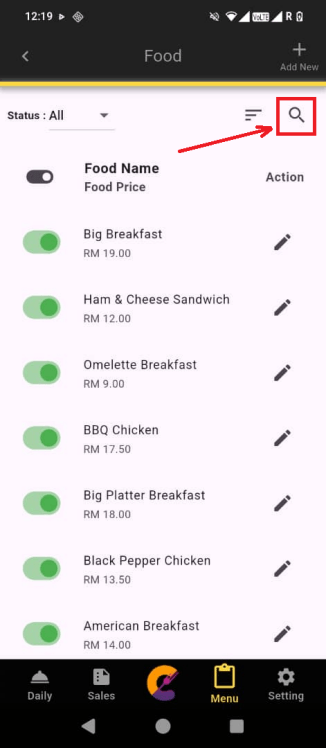
Langkah 1: Pergi ke Menu, pilih Food, kemudian klik ikon Search di bahagian atas sebelah kanan.
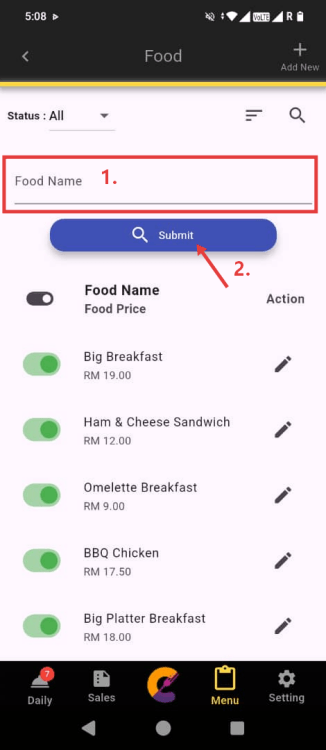
Langkah 2: Masukkan Nama Makanan, kemudian klik butang Submit untuk menapis hasil carian yang sepadan.
Pengisihan Makanan / Minuman
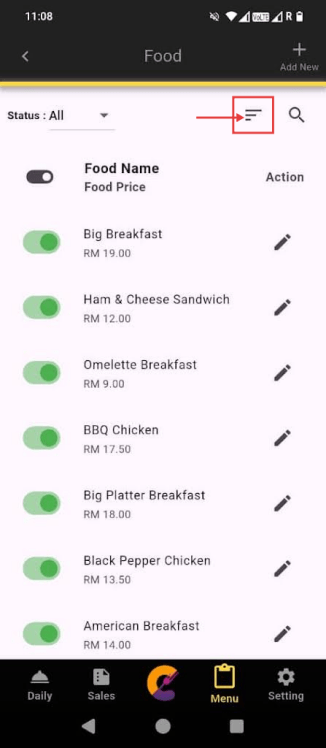
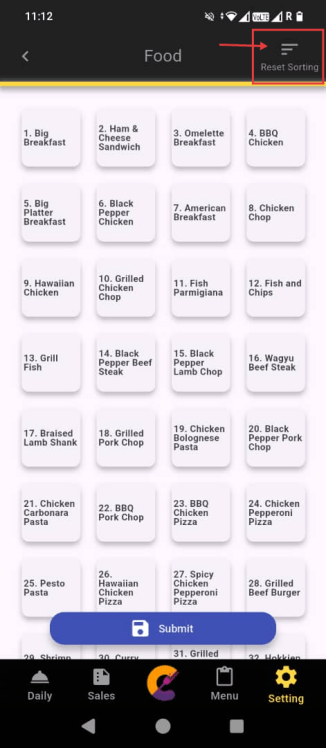
Langkah 1: Pergi ke Menu, pilih Food, kemudian klik ikon Sorting untuk masuk ke halaman pengisihan makanan.
Langkah 2: Terdapat 2 cara untuk mengisih item:
Tekan dan tahan mana-mana item dalam senarai, kemudian seret item tersebut ke kedudukan yang dikehendaki. Klik Submit untuk menyimpan rekod.
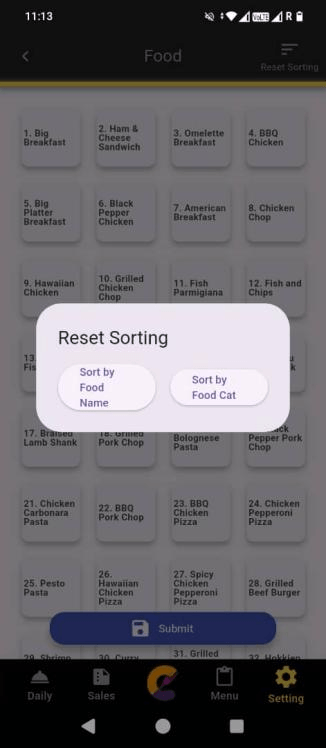
Klik butang Reset Sorting di bahagian atas sebelah kanan.
Pilih Sort by Food Name untuk menyusun semula item mengikut abjad, atau pilih Sort by Food Cat untuk menyusun semula item berdasarkan kategori makanan.
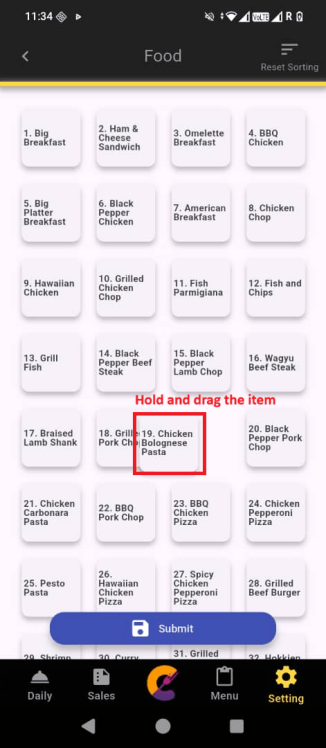
Langkah 3: Klik Submit untuk menyimpan rekod.
Hidangan Sampingan
Tambah Hidangan Sampingan
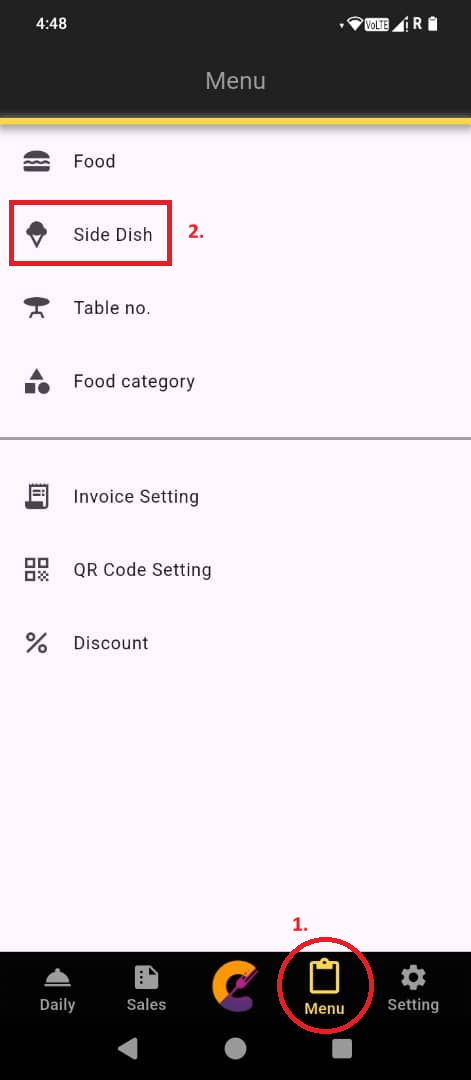
Langkah 1: Pergi ke “Menu”, pilih “Side Dish”, kemudian pilih “Add New” untuk menambah hidangan sampingan baharu.
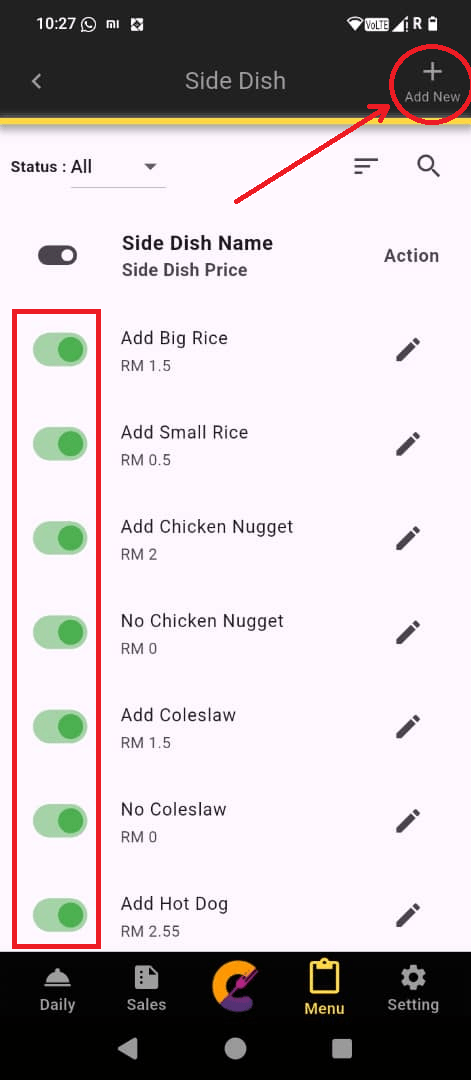
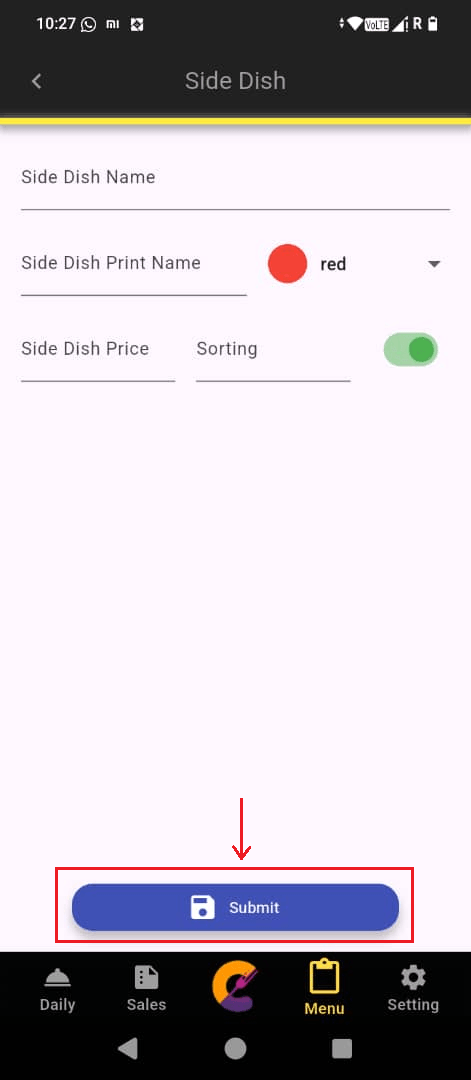
Langkah 2: Masukkan maklumat hidangan sampingan baharu, kemudian klik Submit untuk menyimpan rekod.
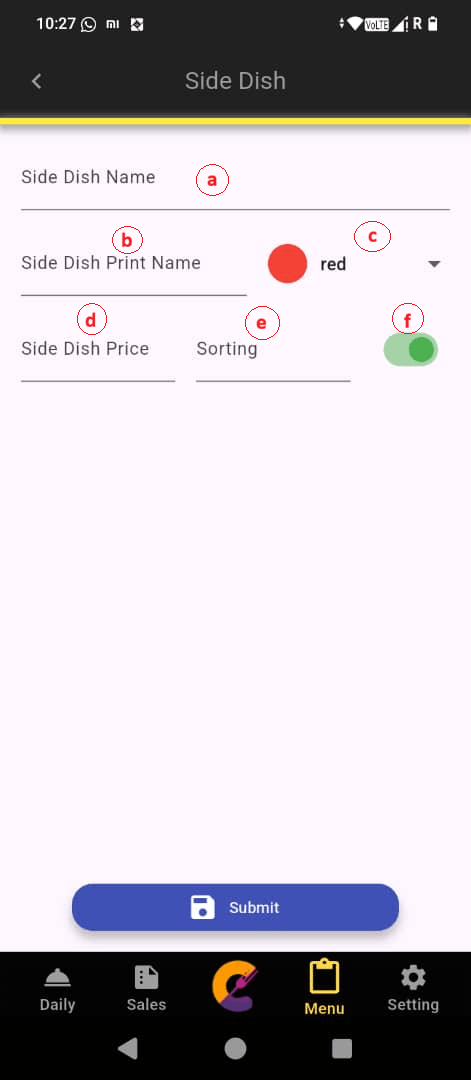
Fungsi-fungsi adalah seperti berikut:-
a) Side Dish Name: Nama yang dipaparkan pada menu untuk membantu staf mengenal pasti item tersebut.
b) Side Dish Print Name: Nama hidangan sampingan yang akan dipaparkan pada invois atau chit dapur yang dicetak.
c) Color: Tetapkan warna tersuai untuk setiap item bagi memudahkan item dibezakan secara visual dalam sistem.
d) Side Dish Price: Harga jualan item yang telah ditetapkan dalam sistem.
e) Sorting: Tetapkan susunan item yang dipaparkan pada menu supaya staf dapat mencari dan memilih item dengan lebih mudah.
f) On/Off button: Gunakan tetapan ini untuk mengaktifkan atau menyahaktifkan item daripada dipaparkan pada menu.
Edit Hidangan Sampingan
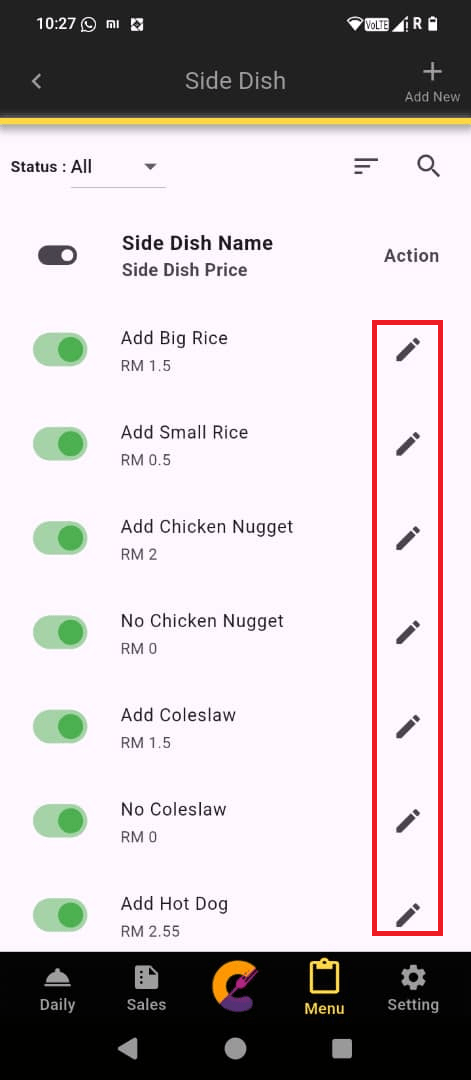
Langkah 1: Pergi ke Menu, pilih Side Dish, kemudian klik ikon Edit untuk mengedit atau melihat item.
Cari Hidangan Sampingan
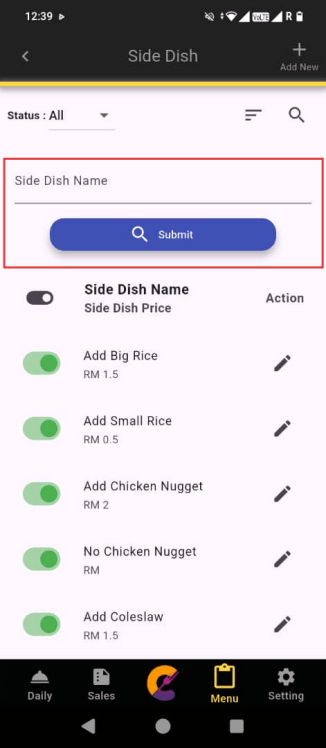
Langkah 1: Pergi ke Menu, pilih Side Dish, kemudian klik ikon Search di bahagian atas sebelah kanan.
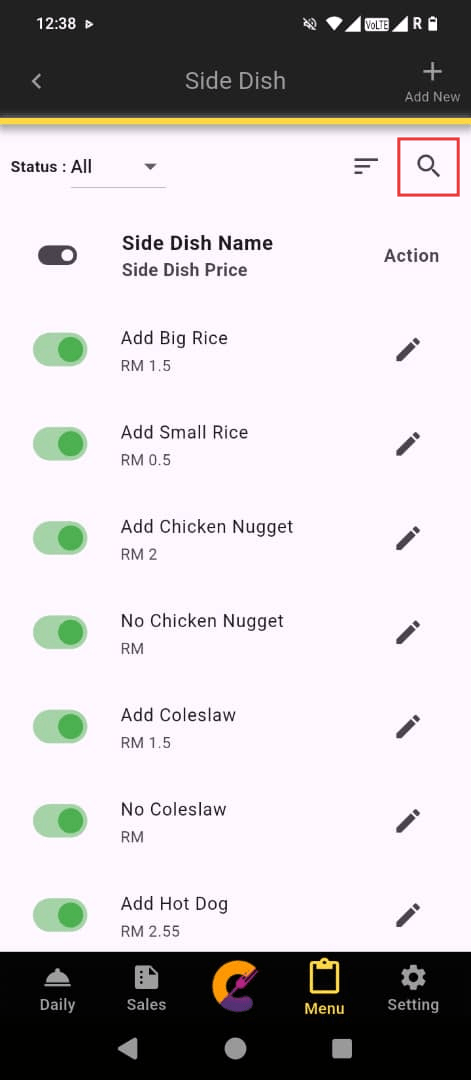
Langkah 2: Masukkan Nama Hidangan Sampingan, kemudian klik butang Submit untuk menapis hasil carian yang sepadan.
Pengisihan Hidangan Sampingan
Langkah 1: Pergi ke Menu, pilih Side Dish, kemudian klik ikon Sorting untuk masuk ke halaman pengisihan.
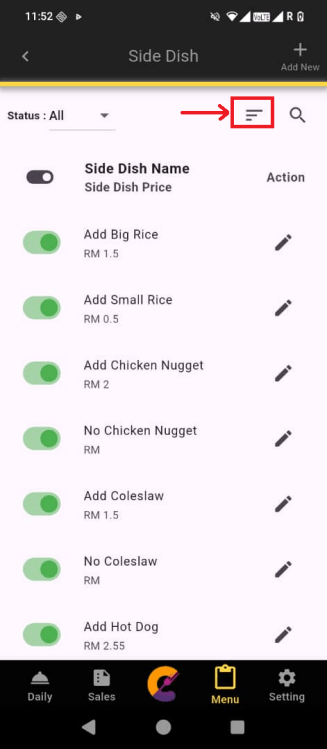
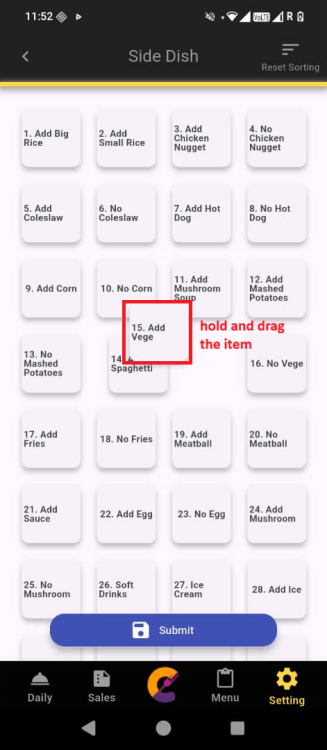
Langkah 2: Terdapat 2 cara untuk mengisih item:
Tekan dan tahan mana-mana item dalam senarai, kemudian seret item tersebut ke kedudukan yang dikehendaki. Klik Submit untuk menyimpan rekod.
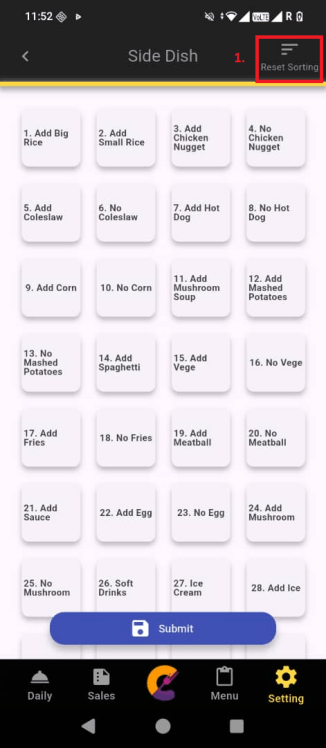
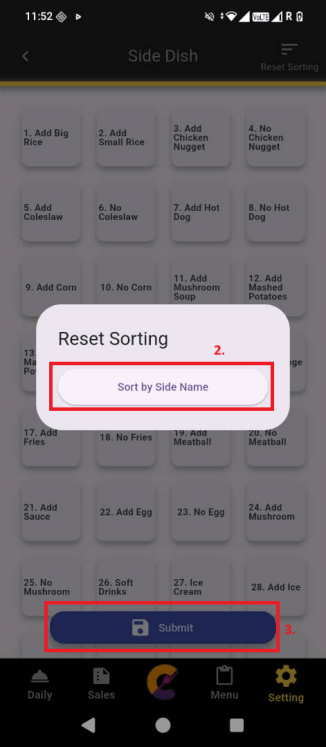
Klik butang Reset Sorting di bahagian atas sebelah kanan. Pilih Sort by Side Name untuk menyusun semula item mengikut abjad, kemudian klik Submit untuk menyimpan rekod.
Nombor Meja
Tambah Nombor Meja
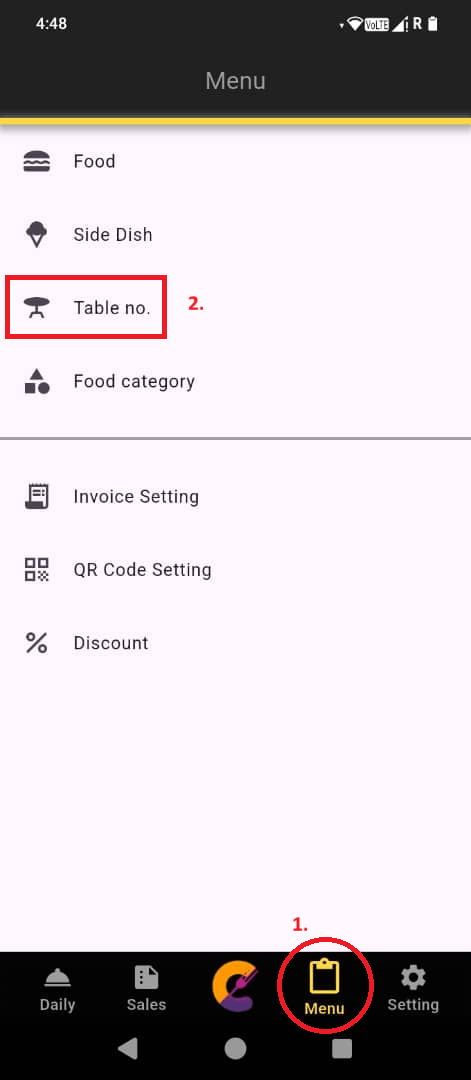
Step 1: Go to “Menu” and select “Table no.” to set up table numbers for easier management.
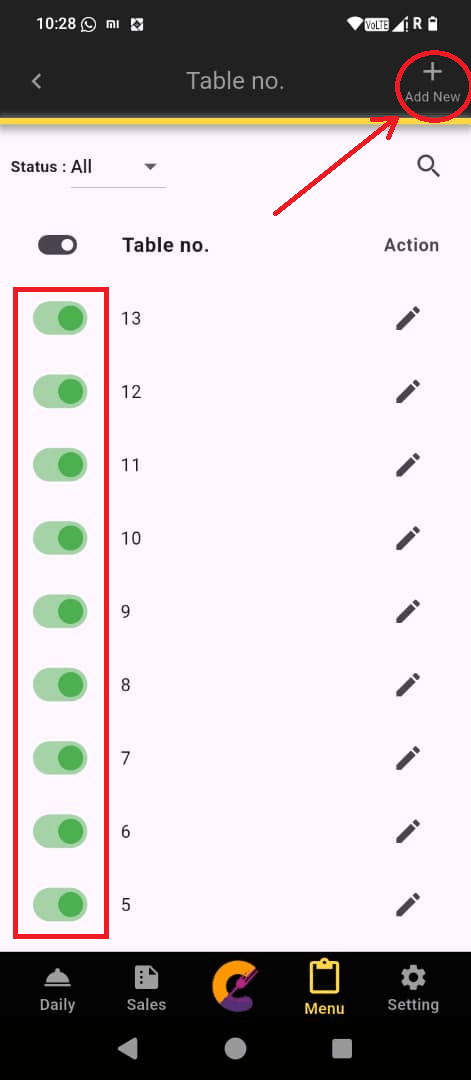
Langkah 2: Pergi ke bahagian atas sebelah kanan dan klik “Add New” untuk menambah nombor meja.
Butang on/off berwarna hijau digunakan untuk mengaktifkan atau menyahaktifkan nombor meja.
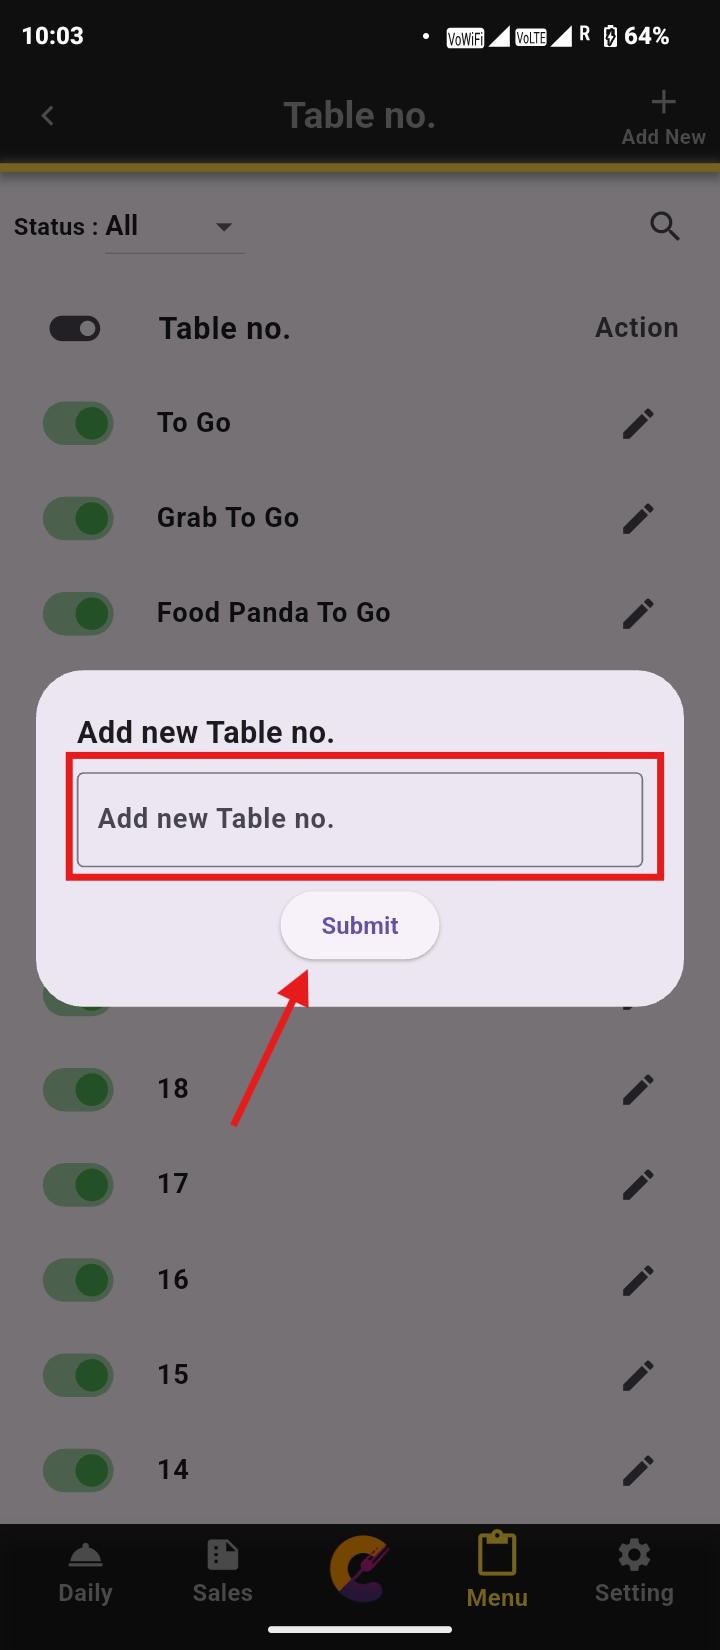
Langkah 3: Masukkan nama atau nombor meja, kemudian klik “Submit” untuk menyimpan.
Edit Nombor Meja
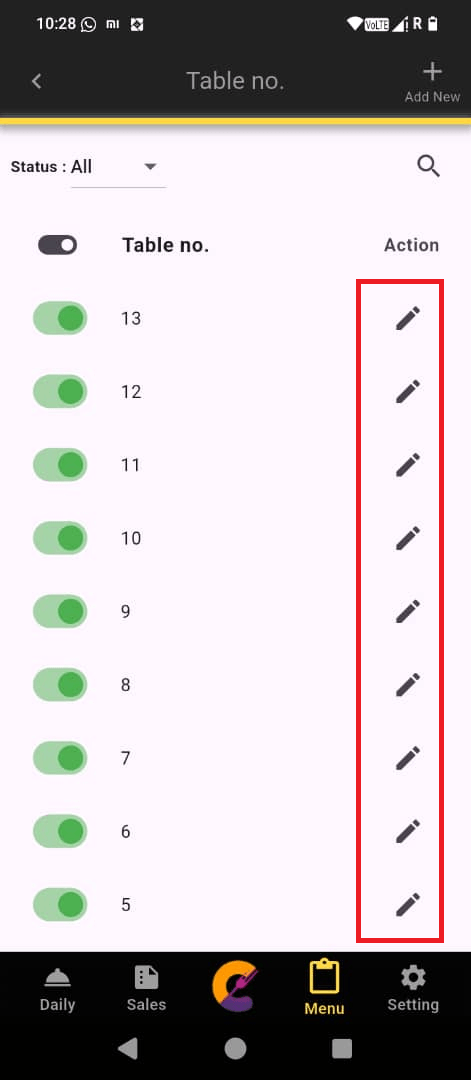
Langkah 1: Pergi ke Menu, pilih Table no., kemudian klik ikon Edit untuk mengedit nombor meja.
Cari Nombor Meja
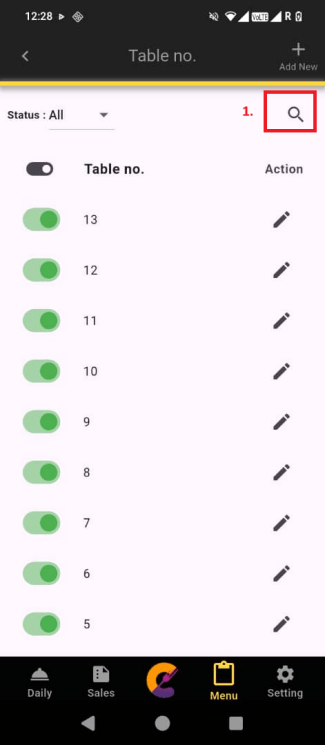
Langkah 1: Pergi ke Menu, pilih Table no., kemudian klik ikon Search.
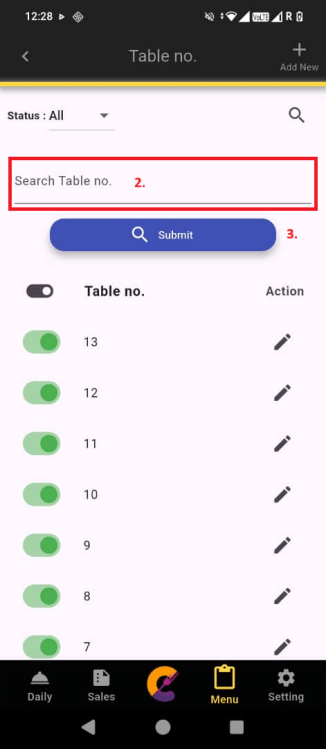
Langkah 2: Masukkan Nombor Meja, kemudian klik Submit untuk menapis hasil carian yang sepadan.
Cetak Kod QR Meja
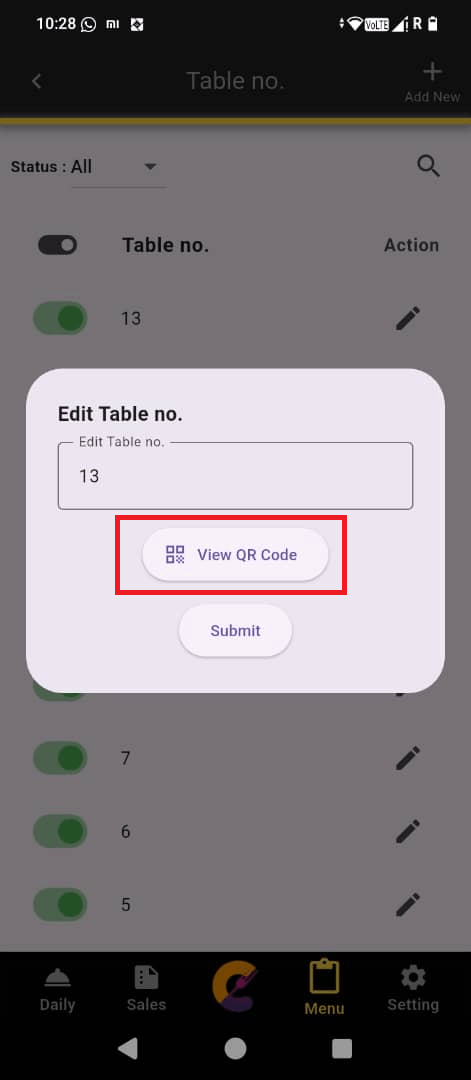
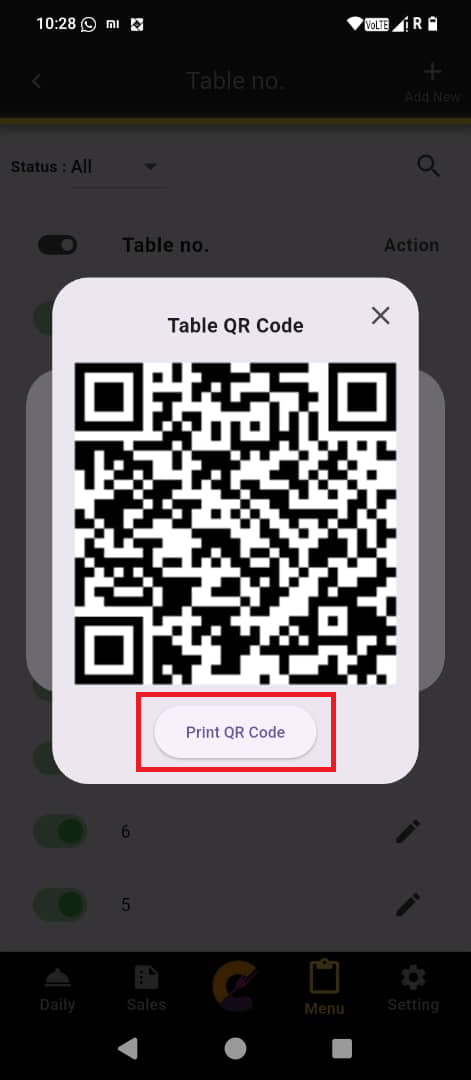
Langkah 1: Klik Lihat Kod QR untuk memaparkan kod QR meja.
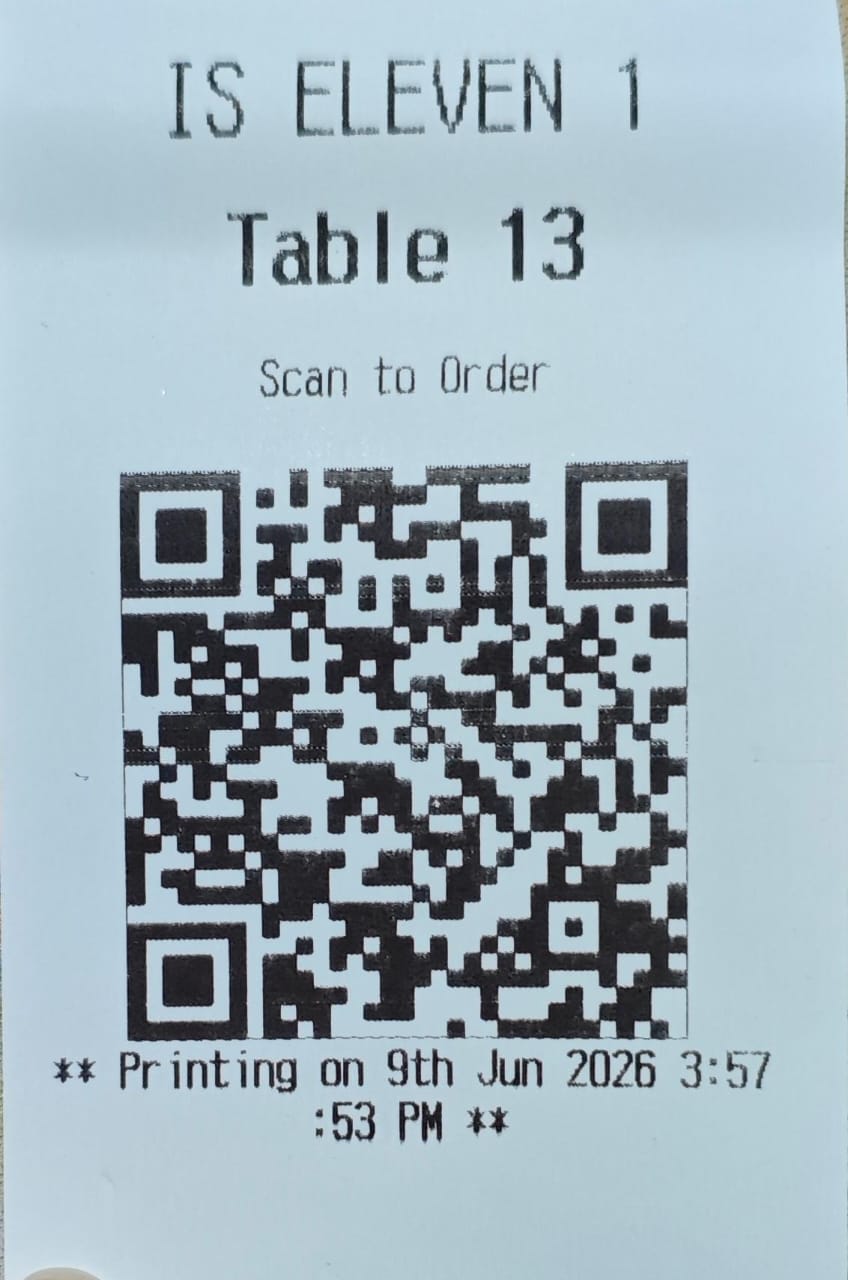
Langkah 2: Untuk mencetak kod QR, klik Cetak Kod QR selepas menyambungkan pencetak.
(Rujuk Package untuk membuka ciri Premium Plan dan QR Code Setting.)
Peringatan: Untuk akaun Pelan Premium , butang View Kod QR akan dipaparkan.
Kategori Makanan
Tambah Kategori Makanan
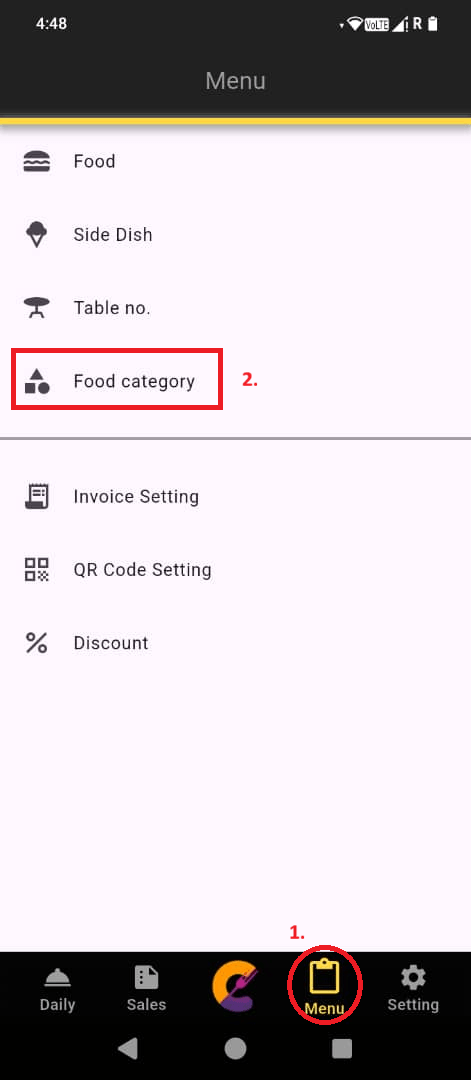
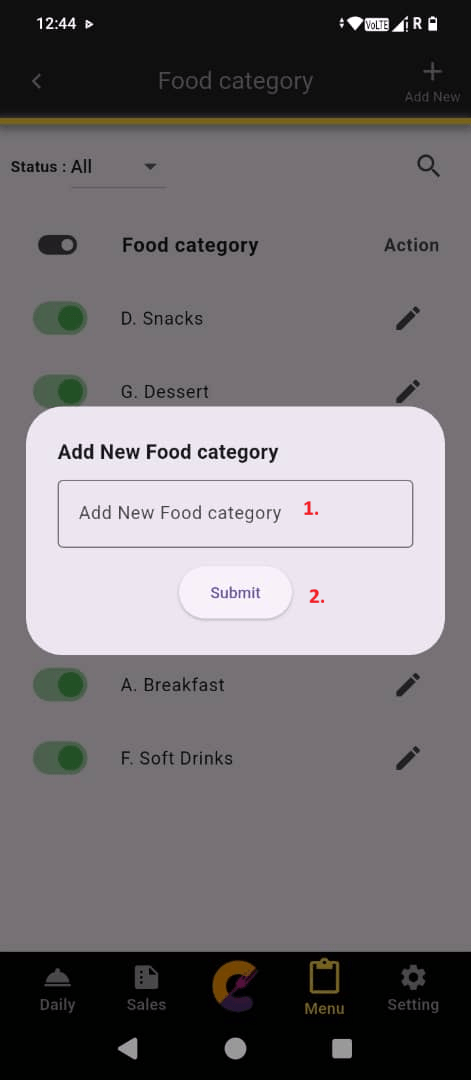
Langkah 1: Pergi ke Menu, pilih Food Category, kemudian klik Add New untuk menambah kategori makanan baharu.
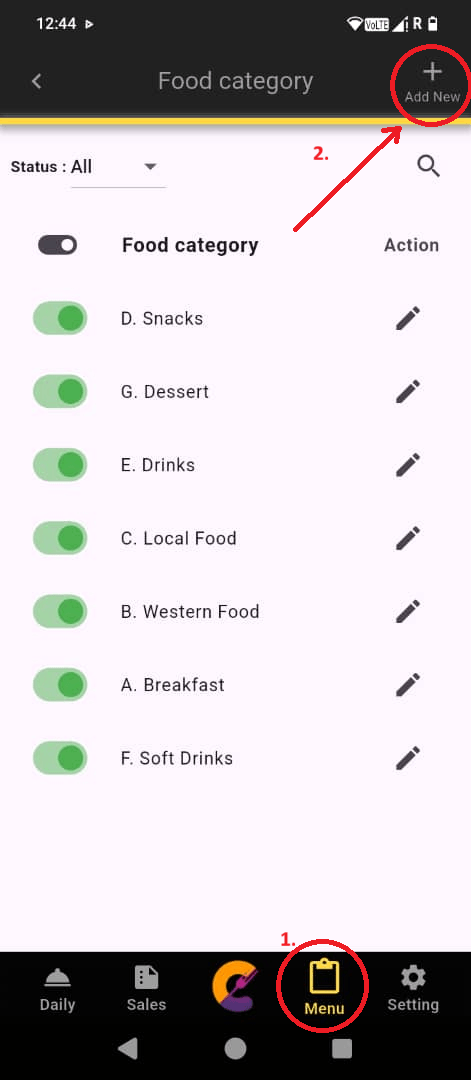
Langkah 2: Masukkan nama kategori makanan, kemudian klik “Submit” untuk menyimpan.
Edit Kategori Makanan
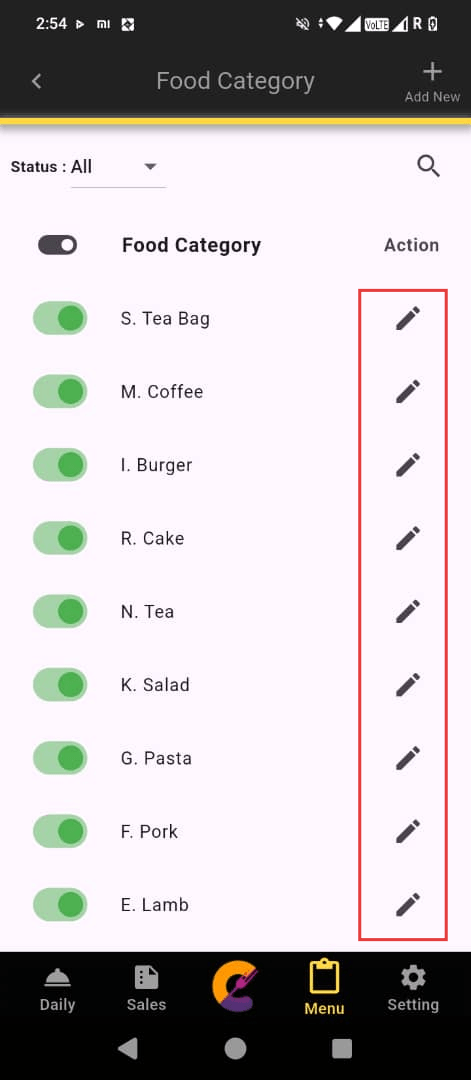
Langkah 1: Pergi ke Menu, pilih Food Category, kemudian klik ikon Edit untuk mengedit kategori makanan.
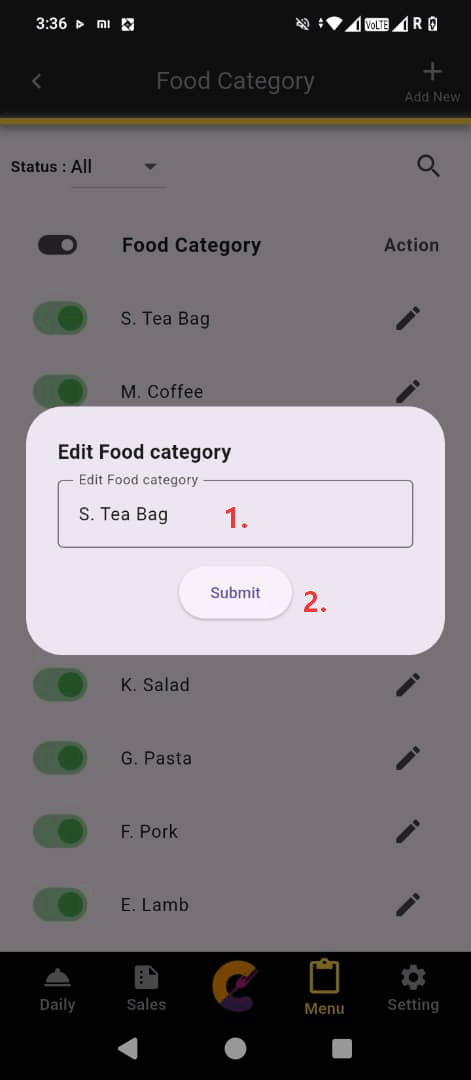
Langkah 2: Masukkan nama Food Category, kemudian klik “Submit” untuk menyimpan.
Cari Kategori Makanan
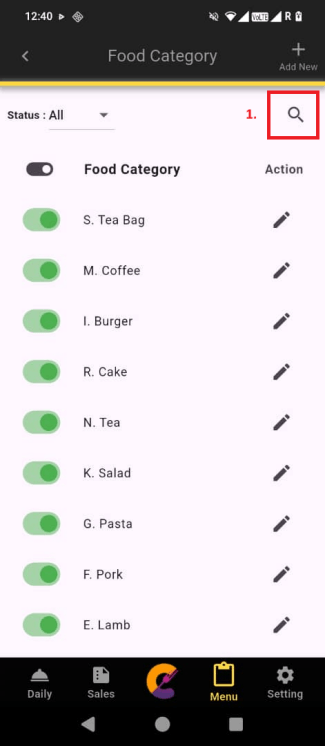
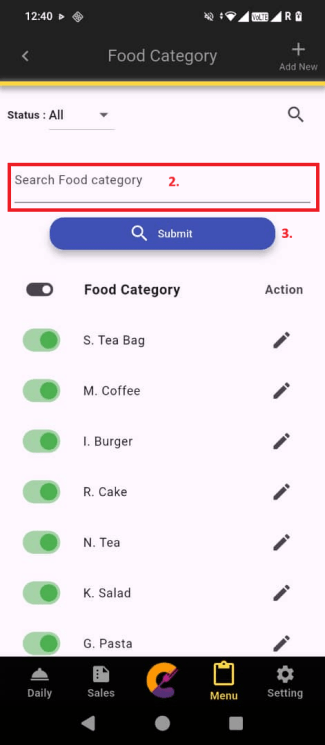
Langkah 1: Pergi ke Menu, pilih Food Category, kemudian klik ikon Search.
Langkah 2: Masukkan nama Food Category, kemudian klik Submit untuk menapis hasil carian yang sepadan.
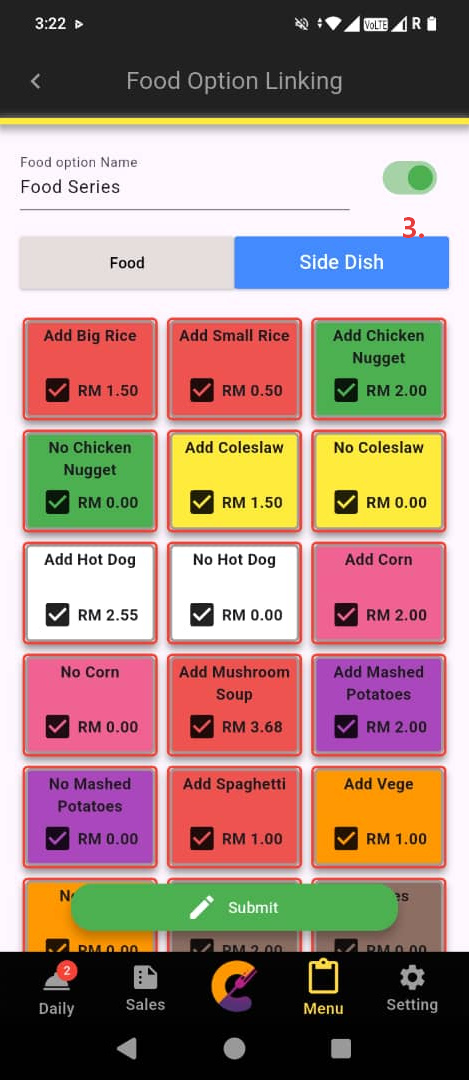
Pautan Pilihan Makanan
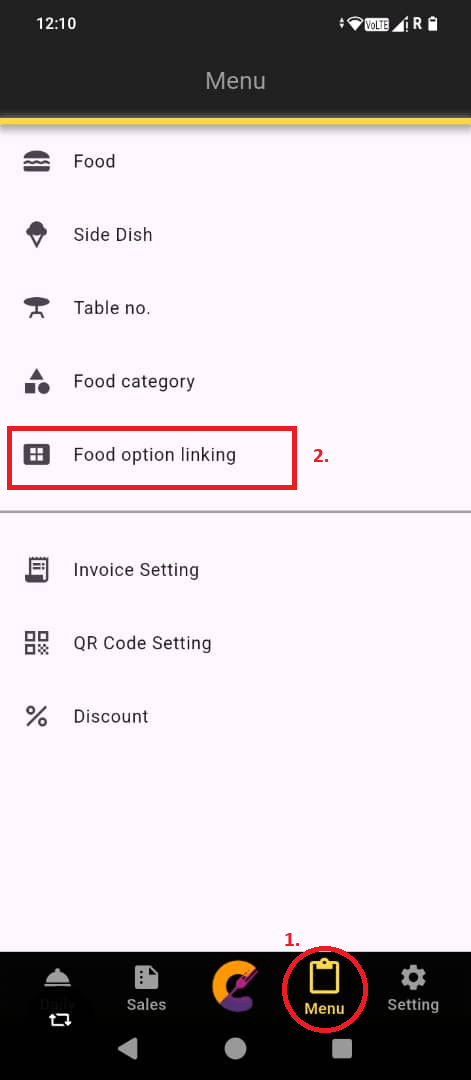
Langkah 1: Pergi ke Menu, pilih Food Option Linking, kemudian klik Add New untuk membuat pautan pilihan makanan baharu (rujuk Food Option Linking untuk membuka ciri ini).
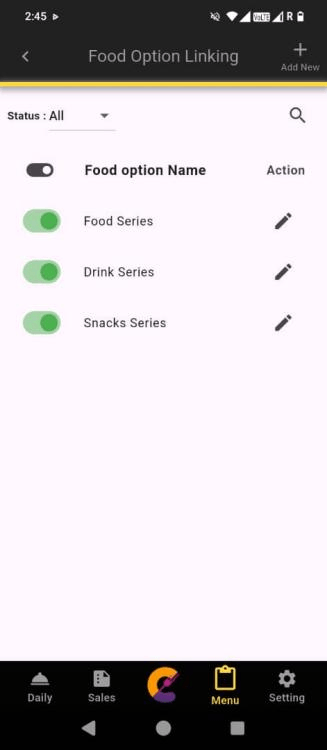
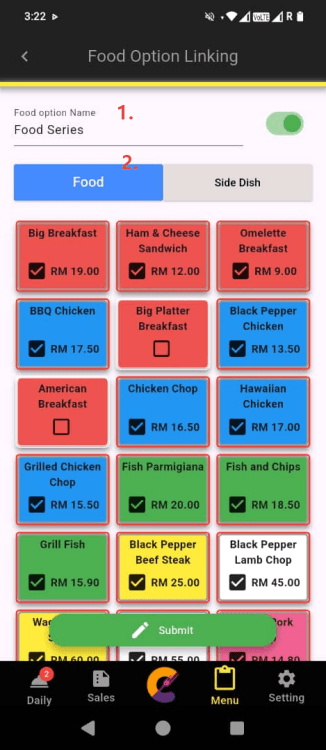
Langkah 2: Masukkan Nama Pilihan Makanan. Pilih Food Item dan pilih Side Dish yang dikongsi. Klik Submit untuk menyimpan.
Diskaun
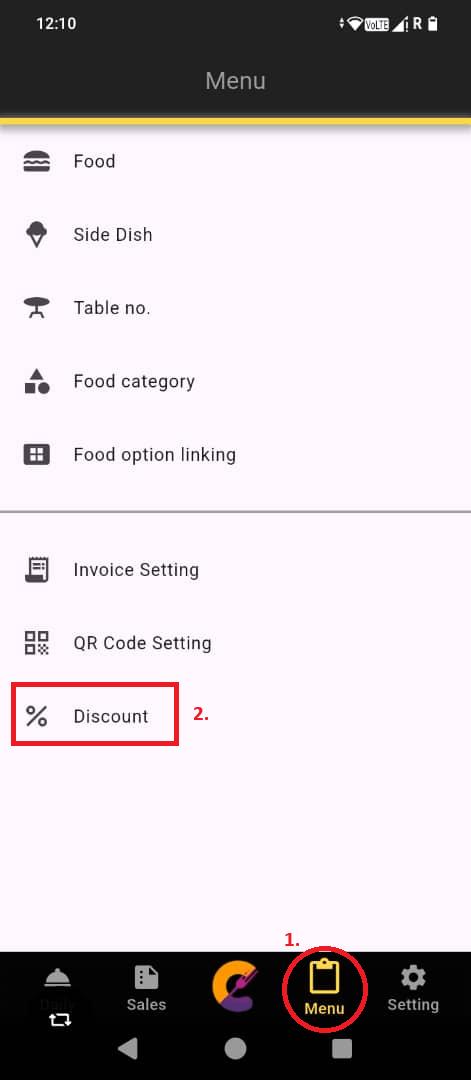
Langkah 1: Pergi ke “Menu” dan pilih “Discount” untuk menguruskan diskaun.
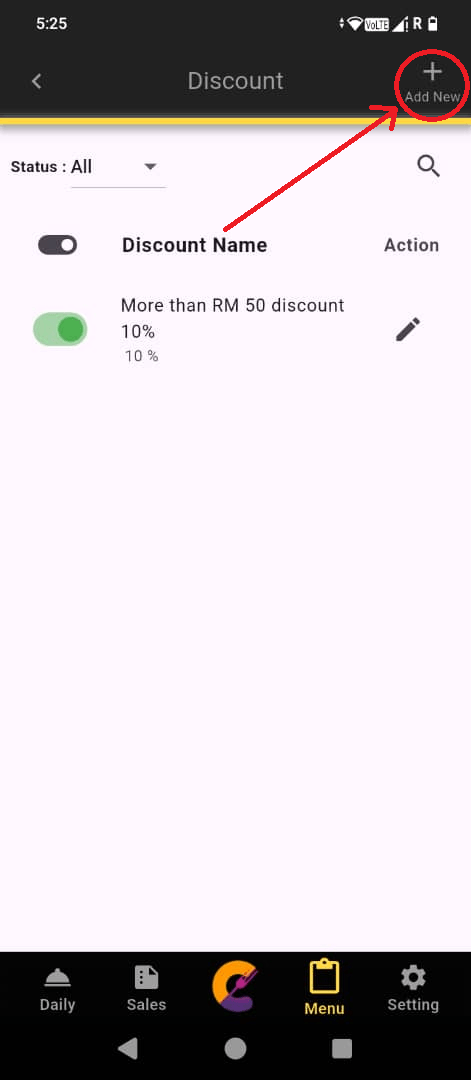
Langkah 2: Pergi ke bahagian atas sebelah kanan dan pilih “Add New” untuk menambah diskaun.
- Butang on/off berwarna hijau digunakan untuk mengaktifkan atau menyahaktifkan diskaun.
- Ikon Pen digunakan untuk menetapkan konfigurasi diskaun.
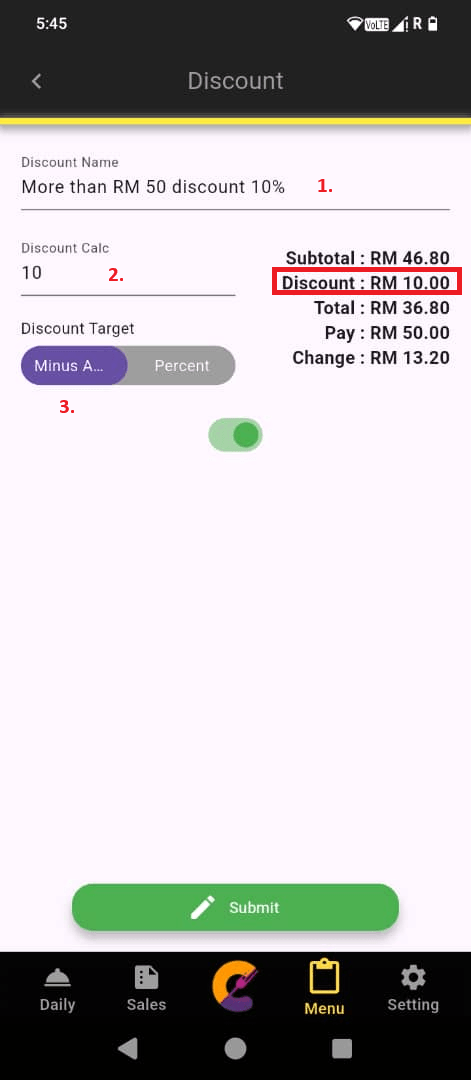
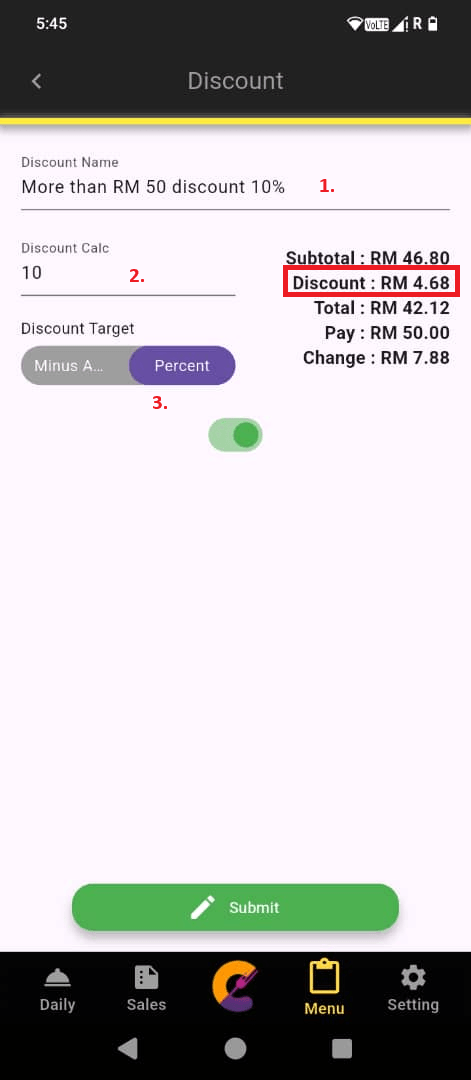
Langkah 3: Masukkan Discount Name dan isi medan Discount Calc.
Jika memilih Minus Amount, nilai tersebut akan ditolak sebagai jumlah tunai tetap daripada Subtotal.
Jika memilih Percent, nilai tersebut akan dikira sebagai peratus potongan.
Tetapan Invois
Untuk maklumat terperinci tentang cara mengkonfigurasi dan mengurus tetapan invois, rujuk halaman Tetapan Invois.


